


Since you may use FonePaw Screen Recorder to record a lot of content, FonePaw now provides you with a One-Stop Solution. You can use the powerful built-in editing tools to edit your recordings. Just read on to learn how to use them.
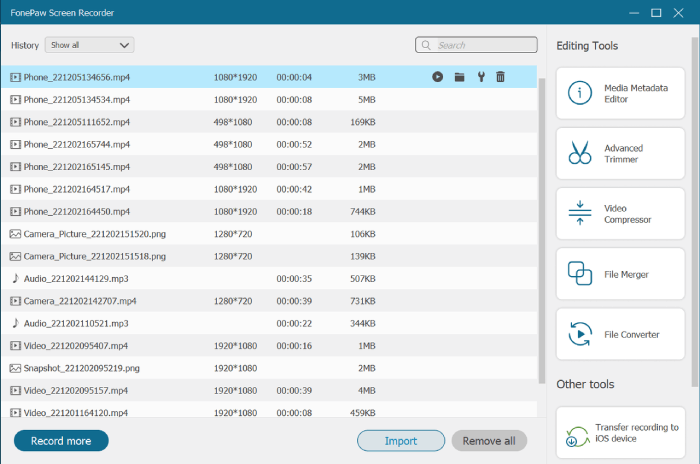
Advanced Trimmer
FonePaw added an advanced trimmer in the latest update. Just follow the tutorial and use the Advanced Trimmer to edit your recordings.
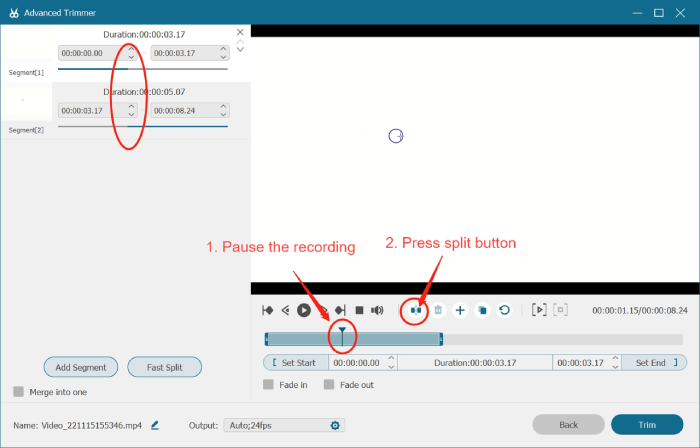
Split Your Recording
Step 1. Pause the recording.
Step 2. Press the split button as shown in the picture. Your recording will be split into 2 parts from where you pause it.
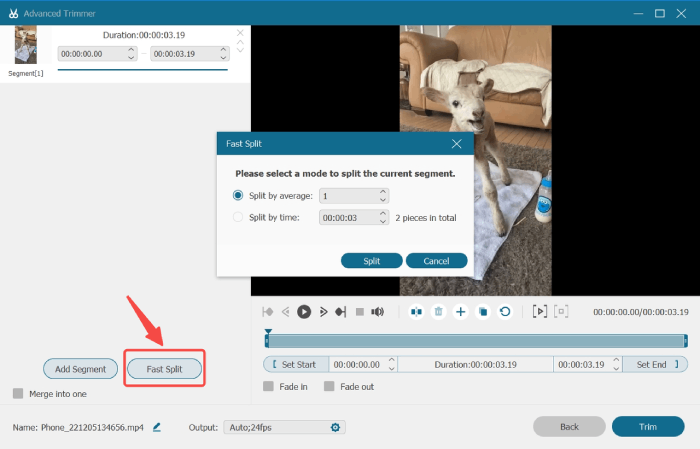
Fast Split
Also, you can use Fast Split to help split a segment. There are two modes.
Split by average: You can set how many pieces you want to split a segment into and click Split.
Split by time: You can set duration for each piece and the program will tell you how many pieces the segment will be split into. Then click Split.
Cut Your Recording
Step 1. Drag either end of the frame viewer, or you can enter a specific timing to locate the frame viewer.
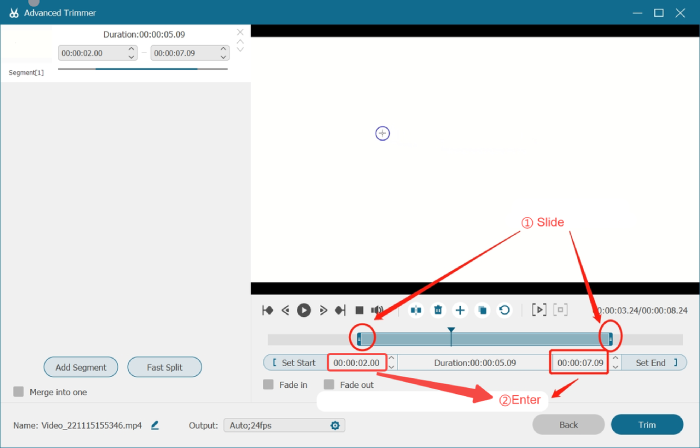
Step 2. Click Trim.
Add Segment
This feature is used to loop play a piece of content, such as your gameplay highlights, some funny things, etc.
Step 1. Drag either end of the frame viewer to select a piece of content. Click Add Segment. The selected part will be copied and pasted at the end of segment[1]. You can add as many segments as you like.
Step 2. You can click Merge into one in the bottom left corner to merge them into a complete video.
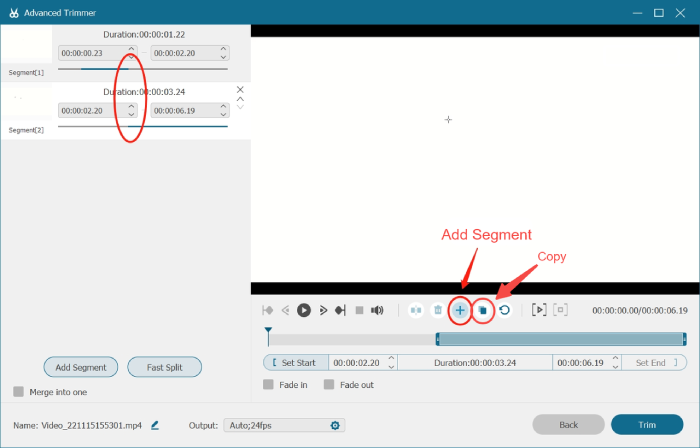
Plus, the Copy button besides Add Segment is used to copy and paste the whole segment[1].
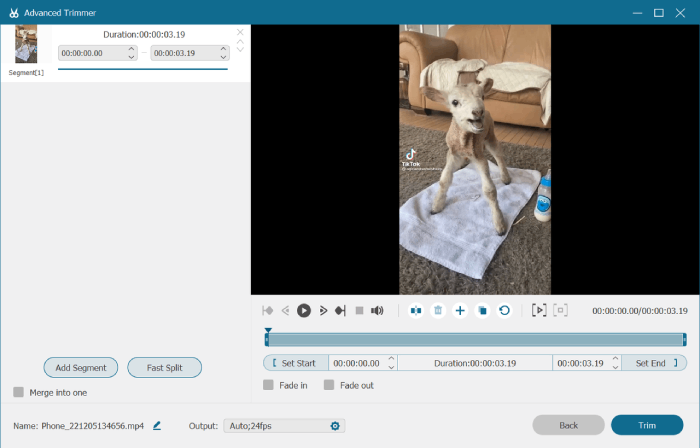
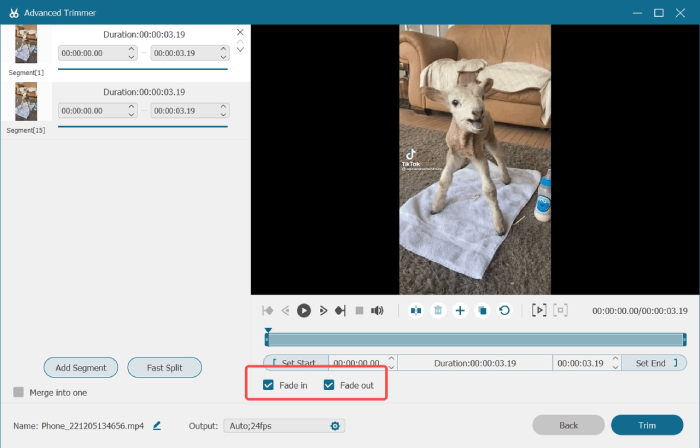
Fade In & Fade Out
It will add a fading effect at the beginning/end of the video clip, which can tell viewers the video is on/over. You can click to turn on/off the fading effect on the main interface of Advanced Trimmer.
Video Compressor
If you are worried about the lack of storage space on your computer, you can compress the size of your recordings with Video Compressor.
Step 1. Drag the slider to adjust the size of the compressed video. You can rename it in case you cannot find it after compressing.
Step 2. If you have special needs, you can set the video format as you like. If not, we recommend just choosing MP4, as it has the highest compatibility with players and devices.
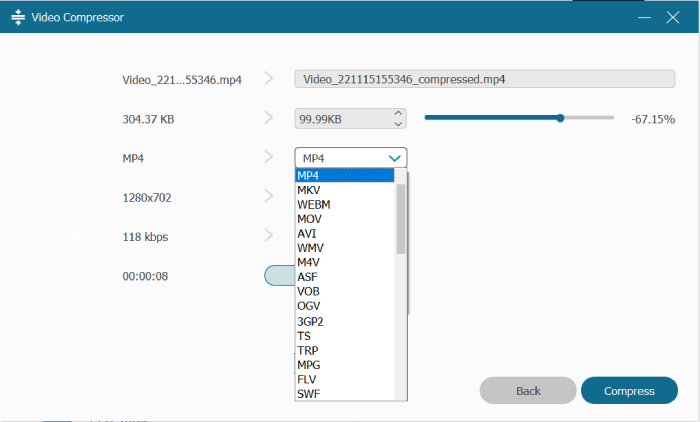
Step 3. The Video Compressor also supports customizing resolution(up to 4K but depends on your original recording resolution) and bitrate for your recordings. If you have no special needs, keep the default settings.
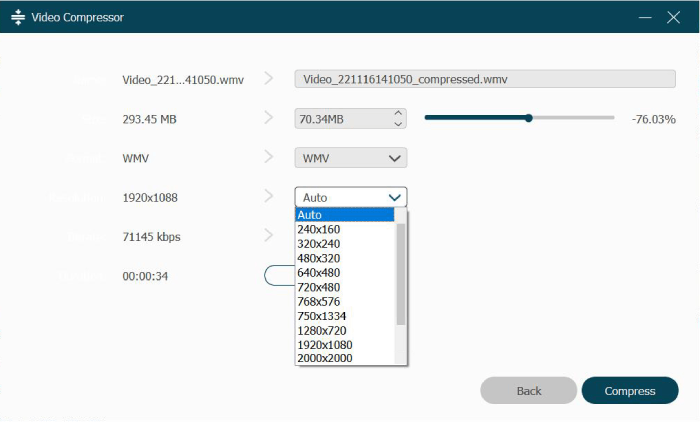
Step 4. Click Compress to extract the compressed video. You can preview the first 10 seconds before compressing.
File Merger
You may use FonePaw to record a lot of clips on your computer. The File Merger helps you to merge your recordings and local videos into one video clip.
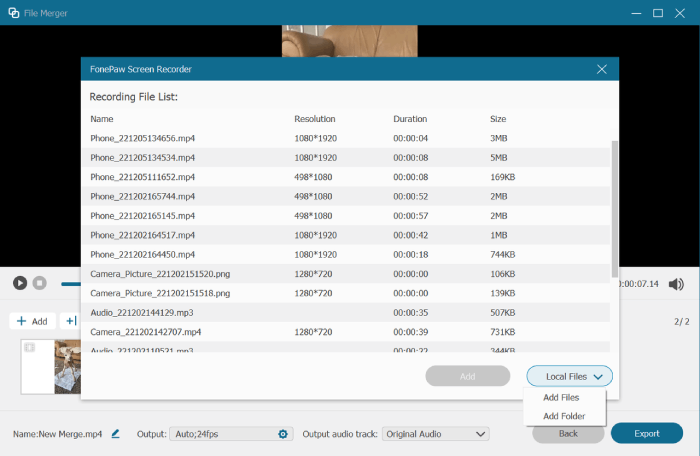
Step 1. Choose a recording file and click File Merger.
Step 2. Add other videos.
You can choose to add recordings or other local video files. Then you can use the Forward/Backward button to adjust the order of the segments(click and drag also works).
The Empty button is used to clear all the segments. This operation won't delete any of the original files.
Step 3. Export the new video.
Before exporting, you can rename the video and set the output quality. Also, you can adjust the output audio track, in which you can even add background music for your new merge.
Flie Converter
To accommodate multi-device playback, you can use File Converter to convert your recordings to the appropriate format. You can even use it to convert videos to animated gifs.
Step 1. Choose a recording and click File Converter
Step 2. Set parameters for your videos/audios.
You can check the parameters that can be set before converting in the following charts.
| Video Settings | Available Options |
| Format | MP4, MOV, WMV, AVI, MKV, GIF |
| Resolution | Auto, 360P, 720P, HD, 2K, 4K 1:1, 9:16, 4:3, 21:9, 5:4, 16:10, 3:2, 2:1, Custom |
| Frame Rate | 12fps, 15fps, 20fps, 23.97fps, 24fps, 25fps, 29.97fps, 30fps, 59.94fps, 60fps |
| Quality | High Quality, Standard, Cutom(you will need to customize the bitrate as well) |
| Encoder | H.264, HEVC, MPEG-4 |
| Zoom Mode | Letter Box, Pan & Scan, Full |
| Audio Settings | Available Options |
| Encoder | AAC, AC3 |
| Channel | 1, 2 |
| Sample Rate | 22050Hz, 32000Hz, 44100Hz, 48000Hz |
| Bitrate | 96kbps, 128kbps, 192kbps, 256kbps, 320kbps |
Step 3. Click convert to extract the video/audio.

Need More Help?
Questions not answered yet? Contact our support team and we’re standing by.