


When you are about to have an important online meeting or a crucial live class but worried about missing key points or not being able to take notes in time, screen recording is undoubtedly one of the best methods. However, during your use, you may find that many screen recording software cannot record the system sound, which reduces your recording effect greatly. So, how to record screens on Windows 10 with audio?
Today, we will share 4 effective methods for screen recording on your Windows 10 PC/laptop with sound preserved, including using the built-in system tool, third-party desktop software, PowerPoint, and an online recorder. You'll learn their respective functionalities and tutorials and get the tool that perfectly meets your needs!
How to Record Screen on Windows 10 with Audio via FonePaw 🔥
The first method we present involves using third-party software, FonePaw Screen Recorder. This versatile screen recorder not only supports free screen recording on Windows 10 but is also compatible with Mac. It enables recording and exporting videos without watermarks, regardless of the version you are using. Also, it allows you to capture all screen activities with internal/external audio, as well as simultaneously recording both your screen and webcam.
FonePaw Screen Recorder offers various recording modes, such as game recording, audio recording, window recording, and more. Thus, it caters to diverse needs and finds extensive applications in scenarios including gaming, live streaming, online meetings, educational/training videos, and recording movies/TV shows.
Free Download Buy with 20% off Free Download Buy with 20% off
- Recording HD quality (1080p & 60fps) videos.
- Allowing free adjustment to preset recording areas.
- Real-time annotation panel and mouse effects for emphasis during recording.
- Supporting preset recording duration to automatically start or stop screen recording.
- Supporting various output formats, including MP4, WMV, MOV, and more.
Now, let's take a look at how to record screen on Windows 10 with audio using this software.
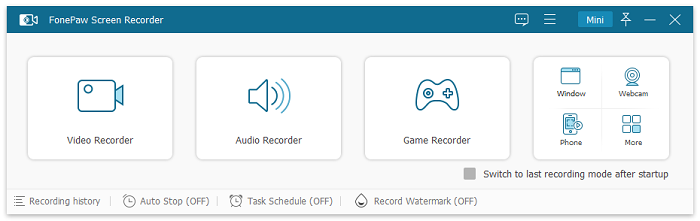
Step 1. Download and install FonePaw Screen Recorder from the official website. Once you launch it on your Windows 10 PC, click the "Video Recorder" icon on the homepage to start.
Free Download Buy with 20% off
Step 2. Before your work, you can choose the recording area, enable system and microphone audio, and check noise cancellation or webcam recording options on this page.

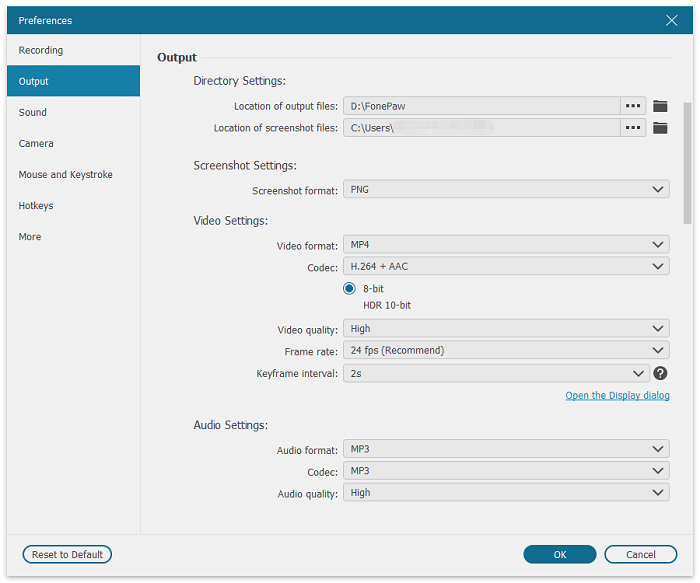
Also, you can turn to the "Preference > Output" menu to customize more settings like parameters, codec, quality, etc. to output the recordings the way you like.
Step 3. After setting up, click on "REC" to start recording. During the recording, you can use the toolbar to write, annotate, and perform other actions on the screen.
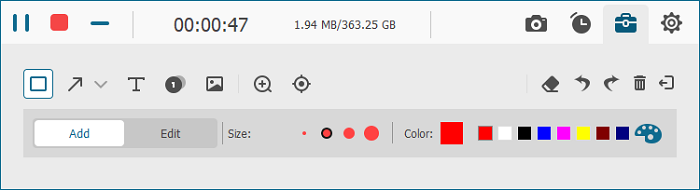
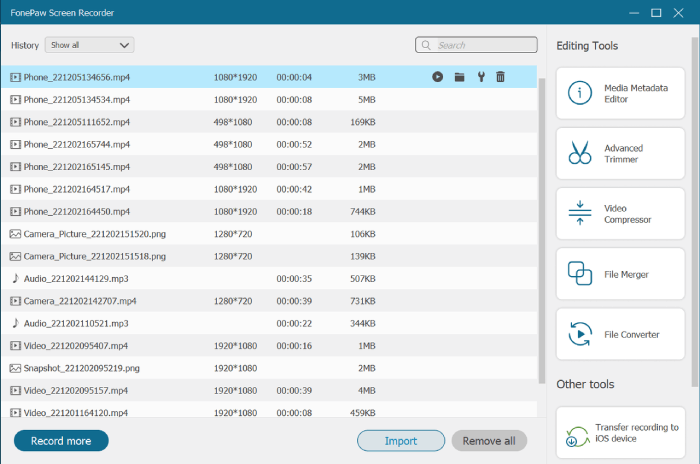
Step 4. Finally, click the red square icon to stop the recording. Afterward, you can find the media toolbar on the right side of the software interface. Utilize these tools to edit your video and save the file.
 Some default hotkeys to FonePaw Screen Recorder:
- Start or Stop Recording: Ctrl+ Alt + R
- Pause/Resume Recording: Ctrl+ Alt + S
- Screen Capture: Ctrl+ Shift + C
- Scrolling Window: Ctrl+ Alt + C
- Open/Clouse Webcam: Ctrl+ Alt + W
- Show/Hide Float Panel: Ctrl+ Alt + H
You also have the option to customize these hotkeys based on your preferences under the "Settings" tag.
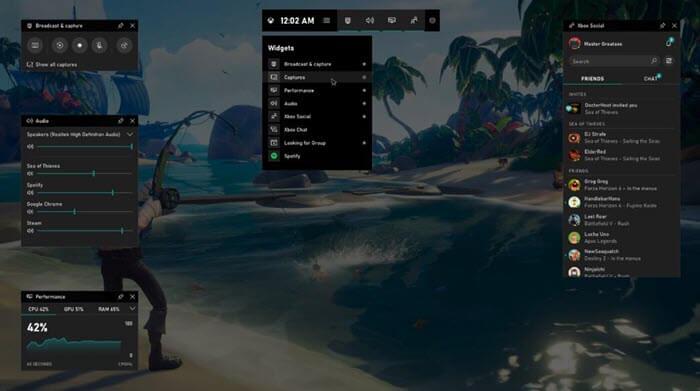
How to Record Screen on PC/Laptop via Windows Xbox Game Bar
On Windows 10/11, there is a built-in gaming toolbar software called Xbox Game Bar. Its main features include game recording, game screenshots, and game monitoring. Xbox Game Bar is more suitable for recording software or games since it cannot record the computer desktop and system operations. In addition, it can only record a single window, and the recording will automatically stop when switching screens.
Although it is a convenient built-in software, it often encounters issues with opening, and only computer graphics cards that meet specific specifications from AMD, NVIDIA, or Intel can use the Xbox Game Bar. If your computer happens to meet the conditions for using Xbox Game Bar and can successfully open it, you can follow the steps below to record the screen.
- Press the "Win+G" keys to open the Xbox Game Bar.
- Select "Record from now" (the circle) from the "Capture" widget to start the recording, and choose "Stop recording" (the square) to end the recording.
- If you want to record full-screen PC games, press the "Win+Alt+G" to start and stop recording.
How to Record Screen on Windows 10 with Audio via PowerPoint
Microsoft PowerPoint is commonly used for creating slides, but it can record the computer screen and related audio. If you are familiar with PowerPoint, using its screen recording function is incredibly straightforward, since there's no need to get and learn new software. Additionally, after completing the recording, PowerPoint provides some basic editing features, such as cutting and deleting segments.
However, its screen recording feature is not very comprehensive. For instance, the records are only saved as MP4, and other features like real-time editions or mouse selections are not possible during the recording process. If you require more advanced screen recording and editing features, you might want to consider using professional screen recording software, such as FonePaw Screen Recorder.
Here is a step-by-step guide on how to screen record on your Windows laptop using PowerPoint.
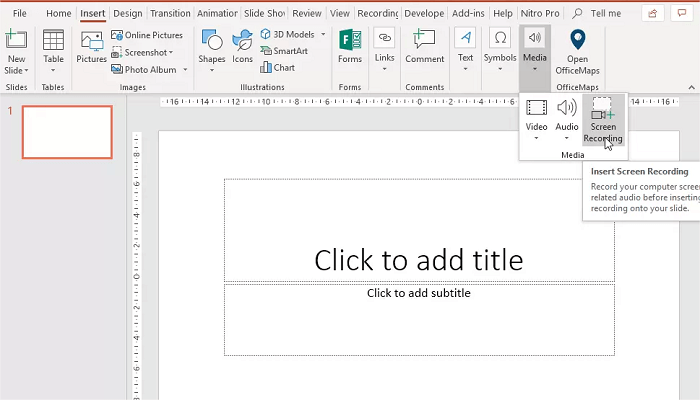
- Open Microsoft PowerPoint and create a new slide.
- In the menu bar, click on "Insert" and then select "Screen Recording" on the far right.
- Click and drag to select the area you want to record. Then, click 'Record' to begin recording.
- Finally, click "Stop" to end the recording. The recorded video will be automatically added to the slide.
How to Screen Record on Windows 10 with Sound via Online Tool
If you prefer not to download software, another method is to use an online tool for screen recording. Apowersoft Free Online Screen Recorder is one of the best free online screen recorders you'll need. It allows recording high-definition videos on Windows 10 without watermarks and time limits. You can capture all activities on your screen, including browser activities, online videos, and meetings. Additionally, it supports recording both screen and webcam simultaneously, along with system sound and microphone.
Being a web-based tool, Apowersoft's major advantage is not only the ability to save the recorded video on the local disk but also to upload it to the cloud platform and share it on social media or with others. Now, let's take a look at how to use the free online tool to record videos on your Windows PC.
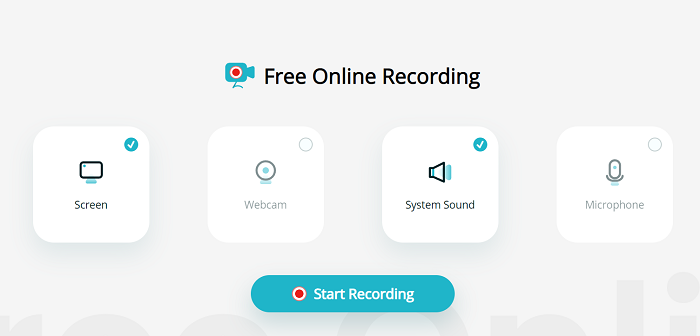
- Open the official website of Apowersoft Free Online Screen Recorder and click on "Start Recording".
- Choose the content you want to record, such as the screen, webcam, system sound, and microphone. Once selected, click on "Start Recording".
- Select the recording mode, such as Entire Screen, Window, or Browser Tab. After choosing, click on "Share" to begin.
- When you're ready to finish, click on "Stop". You can then preview the recorded video and save it locally or upload it to RecCloud.
Final Words
All the 4 methods introduced above can effectively help you record your screen on Windows 10. If you prefer the smoothest recording experience with the best features and no interruptions, FonePaw Screen Recorder will be the top choice. It can handle screen recording in various scenarios, whether it's a single window or multiple windows, providing the best recording results. Additionally, it allows for extensive customization to better meet your recording needs. Hence, it is worth a try.
