


When you want to record your own voice, a song, or an interesting podcast you are listening to on your Mac, which is not allowed to download directly, you may need a voice and audio recorder.
Voice Memo and QuickTime are two in-built tools on Mac that can help you capture voice. Besides, QuickTime can record the screen as well. However, neither of them can record the internal audio on Mac. To fill in this gap, you might need to use a Soundflower plug-in – which requires some efforts.
If you want a more convenient way to record the system sound on Mac, a third-party audio recorder is usually a better choice. For example, FonePaw Audio Recorder captures not only the external voice but also the system sound on your Mac computer.
In the post, we will introduce how to record audio on Mac in detail by talking about how to use the 3 recording software we mentioned above. Read on to find the way that you need the most.
👇According to the audio type you want to record on Mac, you can jump to the sections:
🔊For recording system audio (and microphone simultaneously):- Use FonePaw Audio Recorder (easiest way)
- Use QuickTime Player
How to Record Audio on Mac with FonePaw Audio Recorder (System Sound & Microphone)
If you want to easily record both the external and internal audio on your Mac, we first recommend you to try FonePaw Audio Recorder. It takes only a few and simple steps for you to record any audio on your Mac computer. Compared to the default apps on Mac that are not specialized in screen and audio recording, the FonePaw software is richer in features and easier in operation. Here are the main features of it:
Free Download Buy with 20% off Free Download Buy with 20% off
- Record the internal audio & external audio on Mac in one click.
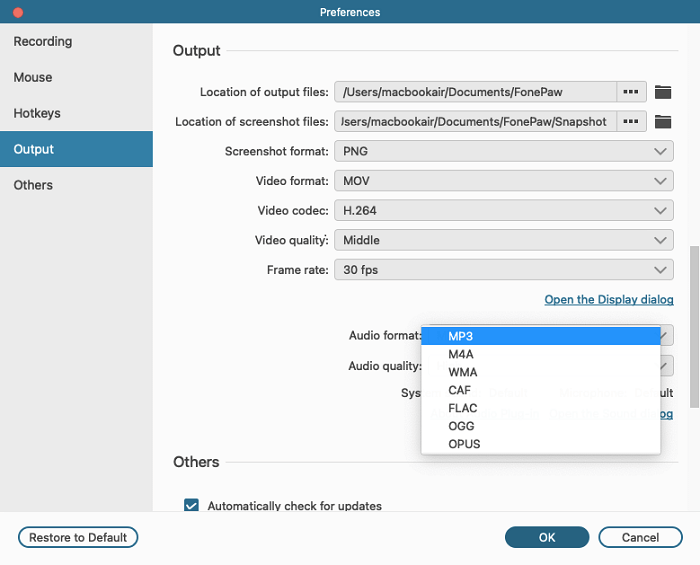
- Save audio as MP3, M4A, WMA, CAF, FLAC, OGG, and OPUS format.
- Set recording length and end up recording automatically.
- Trim audio recordings when the capture is finished.
It can also work as a screen recorder to capture screen video with audio on Mac. So, it is a multi-purpose tool that is perfect for recording both videos and audio on Mac or from the Internet.
🎬 Video Tutorial: Use FonePaw to Record Computer Screen with Audio
Step 1. Download, install and launch FonePaw Audio Recorder on your Mac.
Free Download Buy with 20% off Free Download Buy with 20% off
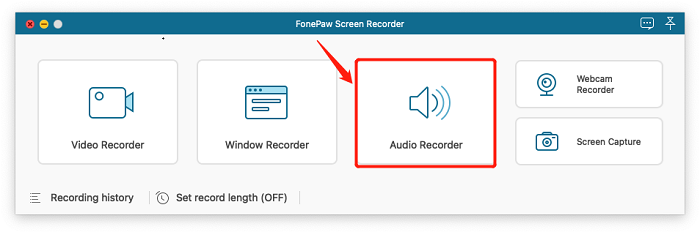
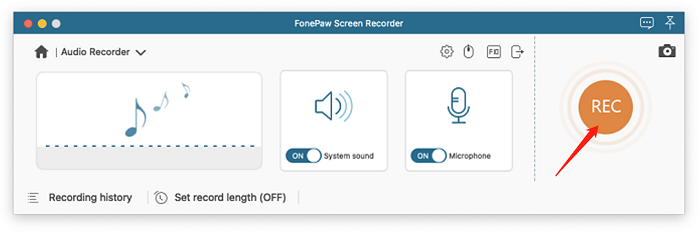
Step 2. Select "Audio Recorder" to record audio on your Mac.
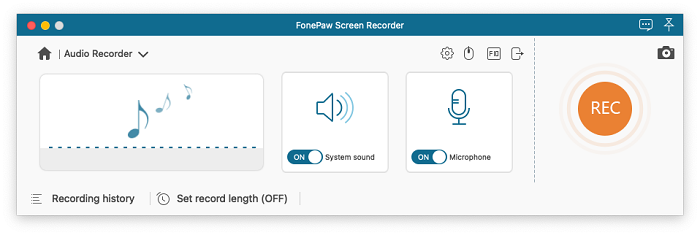
Step 3. Turn on the system sound and microphone as you need. You may not be able to adjust the sound volume on the software but go to your Apple menu > System Preferences > Sound instead. And it's better to test your voice volume by recording a few seconds.
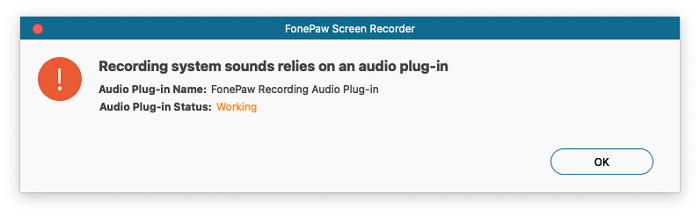
When you toggle on the system sound option for the first time, you will be prompted to install an audio plug-in to record your internal audio on Mac. Just follow the notification to do.
Step 4. You can also click the gear icon or select FonePaw Audio Recorder > Preferences at the top left to customize the audio output format.
Step 5. When you finish all the settings, click "REC" to start audio recording on your Mac.
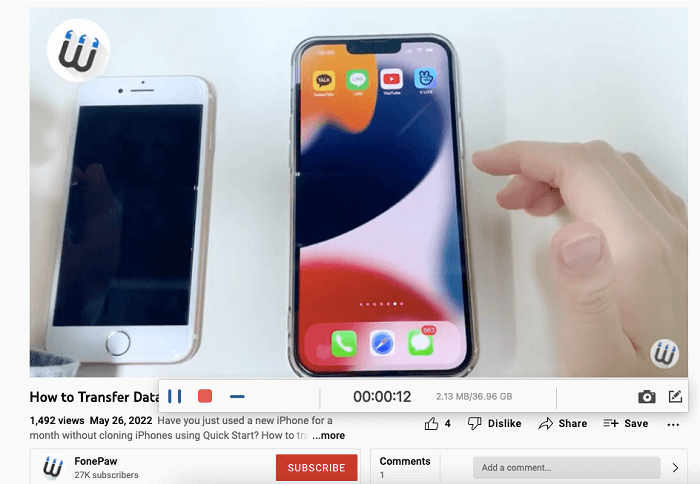
When you are done, click the red square button on the top left corner and check the sound you have recorded.
Step 6. If the audio is too long, clip the file by setting the start and end point on the left bottom of the screen.
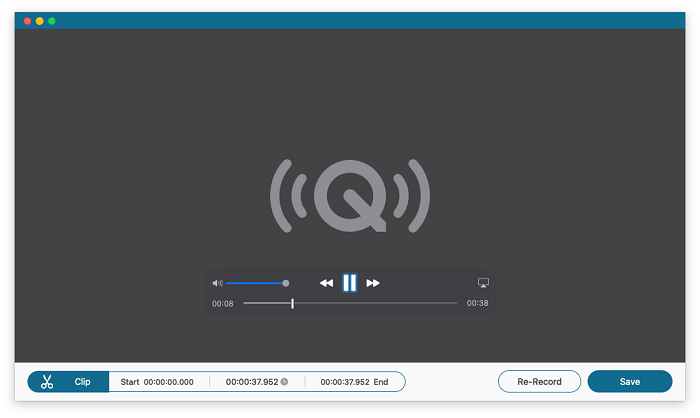
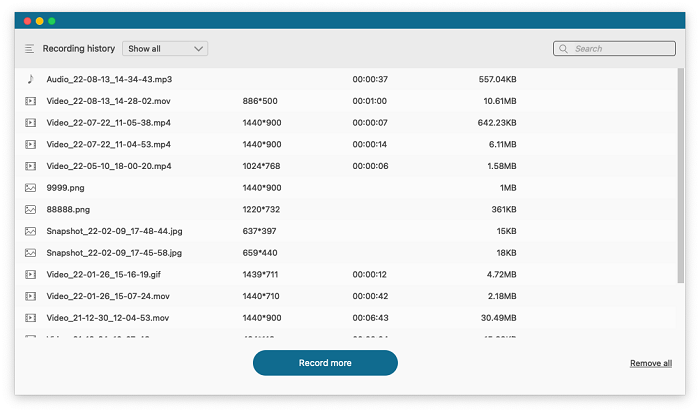
Click "Save" to save your file and "Re-record" to record again. Files will not be saved if you re-record. After exporting the audio, you can find it in the recording history.
Free Download Buy with 20% off Free Download Buy with 20% off
That's how to capture the external and internal audio on your Mac with FonePaw Audio Recorder. The setting up is pretty easy. Not only audio recording, this recorder is also available when you want to record your screen with audio, so it's worthy to try if you have such recording needs.
Also, if you prefer to try the default audio recorders on Mac, check the following guides.
How to Record Audio on Mac with QuickTime Player (Internal Audio & External Mic)
QuickTime Player is the Mac built-in multimedia tool that contains practical features like recording screen and audio. But it can only record external audio like your microphone by default. If you want to use QuickTime to record the internal audio and external mic at the same time, fortunately, installing a Soundflower plug-in will help, and we will also talk about it in the following part.
Now learn about how to record audio on Mac with QuickTime according to your need.
How to Record Audio on Mac with External Mic
If you want to record your voice on Mac with QuickTime Player, you can follow the instruction:
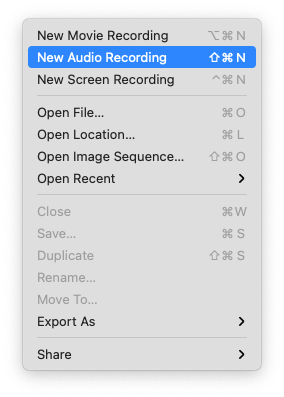
Step 1. Open Finder > Applications and find QuickTime Player. Then, pull down "File > New Audio Recording" at the menu bar.
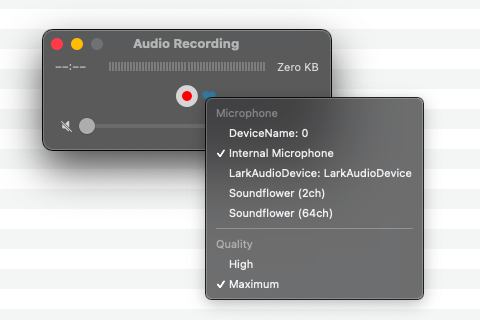
Step 2. Select the microphone device as you need, and choose the audio quality for output.
 Note:
Note:
- There will be different output format according to the audio quality you choose, for instance, .m4a for high quality, and .aifc for maximum quality.
Step 3. Click the red button in cricle to start recording and click the same button to stop.
Note:
- Pay attention that the volume bar at the bottom of the interface is not to adjust the sound volume of your microphone but the echo volume. If you do not want to hear echoes, keep the function turned off.
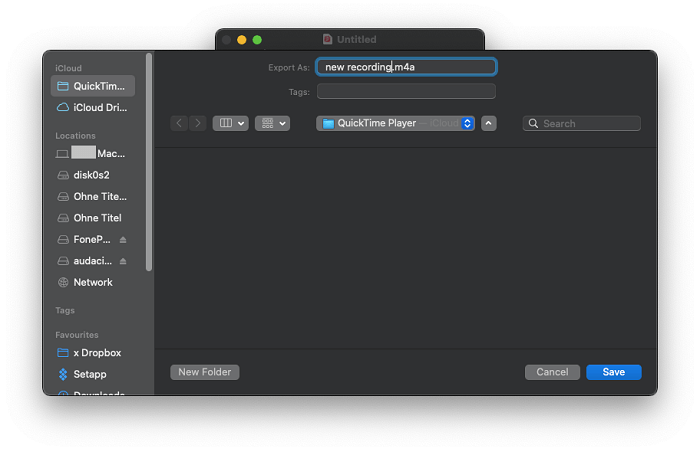
Step 4. Click "File"> "Save" to name the file and choose the location to save your audio recording.
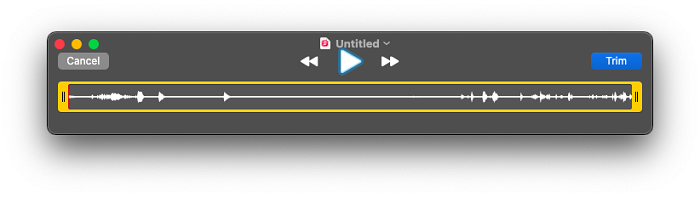
If the audio is too long or you want to cut out some parts, you can select "Edit > Trim" to clip the audio.
How to Record Computer Audio on Mac
Now that you know about how to record the microphone sound with QuickTime Player, it’s time to get to know how to record system audio on Mac. By enabling Soundflower, a free plug-in for Mac which can help you convey the system sound to the recorder, it's possible to record internal audio on Mac with QuickTime.
The settings might seem a bit complicated, but is also straightforward if you properly follow the instruction:
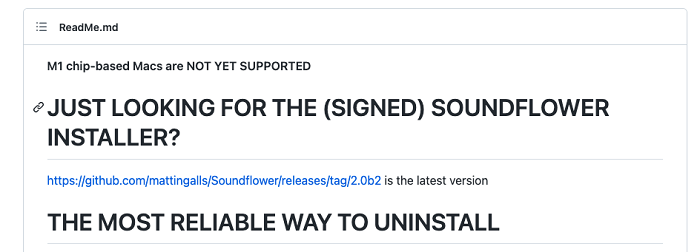
Step 1. Download Soundflower from the Internet. It's better to get it from the official site.
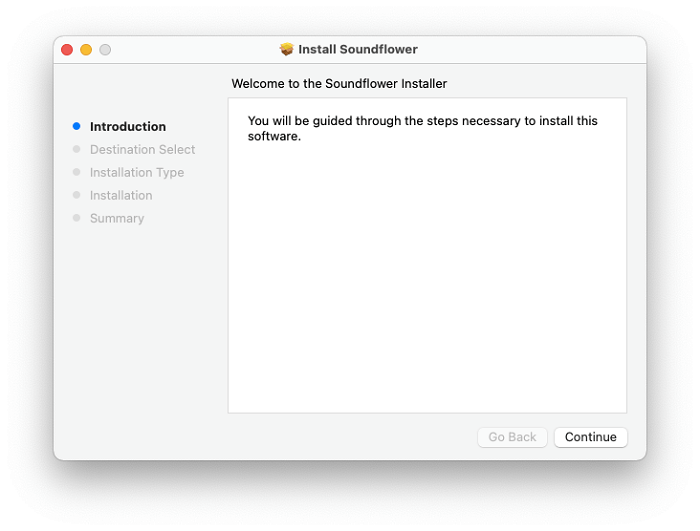
Unzip the package and launch the installer to get the plug-in. If you cannot open the package due to the security warning, go to the Apple menu > System Preferences > Security & Privacy to allow the access.
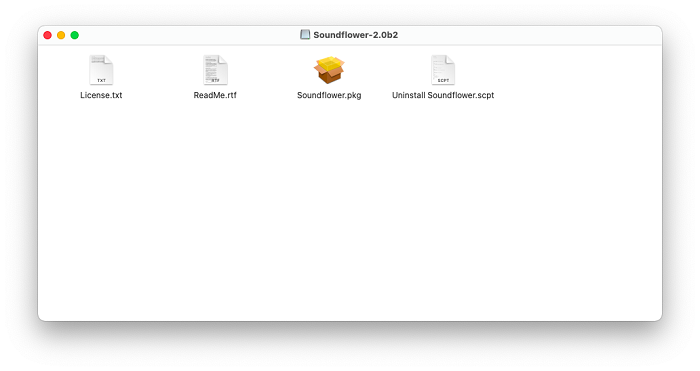
Then install Soundflower on your Mac. When you finish, you should be able to find both Soundflower (2ch) and Soundflower (64ch) on your audio devices, which will help you record the internal audio on your Mac.
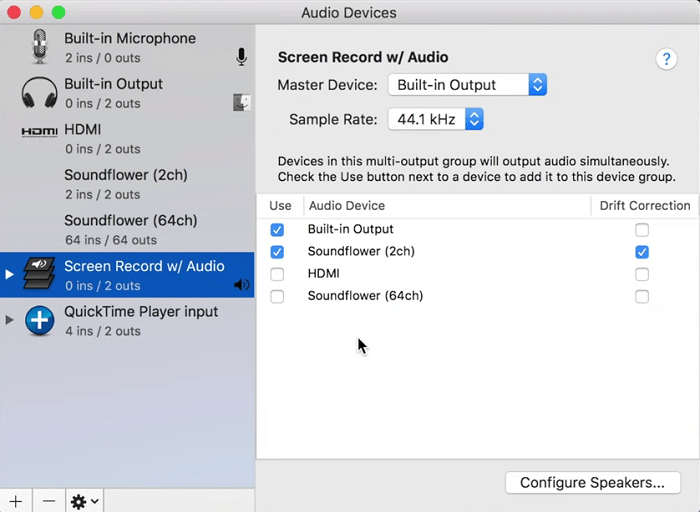
Step 2. Now head to the audio device setup. Find Audio MIDI Setup at Finder > Applications > Utilities. What you need to do is create Aggregate Device and Multi-Output Device that contain the Soundflower. Click "+" at the bottom left corner to add the devices.
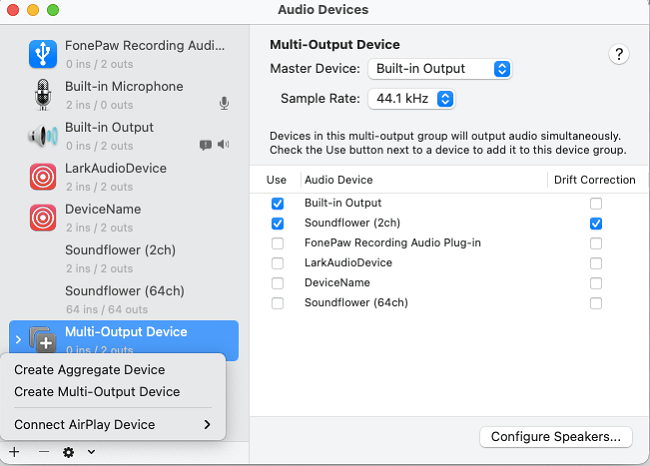
Create and set up the Multi-Output Device like this. Tick Built-in Output and Soundflower (2ch) as the devices. For convenience, you can also rename it as something like "Screen Recorder w/ Audio".
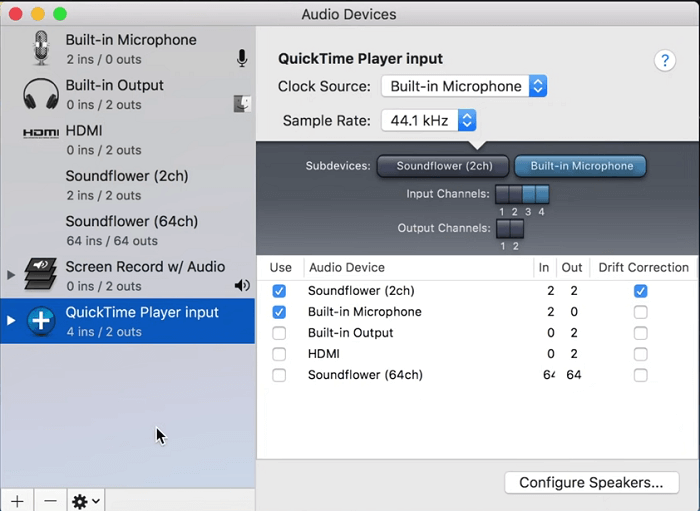
As for the Aggreate Device, create and tick Built-in Microphone and Soundflower (2ch) as the devices. You can also rename it to something like "QuickTime Player input" if you want to better recognize it.
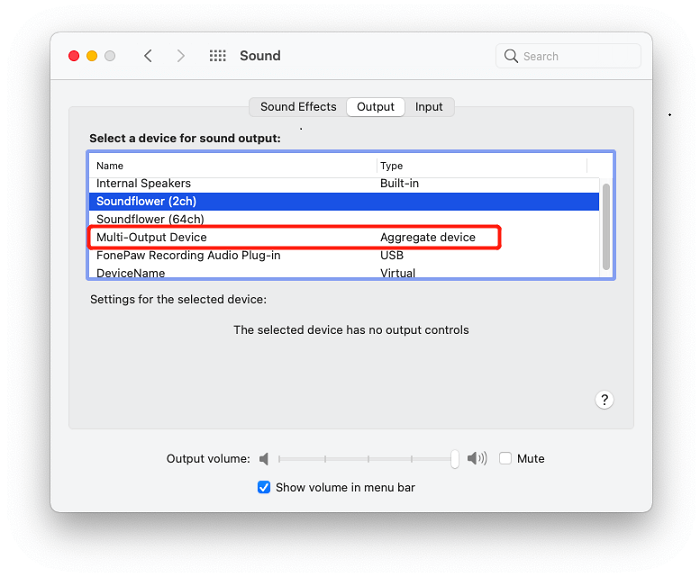
Step 3. Now turn to Apple menu > System Preferences > Sound to do the final setting before the recording. Change the device for sound output to Multi-Output Device as you set up just now. And keep others not changed.
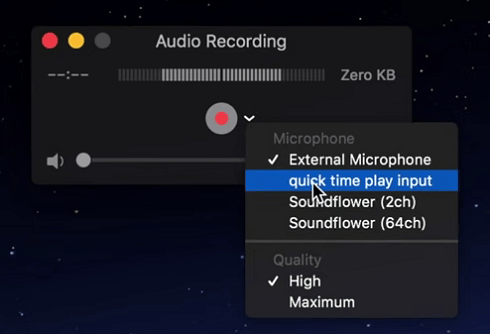
Step 4. Now you can record your internal audio and external audio at the same time. Launch QuickTime Player, choose New Audio Recording, click the drop-down menu beside the red button, you will find Aggregate Device in the microphone device section. Choose it and you will be able to record your internal audio and external audio at the same time. This is also workable when you want to screen record on Mac with audio.
If you desire to record only the internal audio, select Soundflower (2ch) as the microphone device instead (but it might not work for some Macs).
Now you can just begin to record as normal and check the audio recordings. And after setting Multi-Output Device as your default audio output, you will find that the audio on your computer is unchangeable, so remember to change back your audio output device as your Built-in Output after the recording.
Note:
- Do you encounter QuickTime lagging during the recording or is the output video too large? If so, view the following post to solve your problem: How to Stop Lags and Reduce File Size of QuickTime.
How to Record Audio on Mac with Voice Memo (External Audio Only)
Voice Memo is a default voice recorder in macOS 14 or a newer version. It can also help you record your voice easily and then sync across your Apple devices. For users who use macOS 13 or an earlier version, if you also want to record a voice memo, you can use your iPhone, or your QuickTime on Mac, or FonePaw Audio Recorder as an alternative. It's also quite easy to do the audio recording with Voice Memo:
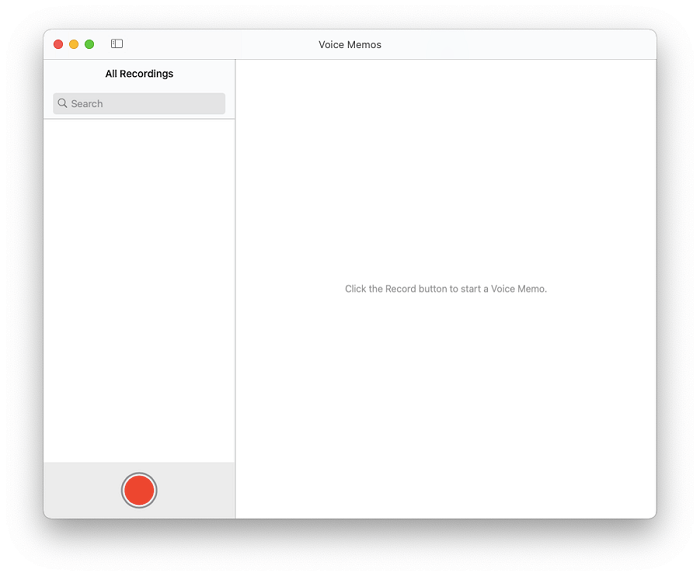
Step 1. Open the Voice Memo app on your Mac and click the large red circle to start recording.
Step 2. Click the pause button to pause and "Resume" to continue.
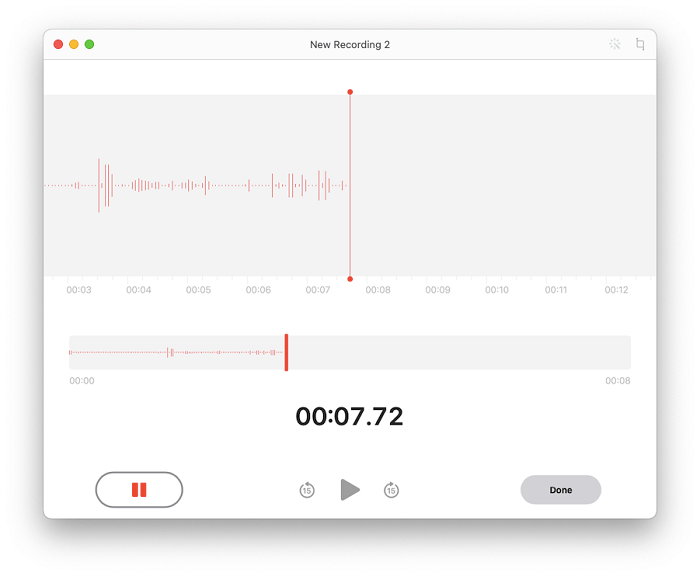
Step 3. When you are done, click "Done" to save the file. You can check, edit and share your audio on Voice Memo.
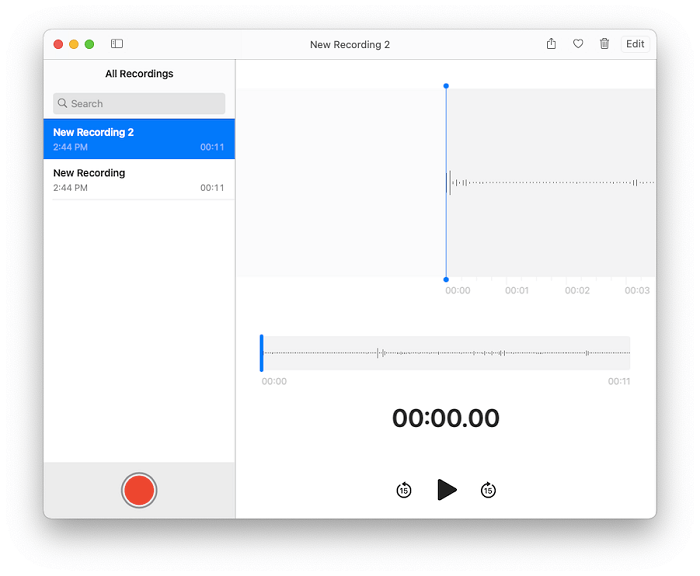
Tip: How to save the audio on Mac?
Back to the primary Voice Memos screen, click and hold on the voice memo you want to save on the left side taskbar then drag it onto the desktop or into a folder. The voice memo will save as an .m4a audio file. The file's name is the same as the voice memo is labeled.
More Tips for Improving the Audio Recording Quality on Mac
First, buy a high-quality microphone.
A good quality microphone is needed, especially when you are going to make a podcast, music or lecture. Audio editing software cannot clean up the noise in a recording completely and it cannot add a sound that is not recorded in the first place.
Second, set up the microphone properly.
If you are recording what you say, you will set the microphone in front of yourself. If you are recording the sound on the Mac, you'd better set the microphone beside the computer. If you are recording an interview or more than one speaker, you might place it in the center of the group.
Third, choose a quiet place to record.
No matter how good your microphone is, it's hard to record pure sound if you are in a noisy environment. The best place must be a quiet small room with a thick wall because a large space will bounce back the sound to your microphone while a small room absorbing the sound, which makes it more natural.
Conclusion
In this post, we introduce 4 ways to record sound on Mac. With all the methods, it is convenient to record your voice, music, and even more on your Mac with the default or third-party software.
Actually, you can use the built-in apps, QuickTime and Voice Memo, to satisfy most of your audio recording needs. But if you think some set-ups for recording internal audio are too troublesome, the third-party recorder software would be a better choice for you. Take FonePaw Audio Recorder as an example, it records audio from both the computer itself and external environment like a microphone. What's more, it can record, edit and share your recorded audios and videos to your social accounts like Facebook and Instagram easily.
Hope this article is of help, and you enjoy your recordings.
