Enabling USB Debugging on an Android phone with a broken or black screen is crucial if you want to recover data, back up files, or control the phone from a computer.
This article provides 3 practical ways to enable USB debugging on an Android device to help you regain control and access data even when you can't see or operate the touchscreen.
Why You Need USB Debugging
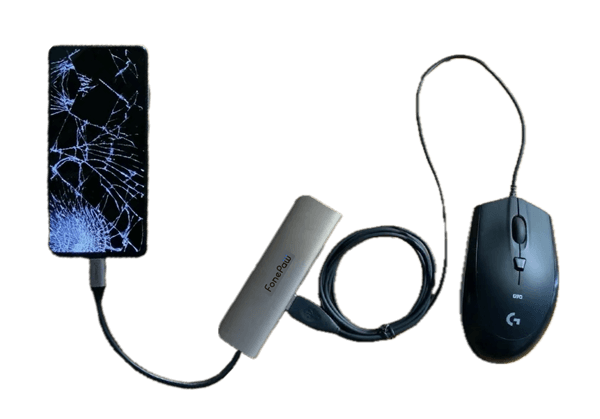
Method 1: Enable USB Debugging with OTG Cable and Mouse
Best for: Android devices with a damaged screen that still displays content.
You’ll need: An OTG adapter and a wired or wireless mouse.
You can control your Android device with a mouse via an OTG adapter just like operating a computer.
Steps:
Step 1. Connect the Mouse:
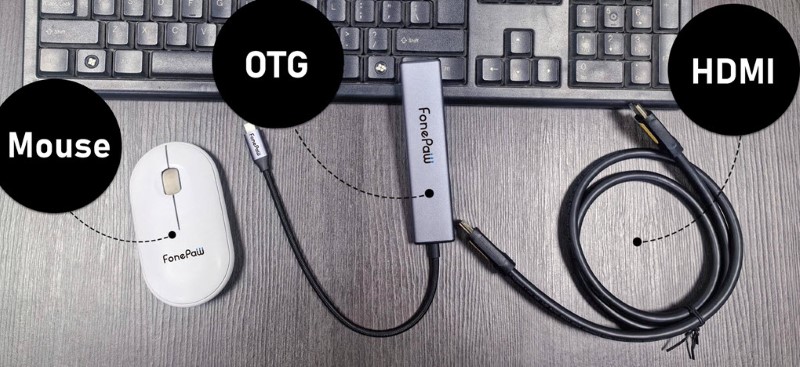
Plug the mouse into the Android device using an OTG adapter.
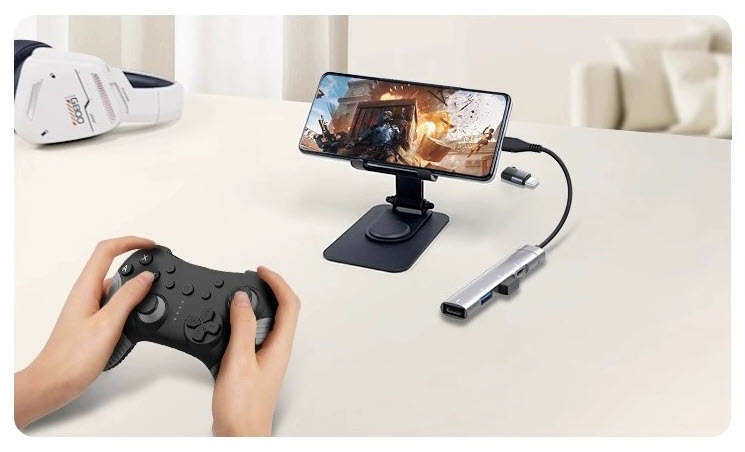
If the phone screen isn’t displaying clearly, you can mirror it to a monitor with an HDMI cable. A Bluetooth mouse or Xbox/PlayStation controller can also work if already paired.
👀 Tips: Things will be much easier if you have paired a Bluetooth mouse or an Xbox/PlayStation controller with your screen-broken Android. Once you turn them on, they will automatically connect to your phone (as long as Bluetooth is enabled on your device). You can then use them to enable USB debugging on the phone.
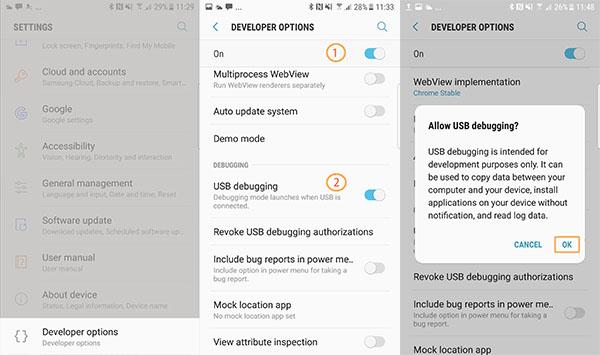
Step 2. Enable Developer Options:
-
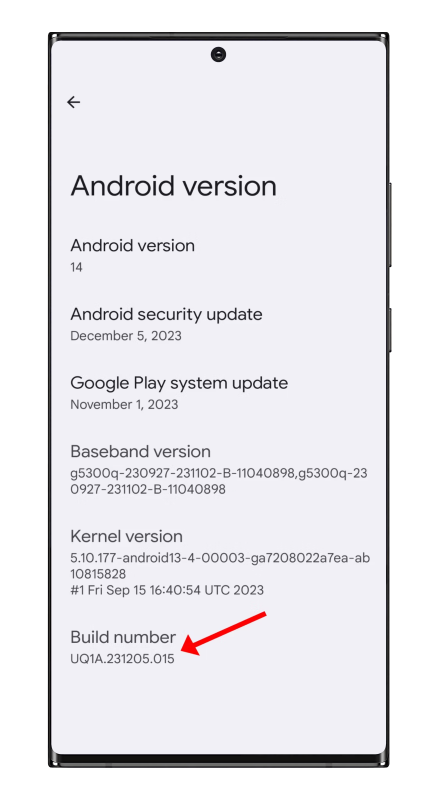
Google Pixel / OnePlus 5T or later: Go to Settings > About phone > Build number.
-
Samsung Galaxy S8 / LG G6 or later: Go to Settings > About phone > Software information > Build number.
Tap Build number seven times until the message "You are now a developer" appears.
Step 3. Turn On USB Debugging:
To enable USB debugging on Android with "Developer Options", follow the options below according to the Android system running on your phone:
-
Android 9 or above: Settings > System > Advanced > Developer Options > USB Debugging
-
Android 8: Settings > System > Developer Options > USB Debugging
-
Android 7.1 or lower: Settings > Developer Options > USB Debugging
After enabling USB Debugging on Android with broken screen using OTG, you'd better transfer the files on your Android to computer for a backup immediately to prevent accidental data loss.
Method 2: Enable USB Debugging from a Computer
Best for: Devices with a completely black screen.
You’ll need: A PC, a USB cable, and one of the following solutions.
A. Use ADB (Android Debug Bridge)
ADB is part of the Android SDK and lets you execute commands to control the phone and retrieve data.
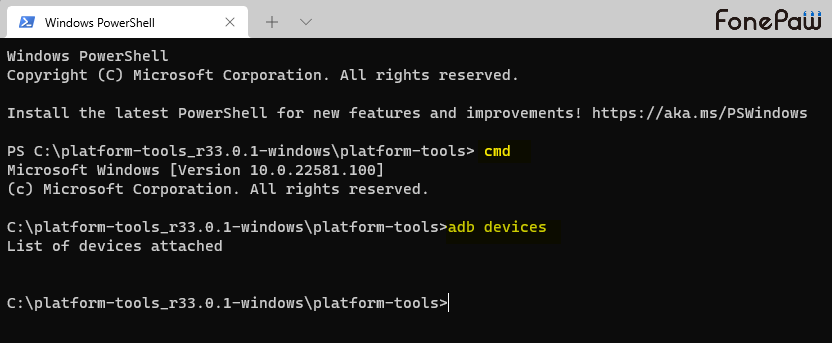
Step 1. Install ADB on your computer.
Step 2. Boot the device into ClockworkMod Recovery (usually by holding Power + Volume Down while the phone is off).
Step 3. Connect the phone to the computer with a USB cable.</divp
Step 4. Open a Command Prompt and type:
adb devices
This lists all connected devices.
Step 5. To back up data, run:
adb pull /data/media/clockworkmod/backup ~/Desktop/Android-backup
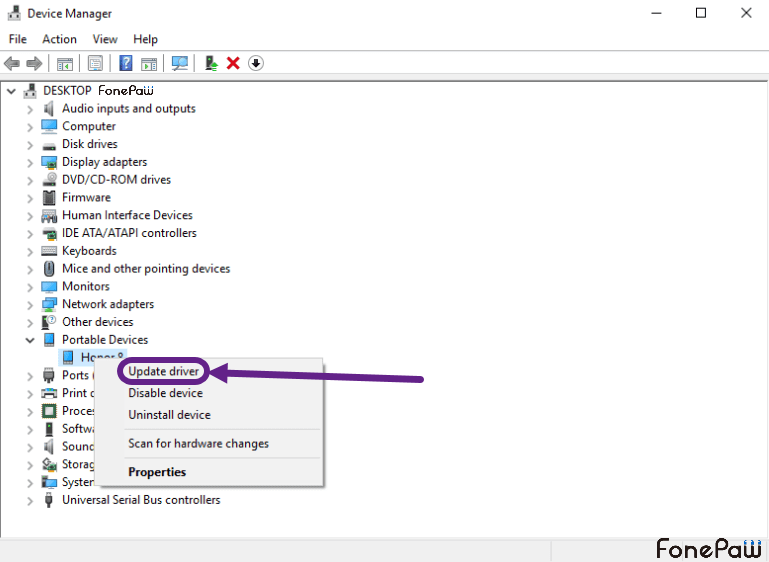
B. Use MTP USB Drivers
MTP (Media Transfer Protocol) USB drivers can help the computer recognize the Android device even if the touchscreen isn't functioning. Here's how to use it:
Step 1. Download and install the latest MTP USB drivers on your computer.
Step 2. Connect the Android phone to the computer with a USB cable.
Step 3. The PC should now detect the phone as an MTP device, allowing file transfer and USB Debugging access.
Step 4. You can now recover or back up data directly from the PC.
If you have lost any important data while enabling USB debugging and want to recover data on your Android devices, you can read on and we will offer you a professional data recovery tool that can help you recover data and files. Just read on to get it!
Bonus: Easily Recover Data from Your Android Device with Broken Screen
When you unexpectedly lose data while enabling the USB debugging on Android device with broken screen, FonePaw Android Data Recovery can work to help. The software is specialized in recovering data from Android phones. Featuring a powerful FREE scanning function, FonePaw can detect all files and data stored in the internal memory or SD card of your devices, and then recover all types of files stored on your Android at a fast speed.
Moreover, FonePaw Android Data Recovery is up-to-date and supports data recovery from several latest models of Android phones, including devices running Android 14. Follow these steps to retrieve data from your phone with a broken screen:
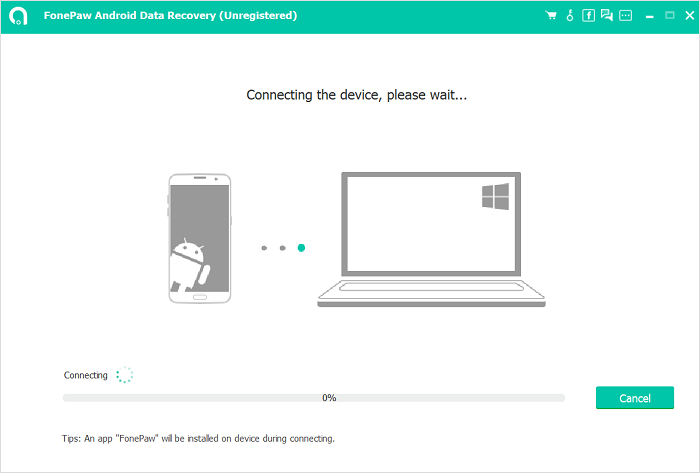
Step 1. Download and install FonePaw Android Data Recovery on your computer. Connect your device to computer via USB.
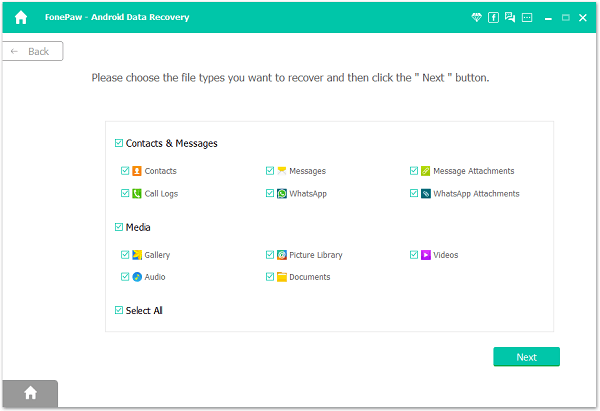
Step 2. Tick the file types that you want to recover from your phone. For example, if you want to recover photos from your Android phone, tick Gallery & Picture Library, and click Next to start scanning.
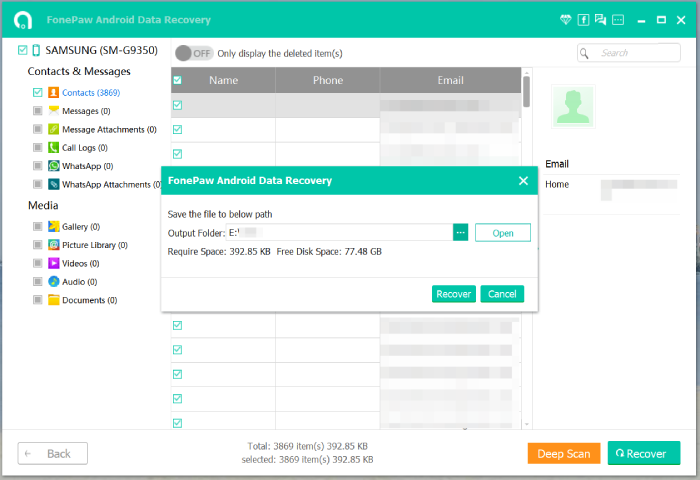
Step 3. Preview the deleted files on your broken Android phone, and check the files you want to recover. Click Recover to extract the files to your computer drive.
💡 Tips: If you have stored your files and data on the SD card inserted into your broken Android, you can also use FonePaw SD Card Recovery to retrieve and extract all the data to your computer.
FAQs about USB Debugging on Android with Broken Screen
Here we list some of the frequently asked questions about the technical procedures of USB debugging broken screen.
Can I turn on USB debugging without screen?
Surely yes. When your Android screen suddenly fails to be responsive, you can use both the ADB tool or MTP USB drivers to turn on USB debugging on Android directly. Don't worry about losing any data because FonePaw Android Data Recovery can work as a backup to help you retrieve lost data again.
How do I enable USB debugging with a locked screen?
Don't worry if your Android screen is locked up but you need to enable USB debugging on it. There are several methods working to help:
- Use a third-party Android unlocker tool to unlock the device and then manually turn on USB debugging.
- Try the USB OTG method introduced above to enable USB debugging on a locked device.
- ADB command is also working to help turn on USB debugging even without unlocking the Android device.
- Putting your locked Android device into Recovery Mode and also working to turn on USB debugging for you.
The Bottom Line
To sum up, this article is a complete guide on how to enable USB debugging on Android with black screen. Said with no exaggeration, USB debugging on Android with black screen is a lifesaver when it comes to recovering data. Don't need to feel panic if your Android phone's screen has become black. Just follow the methods above, and you’ll be able to retreive the important data with FonePaw Android Data Recovery in no time.
Android Data Recovery
Retrieve your lost data from your Android phone within seconds!
Hot Articles
- How to Recover Deleted Text Messages on Android (Ultimate Guide)
- How to Restore Lost Files from Android SD Card (2 Quick Ways)
- How to Recover Deleted Files from Android Internal Storage
- Android Recycle Bin: Where Are Deleted Files Stored on Android Phone
- How to Recover Deleted Photos from Android Gallery [2023]