Generally speaking, transferring photos from iPhone to Mac is quite easy most of the time. With a USB cable, you can easily complete this process with a few clicks or a drag-and-drop movement. However, system glitches, iPhoto unrecognized formats, and other hiccups may occur sometimes, and that can lead to import errors. If you are also facing the same confusion about how to import photos from iPhone to Mac, let's jump into the 8 practical workarounds in this post and fix the "iPhone won't import photos to Mac" issue.

How to Transfer Photos from iPhone to Computer [5 Ways]
7 Ways to Transfer Photos from iPhone to External Hard Drive
Why Can't I Import Photos from iPhone to Mac?
Usually, the "import photos from iPhone to Mac not working" problem is caused by 4 possible reasons:
| Reasons | Solutions |
|---|---|
| ☁️ Your photos are in iCloud rather than on the iPhone | Fix 1, Fix 2 |
| ➰ Connection problems between your iPhone and Mac | Fix 3, Alternative 2 |
| 💻 System glitch on your iPhone or Mac | Fix 4, Fix 5, Fix 6, or Alternative 1 |
| 📚 Adding a large number of photos to Mac at a time | Alternative 1, Alternative 2 |
To address the issues mentioned above, we will provide targeted solutions below. You can navigate to the relevant sections by clicking the solution name like "Fix 1" and "Alternative 1" provided in the table. Additionally, we offer universal methods to help you quickly import photos from your iPhone to your Mac successfully.
How to Fix Photos Not Importing from iPhone to Mac
Fix 1. Download Photos from iCloud to iPhone
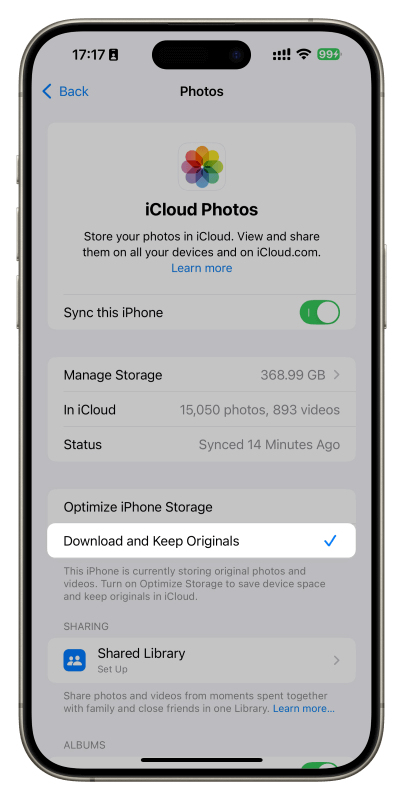
If you have set your iPhone syncing photos to iCloud with "Optimize iPhone Storage", any optimized photos (stored only in iCloud) will not be available for importing to Mac. Your Mac will display "Preparing to import..." but never does. To resolve the issue, you can download the original photos from iCloud to your iPhone for transfer.
- Go to Settings > iCloud > iCloud Photos on your iPhone.
- Choose "Download and Keep Originals".
- Wait for your iPhone to download photos from iCloud to local storage, then you can import photos from iPhone to Mac.
Fix 2. Sync Photos from iPhone to Mac with iCloud
Now that your iPhone photos are synced to iCloud, you can easily import the photos from iPhone to Mac via the Photos app if your Mac and iPhone are logged in with the same iCloud account.
- Make sure your iPhone and Mac are logged in with the same Apple Account. If not, turn to Fix 1.
- Enable iCloud Photos on Mac.
- Launch the Photos app on your Mac, and wait for the photos to sync from iCloud to your Mac.
Fix 3. Check the Connection Between iPhone and Mac
If you take a cable that is broken, has a non-working port, or is not compatible, your Macbook will not recognize the iPhone you've plugged in. Thus, transferring photos from iPhone to Mac will fail you consequently. To fix it, you may either:
- When prompted on your iPhone, enter your passcode to trust the Mac.
- Try using another cable to connect your iPhone and Mac.
- Use another USB/USB-C port on your Mac.
- Make sure your iPhone is unlocked during the transfer.
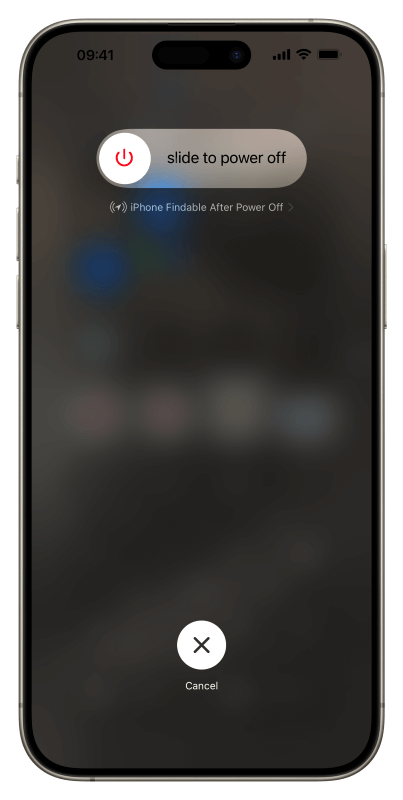
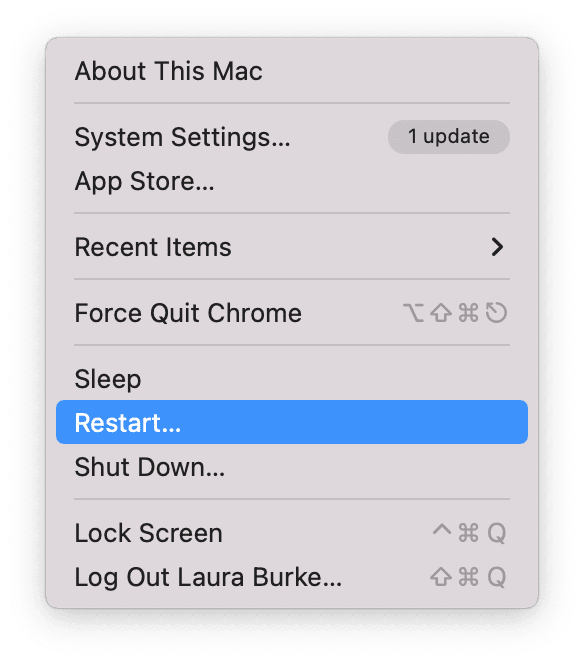
Fix 4. Restart Your iPhone and Mac
Restarting is usually the most effective way to deal with small glitches on the devices. Try to restart your iPhone and Mac if the Photos app gets stuck at importing photos on Mac, and then try moving photos again.
On your iPhone: press and hold both the volume up and side button until the power-off screen appears. Slide the power-off slider to power off. And then hold the side button to restart your iPhone.
On your Mac: Navigate to Apple Menu > Restart.
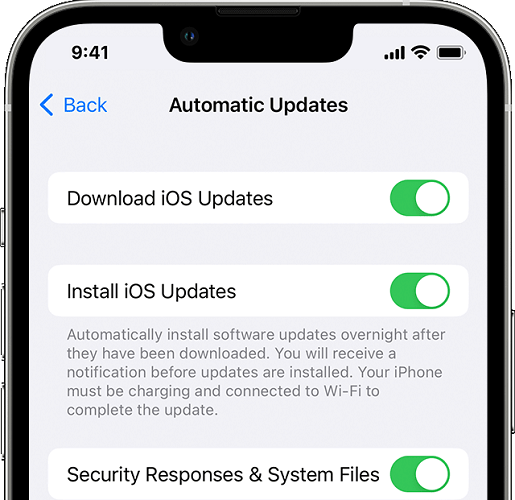
Fix 5. Update System on iPhone and Mac
The normal use of iPhone and Mac is also closely related to the system version. If you find that photos won't be imported from iPhone to Mac properly, you can try to check and upgrade the operating system according to the following process. However, if you encounter the "can't import photos from iPhone to Mac" issue after updating to the latest system version, you may consider using professional iPhone transfer tools to resolve it.
iPhone System Update:
- Open "Settings" on your iPhone, and go to General > Software Update.
- If the upgrade is available, tap Download and Install.
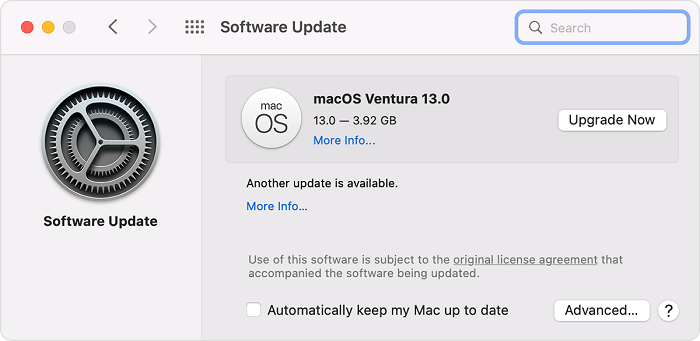
Mac System Update:
- Head to Apple menu > System Settings.
- Click "General" on the left side of the System Settings window.
- Click Software Update on the right.
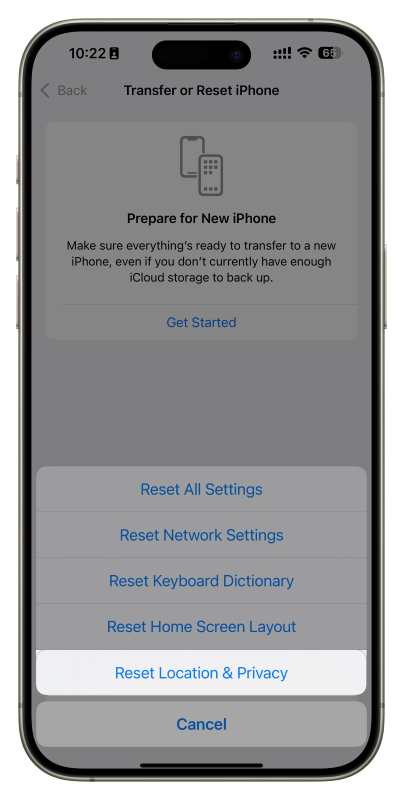
Fix 6. Reset iPhone Location & Privacy
If your iPhone can't be recognized for importing photos to your Mac computer, it can be caused by the location and privacy settings. To fix this, you can reset the iPhone location and privacy by following the steps below:
- Open your iPhone and go to "Settings".
- Find General > Reset/Transfer or Reset iPhone > Reset Location & Privacy.
- After that, re-plug your iPhone to Mac and tap Trust on your iPhone when you see the Trust the Mac alert.
Alternative Methods to Import Photos from iPhone to Mac
Maybe you think the above 6 methods are troublesome, and some of them may not be so effective in fixing the "unable to import photos from iPhone to Mac" issue. Therefore, we'd also like to offer you the other 2 ways to transfer pictures from iPhone to Mac.
Way 1. Copy Photos from iPhone to Mac with FonePaw iOS Transfer
Using a powerful third-party tool to transfer photos can be a good choice because it can help you import photos from iPhone to Mac quickly and easily. FonePaw iOS Transfer is such an expert in transferring files from iPhone to Mac. Whether it is video, audio, or pictures in various formats, this dedicated software can easily transfer them from iPhone to Mac. Better yet, FonePaw iOS Transfer can be considered your photo manager, which can help you organize your photos and albums with clicks!
- Stably transfer large amounts of photos from iPhone to Mac
- Swiftly get photos from iPhone to Mac
- Securely export pictures from iPhone to MacBook
- Selectively transfer the photos you want only
- Seamlessly manage photos during the transfer from iPhone to Mac
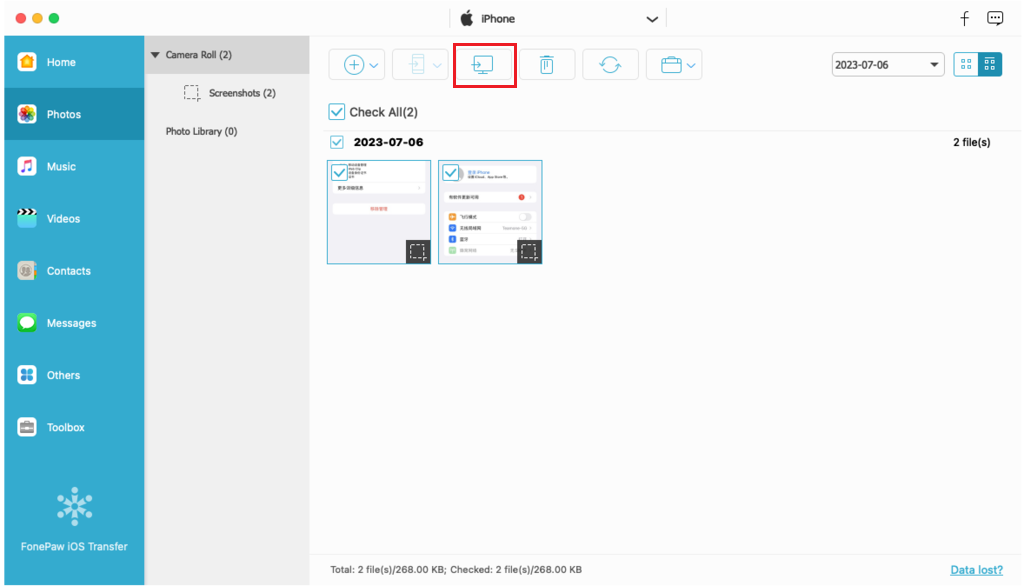
Now, follow the steps to import photos from iPhone to Mac with FonePaw
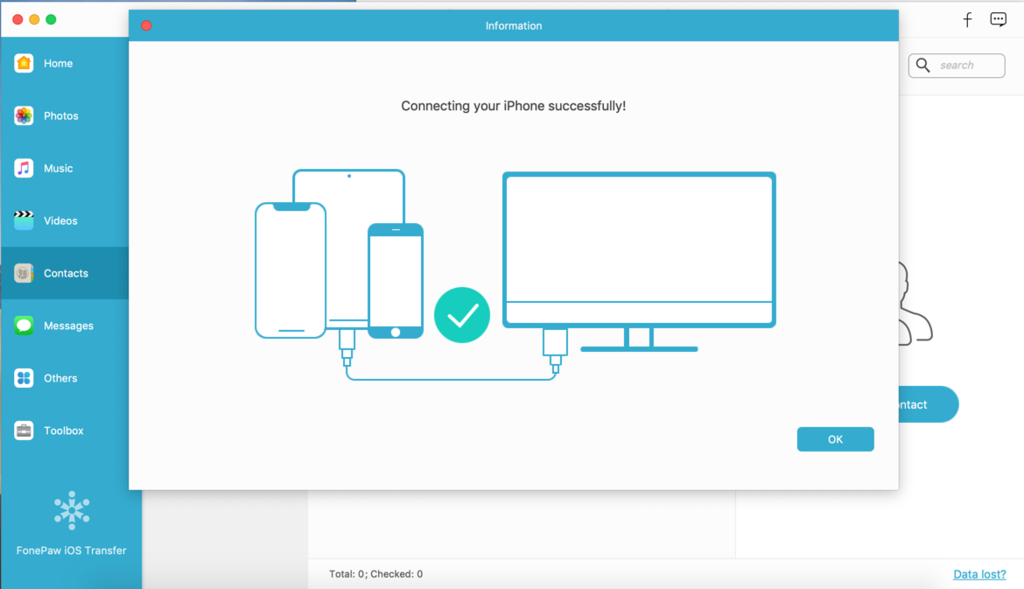
Step 1. Download, install, and launch FonePaw iOS Transfer on your Mac.
Connect your iPhone to Mac with a USB cable. Trust the Mac on your iPhone when prompted.
Step 2. From the main interface of FonePaw, choose Photos to preview the photos on your iPhone.
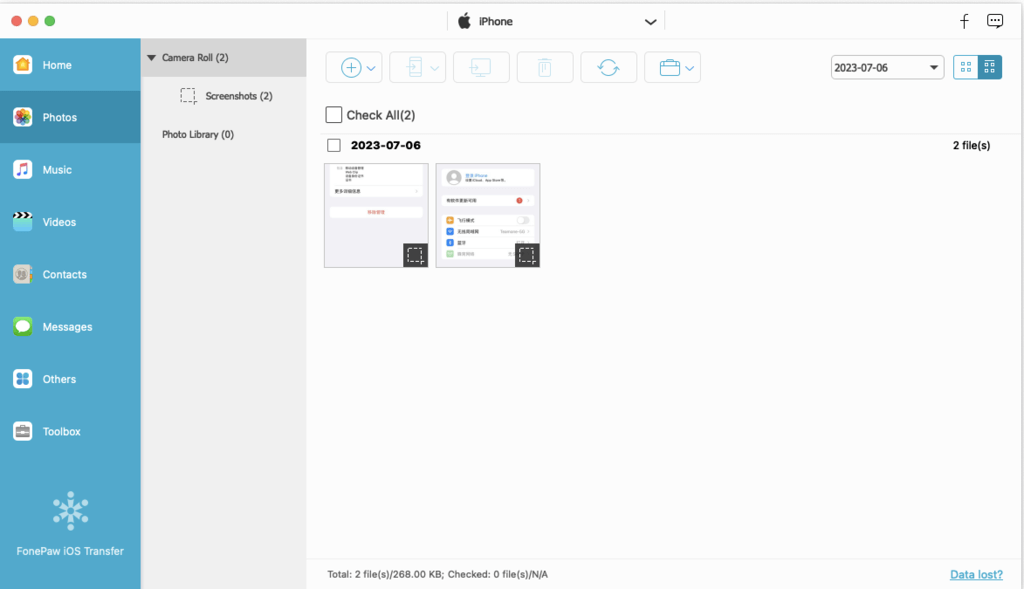
Step 3. Tick the pictures you want to transfer to your Mac.
Step 4. Click the Export button to export photos from iPhone to Mac.
Way 2. AirDrop Photos from iPhone to Mac
If you only need to transfer a small number of photos, AirDrop is a more convenient and quicker option. It allows you to transfer pics from iPhone to Mac in a few seconds without the need for a wired connection.
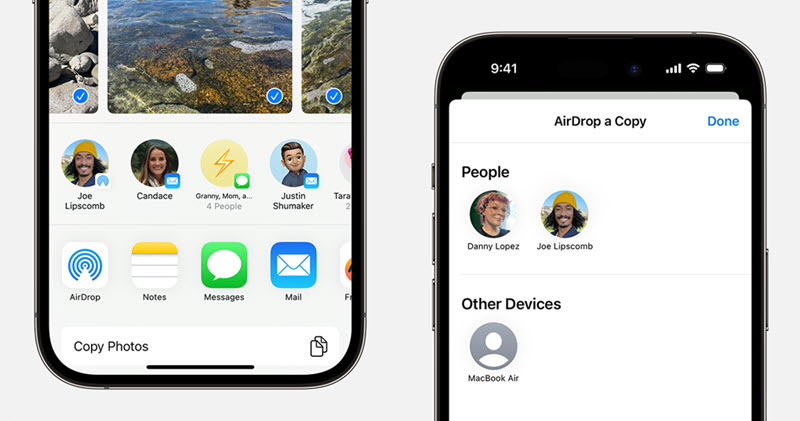
Step 1. Go to Finder > AidrDrop on your Mac. Allow everyone to discover you.

Step 2. Open the Photos app on your iPhone, and select the photos you want to transfer.
Step 3. Tap Share > AirDrop. Tap the icon of your Mac to send photos from iPhone to Mac.
The Bottom Line
That's all about the fixes to the problem of how to import photos from iPhone to Mac. Hope the solutions listed can help you. Compared to the common solutions, FonePaw iOS Transfer can be a better method when you want to import a large number of photos from your iPhone to your Mac, and can keep you from encountering problems that are hard to figure out. Why not have a try if you want the transfer to go more smoothly?

iOS Transfer