In our daily lives and at work, we often need to transfer iPhone photos to Mac, such as transferring iPhone photos to Mac for backups, editing, and sharing. Although traditional iTunes supports data transfer between Apple devices, its drawbacks are obvious. It is difficult to use for newbies and takes a long transfer time. What's worse. iTunes transfer sometimes causes duplicate files and data loss issues. So, many iPhone users are searching for simpler ways to transfer iPhone files to Mac.
For this, we have collected 5 ways to help you transfer files from iPhone to Mac without using iTunes. Read on to get more information if you are interested.
Way 1. Transfer Files from iPhone to Mac with iOS Transfer
Want to transfer iPhone files to Mac without using iTunes? The simplest way is to use a professional iOS data transfer tool. Among so many available options in the market, FonePaw iOS Transfer stands out for its versatile features and intuitive interface. It is the best alternative to iTunes, yet it is more advanced for managing your iOS data.
FonePaw iOS Transfer supports transferring iOS files to Mac, as well as transferring files from Mac to iPhone. Don't worry about it cannot fulfill your various file transfer needs. It allows you to transfer multiple iOS file types, such as photos, videos, music, contacts, messages, and more. With its fast and secure data transfer, it greatly reduces the transfer time, guaranteeing you no potential data loss and overwritten issues. Simple to use; you don't need to be a computer expert to use it. What's better, it provides a backup and restore feature. You can back up your iOS files on Mac easily and restore them if necessary. Overall, it is your best go-to option for transferring your iOS data to Mac.
- Easy to navigate with an intuitive interface.
- Supports transferring multiple file types, like photos, videos, music, contacts, messages, and more.
- No data loss and data overwritten issues.
- Easily back up iPhone data and restore it when needed.
- Supports freely adding, deleting, and editing iOS files/data before transfer.
Now let’s have a look at how to use FonePaw iOS Transfer to transfer files from iPhone to Mac without iTunes:
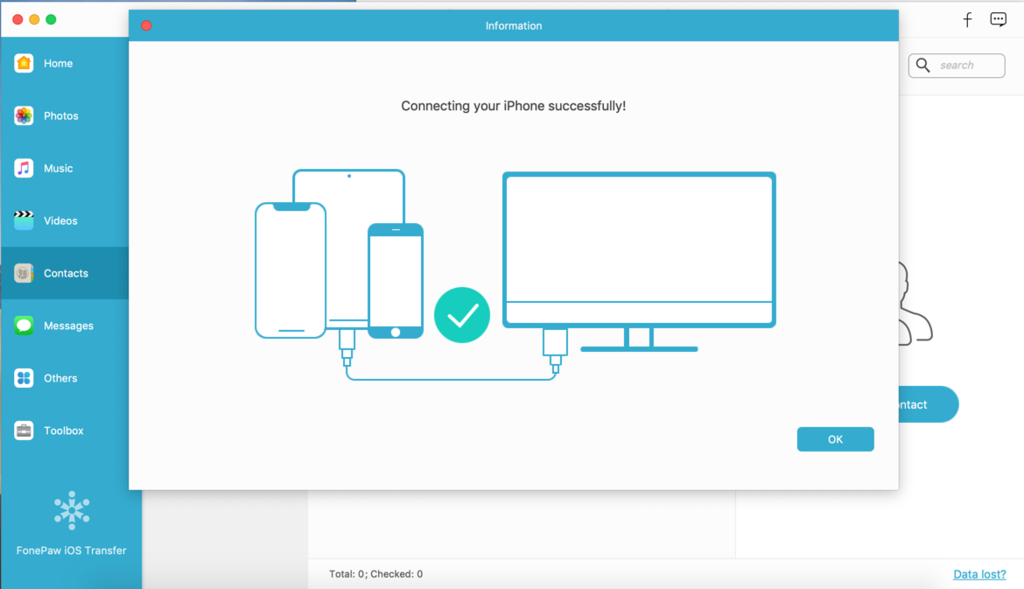
Step 1. Launch FonePaw iOS Transfer. Connect your iPhone to your Mac computer with a cable. You will see information on successfully connecting.
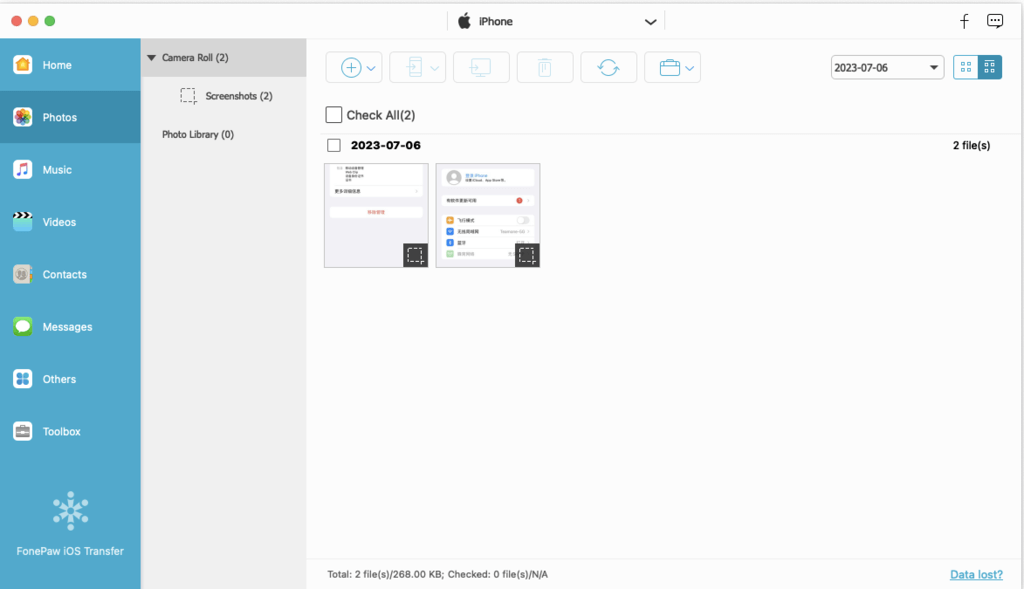
Step 2. On the left panel, choose the file type you want to transfer, for example, Photos. You can right-click on the photo to preview it, and you can perform other operations like deleting the photo from your iPhone, etc.
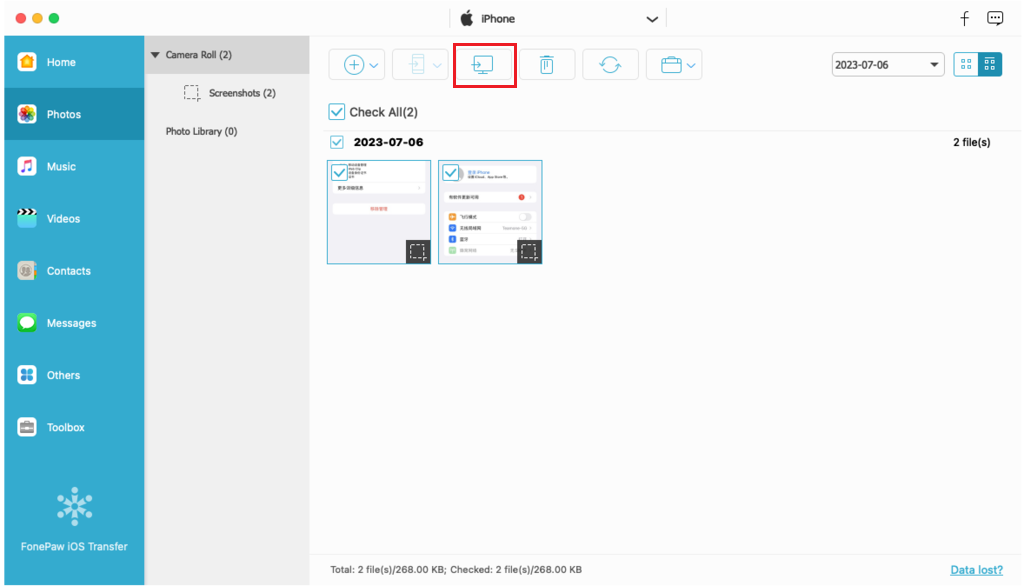
Step 3. Select the photos you want to transfer. Click on the computer icon to export your photos to your Mac.
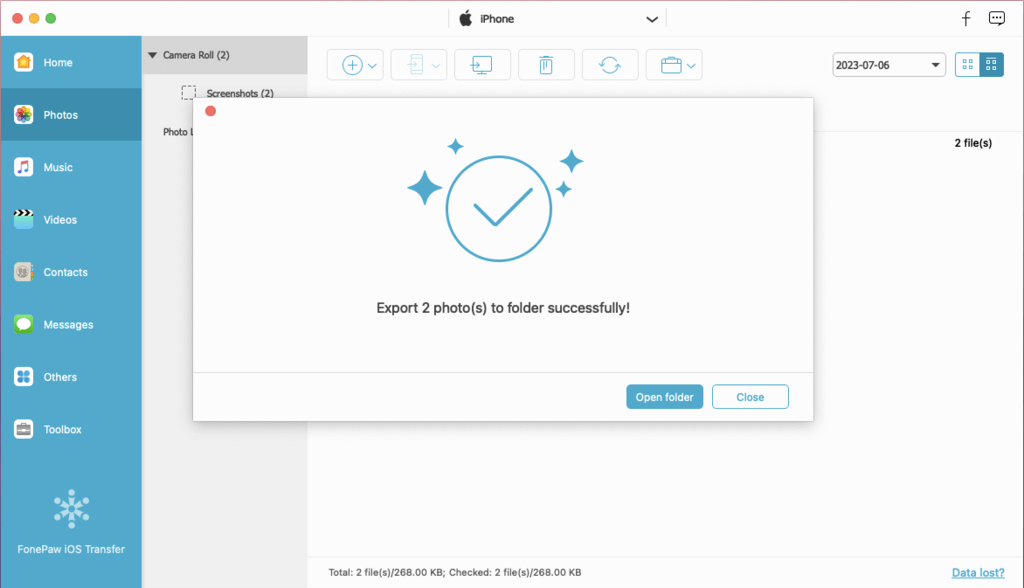
Step 4. The software will automatically transfer your photos to your Mac at a fast speed, and you will receive a notification that you have successfully transferred them.
Way 2. Send Files from iPhone to Mac via AirDrop
AirDrop is a built-in feature that is available on all Apple devices. Using it, you can drop a single file between your iPhone and Mac, including photos, music, videos, contacts, etc., without using a cable. However, something you need to know more about Airdrop when using it, is that since the single file transfer limitation, you need to drop your files one by one, and it can be a very long time. Here are the steps.
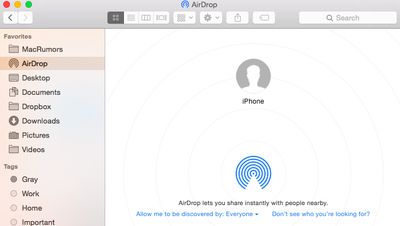
Step 1. Swipe down the upper right corner to access the Control Center on your iPhone. Press and hold the WIFI icon, and turn on WIFI, Bluetooth, and AirDrop. Tap "Allow me to be discovered by". Choose the "Contacts Only" or "Everyone" option.

Step 2. Go to your Mac's Menu bar, then System Preferences to turn on WIFI and Bluetooth. Enter Go to turn on AirDrop. Click "Allow me to be discovered by". Choose Choose "Contacts Only" or "Everyone" option as well.
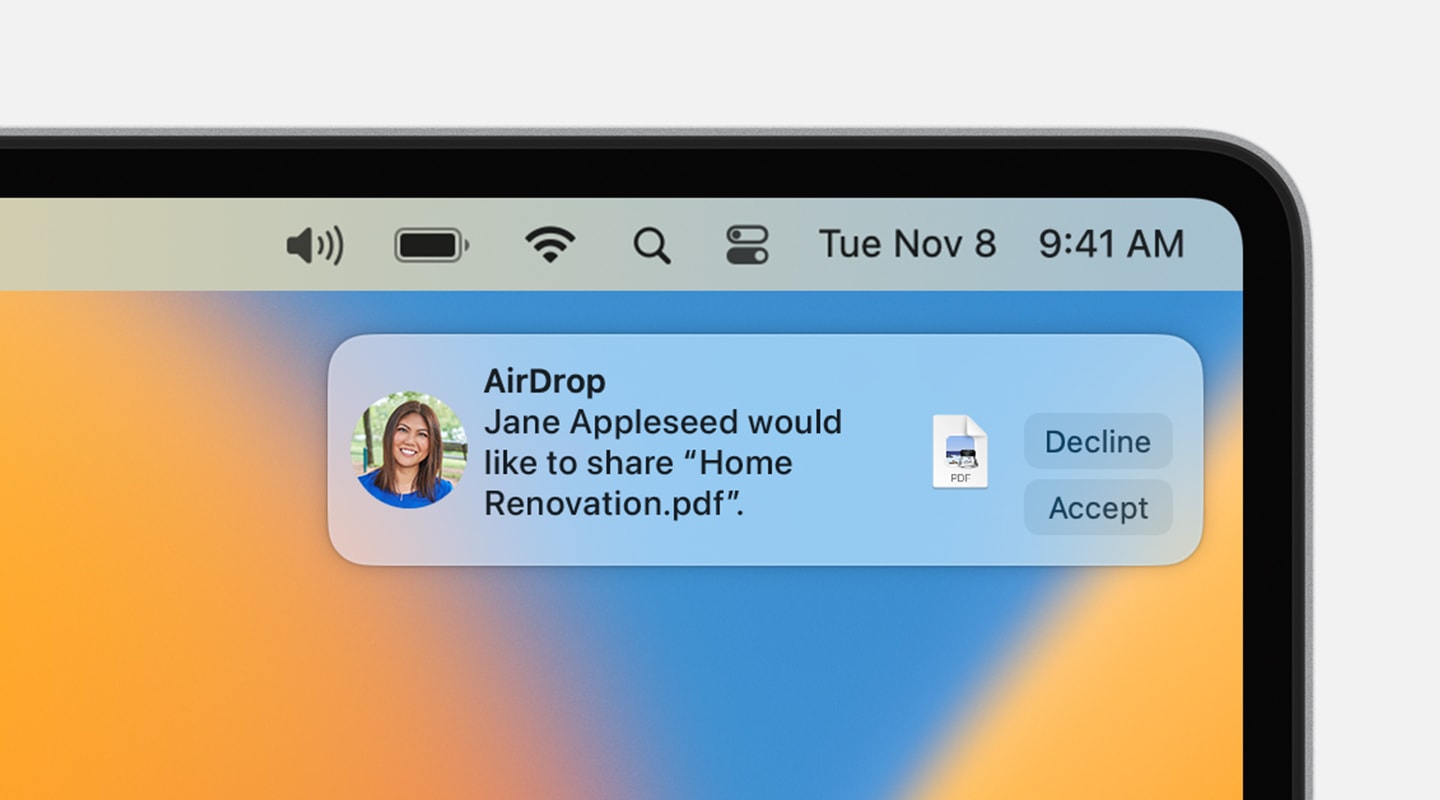
Step 3. On your iPhone, open the file you want to transfer. Tap the share button and select your Mac as the recipient.
Step 4. On your Mac, click "Accept" on the notification that appears on your Mac. The file will be saved to the Download folder.
Way 3. Sync Files from iPhone to Mac with Finder
If you use macOS Catalina or later, Finder is also an effective tool for you. It allows you to sync files between iPhone, Mac, and other Apple devices, supporting transferring files like music, movies, TV shows, podcasts, audiobooks, and more with a cable to keep your data secure. For example, if you use a wireless method to transfer your iPhone photos to your Mac, you may encounter a situation where your iPhone photos cannot show up on your Mac because these photos may already be damaged and lost. The best way to do this is to use a cable method to avoid data loss. However, this tool does not support advanced features, like managing, editing, backing up, and restoring before transfer. The steps are similar to iTunes. Here is how.
Step 1. Connect your iPhone to your Mac using a USB cable.
Step 2. Click on the Finder button in the Dock.
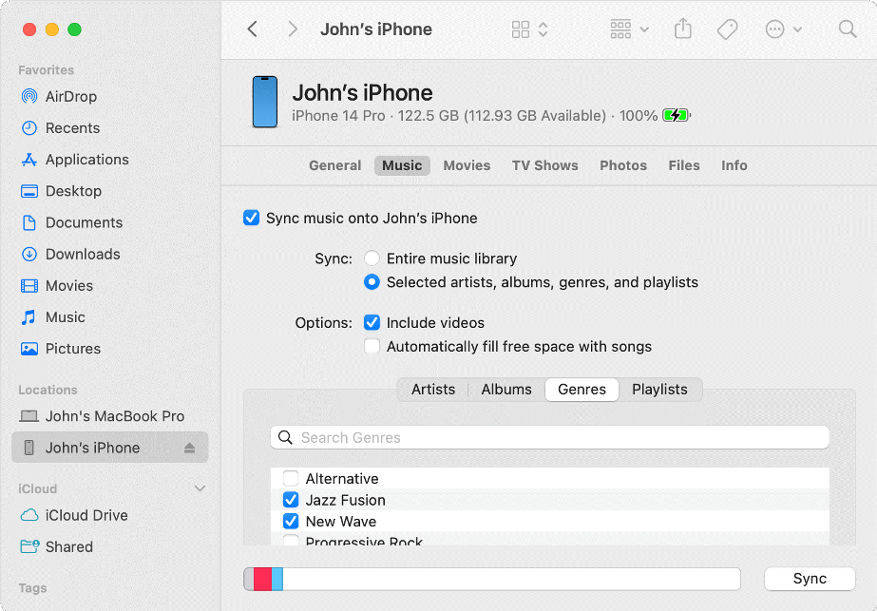
Step 3. Find your iPhone under the "Locations" section and click on it.
Step 4. Click on the tabs (e.g., Music, Photos, Files) of the file type that you want to sync.
Step 5. Check the boxes next to the specific files or folders you want to sync.
Step 6. Click on Apply at the bottom right corner, then click on Sync to start.
Way 4. Transfer Files from iPhone to Mac Using iCloud Drive
Apple users are not strangers to iCloud. It is a storage service by Apple Inc. However, it is important to distinguish between the iCloud sync feature and iCloud Drive. The former one allows you to sync and access the latest files on all Apple devices after you turn on the feature. For instance, you can sync iPhone contacts to Mac and sync your precious photos to iPad, etc. The latter is similar to Google Drive, which lets you upload any files you want to store on iCloud Drive so that you can download them from any other Apple device, including a Mac. One thing to note is that iCloud Drive only offers 5GB of free storage, so you may need to purchase more storage space if you get many files to upload, and the transfer speed
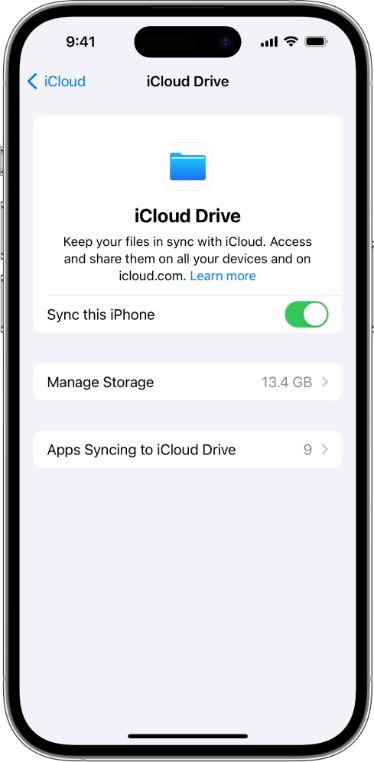
Step 1. Go to your iPhone Settings, click on your Apple ID, and then click iCloud and turn on iCloud Drive.
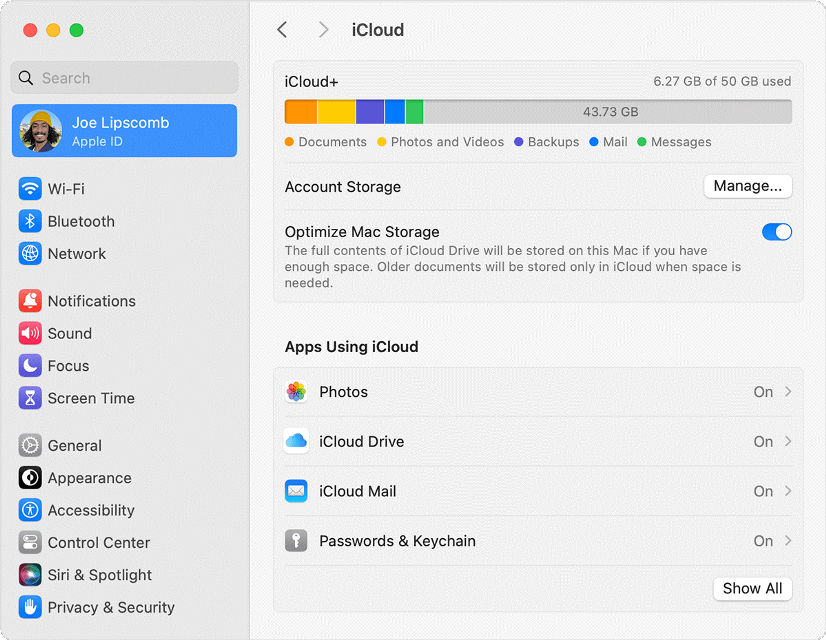
Step 2. On your Mac, click on the Apple icon, then go to Settings, then System Preferences.
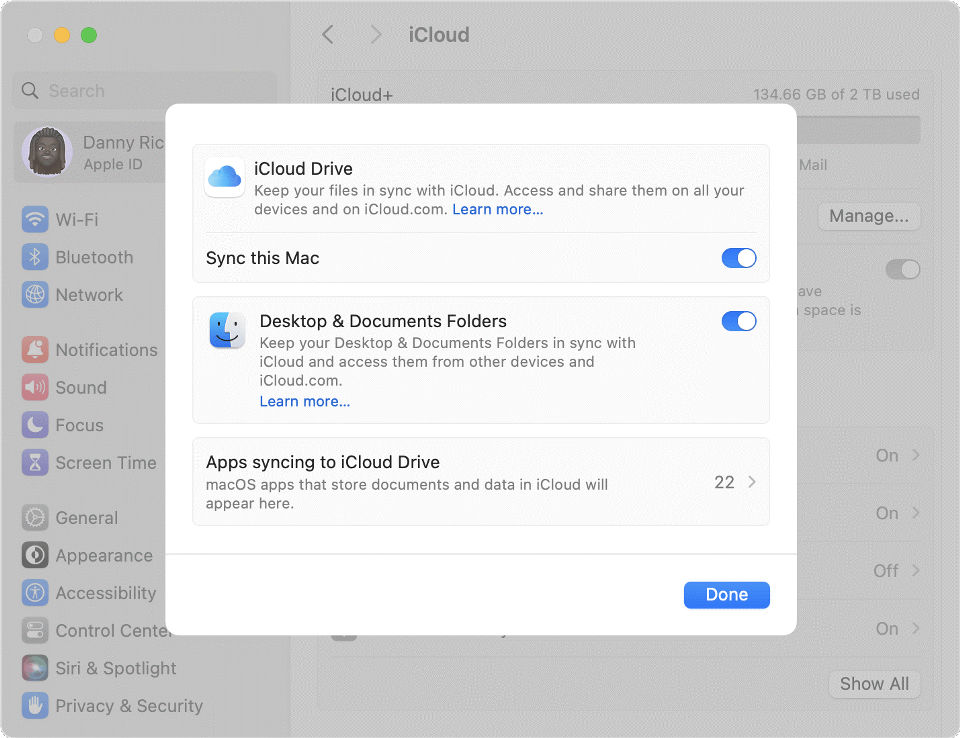
Step 3. Click on your ID to find iCloud. Under Apps Using iCloud, click iCloud Drive.
Step 4. Check the Sync options for this Mac and Desktop & Documents folder. So, you can find your iCloud Drive on the sidebar after clicking Finder.
Step 5. Locate the File you uploaded from your iPhone. You can download it on your Mac.
Way 5. Move Files from iPhone to Mac via External Storage
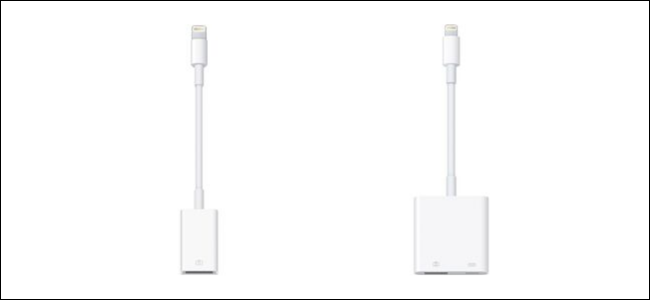
Using an external storage device is a way to transfer your iPhone files to a Mac, especially when your internet connection is not available. Also, it can serve as your physical backup files. However, this method requires you to buy a compatible adapter and external storage device like USB, HHD, etc. So, it is not convenient enough if you compare with the above methods. Here are the steps.
Step 1. Use an adapter to connect your external storage device, like a USB, to your iPhone.
Step 2. Open the File app on your iPhone.
Step 3. Press and hold the file. Copy and paste the file to the USB.
Step 4. Disconnect your USB and connect it to your Mac.
Step 5. Open Finder on your Mac. In the sidebar, open your USB.
Step 6. Copy and paste the file onto your Mac.
The Bottom Line
Each method has pros and cons. AirDrop is simple for individual file transfer but not suitable for a large number of files. iCloud Drive offers you a cloud convenience but relies on good internet conditions. If you prefer cable methods with stable performance, Finder is a decent option, but it is not as versatile as FonePaw iOS Transfer. So, among these methods, FonePaw iOS Transfer is the one that needs attention. With its support for multiple file types transfer, secure transfer, and the ability to backup and restore, it gives you the best iPhone-to-Mac transfer experience.

iOS Transfer