System integration has become a hallmark of the Apple ecosystem. The process of transferring files between iPhone and Mac has become an essential part of your digital journey. By utilizing both USB and wireless transmission methods, you can easily transfer files from Mac to iPhone. Just check this post to get 5 effective ways to seamlessly transfer files between your iPhone and Mac.
Way 1. Transfer Files from Mac to iPhone with iOS Transfer Tool
FonePaw iOS Transfer is a versatile third-party tool designed to simplify and enhance file transfers between iPhone and Mac, bypassing the need for iTunes. With a USB connection, FonePaw offers reliable and fast file transfers, allowing you to move files directly without relying on internet connectivity. This top-rated program stands out with unique advantages, such as the ability to control and preview your files before transferring them. This feature lets you selectively transfer only the files you want, ensuring a more efficient and tailored transfer process.
- Versatile File Support - Transfer iPhone photos, videos, contacts, messages, and third-party app data.
- Swift Transfer Speeds - Ensure fast & reliable file transfer for both small and large files.
- File Preview Function - Offer preview of files for selective iPhone file transfer.
- Secure File Transfer - 100% clean and safe to use, without the risk of privacy leakage.
- One-button operation - One-button operation without complicated steps.
With all the remarkable features above, you can easily transfer files between iPhone and Mac in several simple steps. Follow the step-by-step guide below to move files from Mac to iPhone freely.
Step 1. Download and install FonePaw iOS Transfer on your Mac.
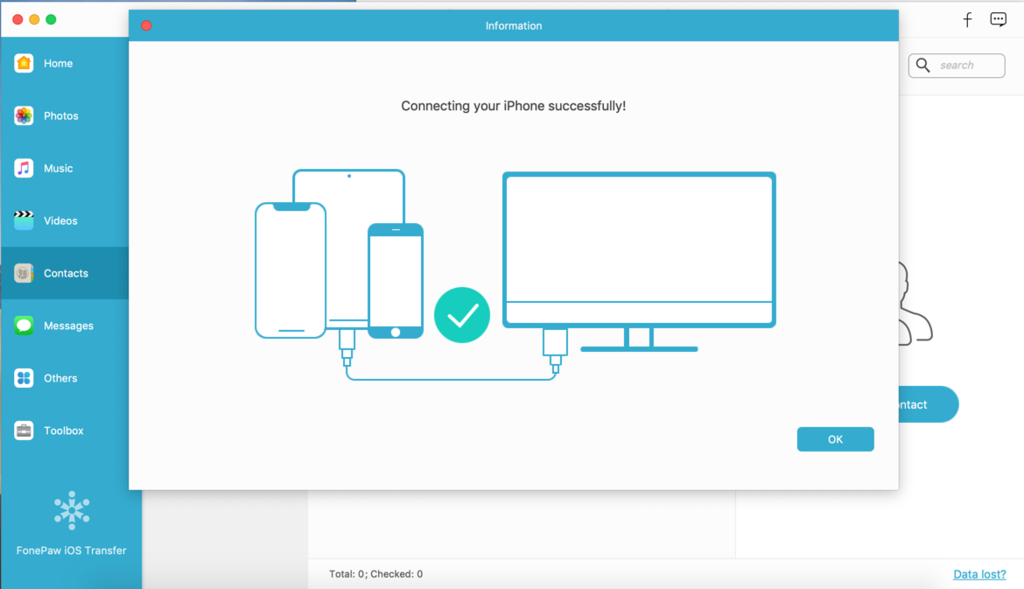
Step 2. Connect your iPhone to your Mac with a USB cable, and launch FonePaw iOS Transfer. Your device will be recognized at once.
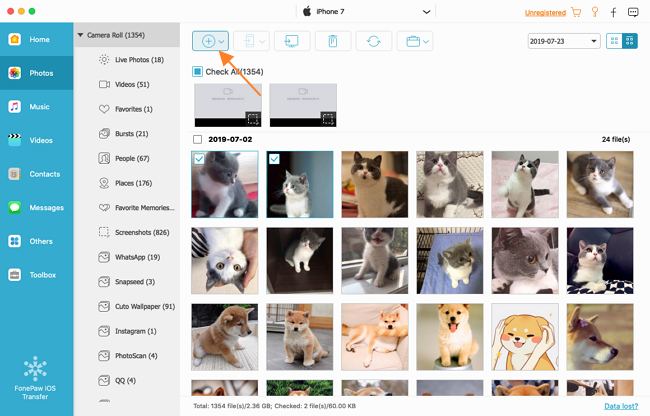
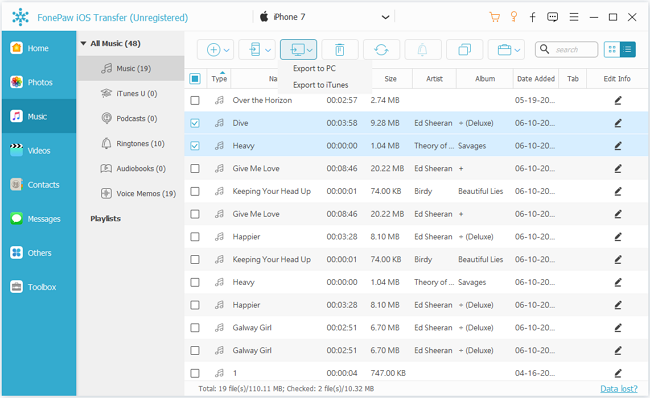
Step 3. Choose the data type you want to move on the left panel. Click "add" and then you can select the files you want to move from your Mac to your iPhone. The transfer process will be finished in several minutes as well.
Apart from transferring files from Mac to iPhone, FonePaw iOS Transfer can also help you export iPhone files to Mac without iTunes. Just hit the download button to have a try!
Way 2. Sync Files from Mac to iPhone Using Finder with USB
Another way to transfer files between iPhone and Mac is using Finder. Finder, a built-in macOS tool, offers seamless file management and synchronization between your iPhone and Mac. It enables syncing supported content like music, movies, photos, contacts, and calendars. With this Mac tool, you can easily transfer data within several steps as below:
Step 1. Plug your iPhone into your Mac using a USB cable. If prompted, tap "Trust" on your iPhone to establish the connection.
Step 2. Open Finder on your Mac. Look for your iPhone listed under "Locations" in the left sidebar and click it.
Step 3. Select the "Files" tab to see apps on your iPhone with files and then click the right arrow next to an app to reveal its files.
Step 4. To move files from your Mac to your iPhone, choose the type of content you want to transfer to your iPhone. And then select "Sync to [Your Device Name]". Finder will transfer files from Mac to iPhone for you.

While Finder offers a practical file transfer method between iPhone and Mac, it lacks file preview features. For a flexible preview feature, we recommend FonePaw iOS Transfer, which allows you to preview files before transferring them, thus enhancing the user experience and ensuring efficient file management.
Except for wired transfer, wireless tools like AirDrop and iCloud Drive are recognized as convenient and effective ways to transfer files between iPhone and Mac. They can serve as a great alternative to transferring single or small amounts of files from Mac to iPhone. Without further ado, let's explore the seamless file transfer capabilities of AirDrop and iCloud Drive now.
Way 3. Send Files from Mac to iPhone via AirDrop
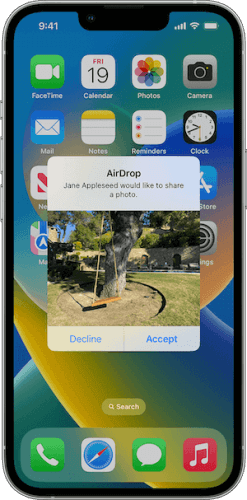
AirDrop is a user-friendly solution for seamless file sharing between compatible Apple devices within proximity. Available on iOS 7, iPadOS 13, OS X 10.10, or later required, AirDrop empowers you to wirelessly transmit a diverse range of content to nearby devices and Mac computers, including photos, videos, websites, locations, files, and more.
To use AirDrop to transfer files from Mac to iPhone, make sure Wi-Fi, Bluetooth, and AirDrop are turned on on both devices first.
- On iPhone: Swipe down the Control Center, press and hold the network settings box, then choose "Contacts Only" or "Everyone" for AirDrop visibility.
- On Mac: Open Finder, click on "AirDrop" in the sidebar, and adjust the visibility setting at the bottom to "Contacts Only" or "Everyone".
Step 1. When AirDrop is turned on, select the files you want to share on your Mac.
Step 2. Tap the Share icon, then pick your iPhone's name from the AirDrop options.
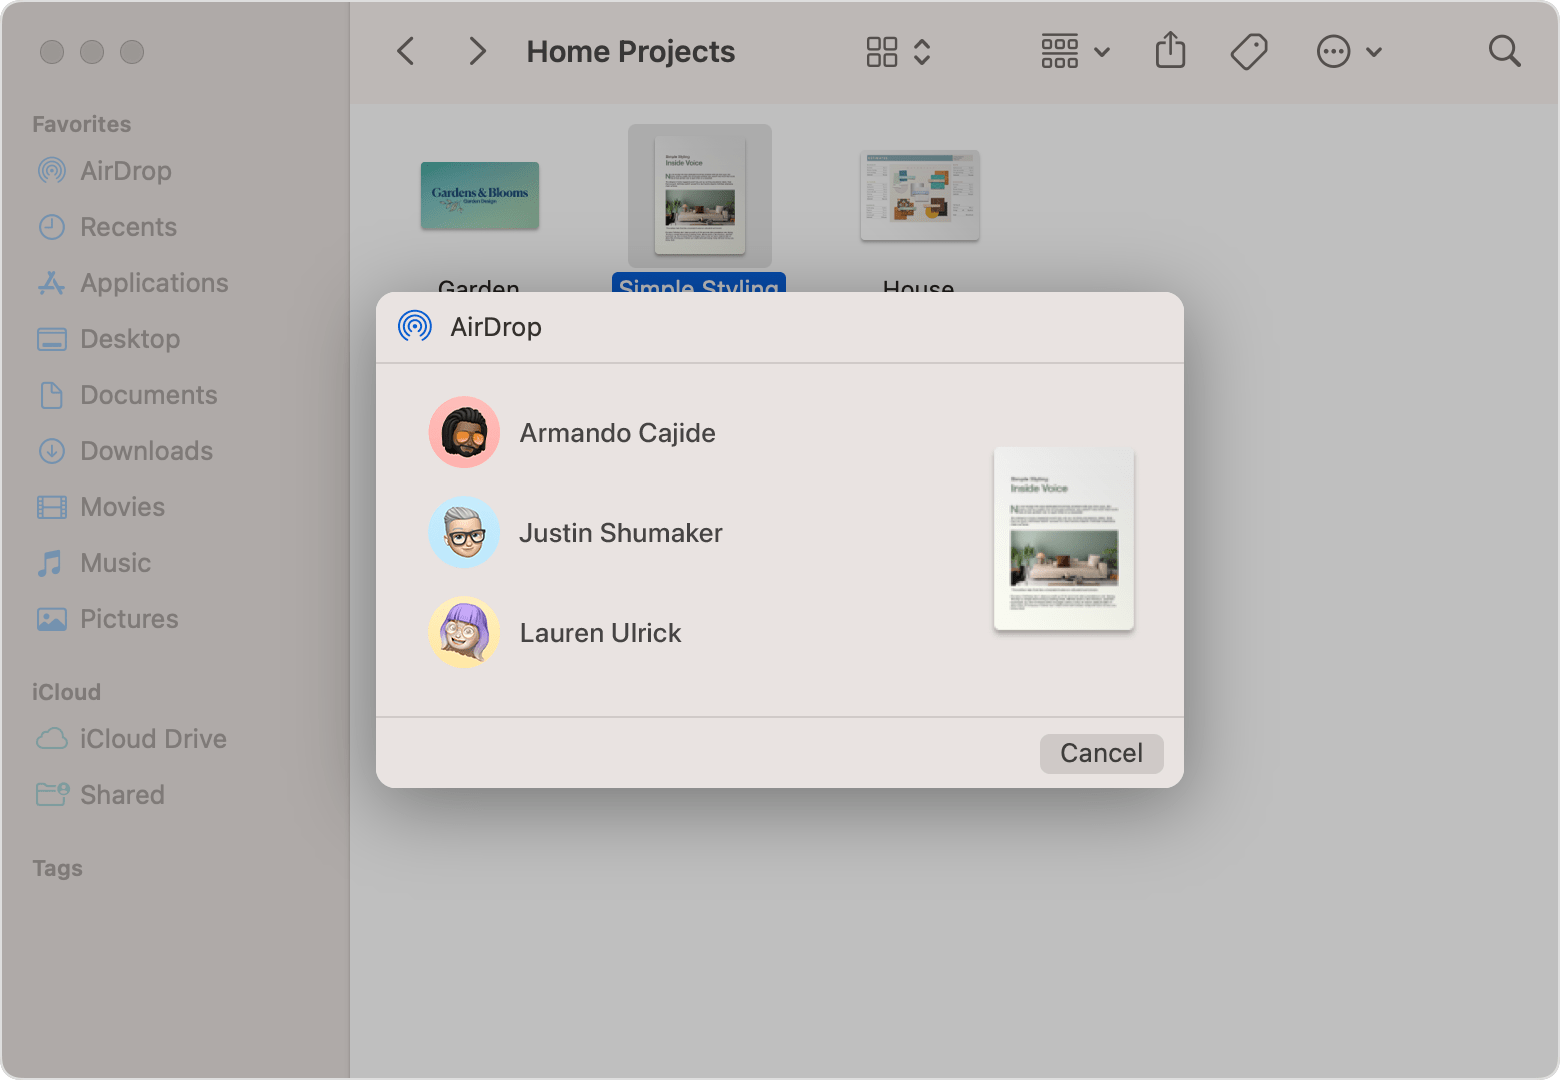
Step 3. On your iPhone, accept the incoming file, and it will be saved quickly.
Way 4. Download Files from Mac to iPhone via iCloud Drive
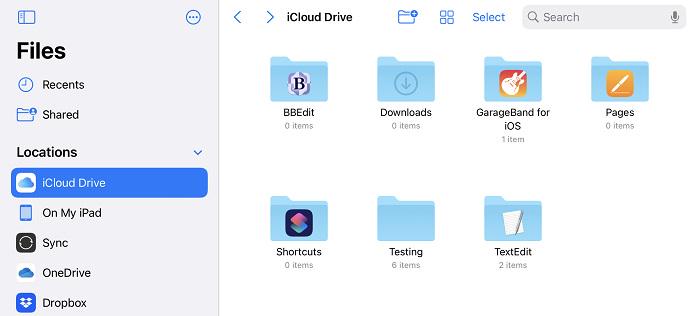
iCloud Drive is Apple's cloud storage service that enables you to store and access your files across your Apple devices using your Apple ID. It offers a convenient way to keep your files synchronized and accessible between your iPhone and Mac. However, it's important to note that iCloud offers only 5GB of free storage space. If you exceed this limit, you may need to consider purchasing additional storage.
Here is the guide on how to sync data between iPhone and Mac via iCloud:
Step 1. To enable iCloud Drive respectively on your iPhone and Mac first, you can refer to the tip below:
- On iPhone: Go to "Settings" > [your name] > "iCloud" and then toggle on "iCloud Drive".
- On Mac: Click Apple menu > "System Preferences" > "iCloud" and then enable "iCloud Drive".
Step 2. Choose and upload the files from your Mac to iCloud Drive.
Step 3. When the importation is finished, you can access and download the uploaded files from iCloud Drive on your iPhone.
Way 5. Copy Files from Mac to iPhone through External Storage
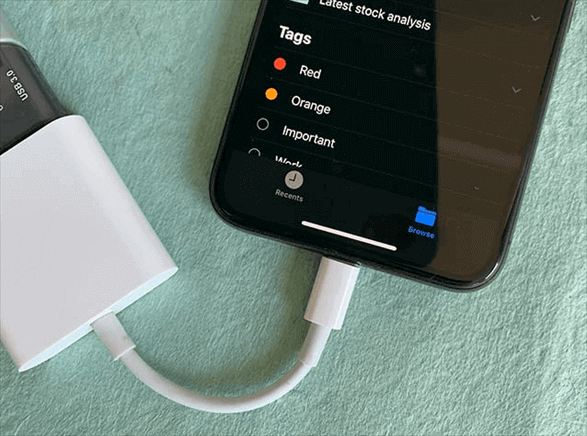
The Files app on iPhone can directly read external storage devices such as USB drives or external hard drives. This capability is especially enhanced with the iPhone 15 series, which now features a USB-C port, broadening support for external storage. You can easily copy files from your Mac to an external storage device and then transfer files from Mac to iPhone. Here are the steps to follow:
Step 1. Connect the external storage to your Mac.
Step 2. Open Finder on your Mac and copy the files you want to transfer to the external storage device.
Step 3. Disconnect the external storage with your Mac and connect it to your iPhone.
Step 4. Open the Files app on your iPhone. Open the external storage folder.
Step 5. Copy your desired files to the "My iPhone" folder.
The Bottom Line
In conclusion, we've explored 5 distinct ways to transfer files from Mac to iPhone, each catering to different preferences and needs. Among these options, FonePaw iOS Transfer is recommended as a comprehensive solution. This third-party tool not only compensates for the limitations of other methods, but also offers various advantages, including support for a wide range of file types, fast transfer speeds, file preview capabilities, and iTunes-like functionality. So why not try it right now and enjoy all-in-one features?

iOS Transfer