After taking numerous photos and videos with your iPhone, you might want to back them up or transfer them to other devices for viewing or editing. To do this, you'll likely need to transfer photos from iPhone to external hard drive.
In the following sections, this article will explore all the available solutions for transferring photos from an iPhone to an external hard drive. Whether you're using an iPhone with a lightning connector or a USB-C connector, you'll find a solution in this article. Read on to learn more!
Part 1. Universal Way to Transfer iPhone Photos to External Hard Drive
To effortlessly transfer iPhone photos to an external hard drive with speedy performance, a professional file transfer program is essential. We recommend FonePaw iOS Transfer, which specializes in transferring iPhone files to other devices. With just a USB cable, FonePaw iOS Transfer makes it easy to move photos from your iPhone to an external hard drive in just a few clicks.
When transferring photos from iPhone to external hard drive, FonePaw ensures:
- Preview feature for selectively transferring the photos you want
- Convert HEIC/HEIF images to JPEG for compatibility with Windows PC
- Retain the original image quality for lossless iPhone photo transfer
- Local process to ensure no risk of data loss/privacy leakage
- Compatible with various Windows PCs, Macs, and iPhones
- Works with various external hard drives (Samsung, Seagate, Westdata, etc.)
Now follow the steps below to transfer pictures from iPhone to external hard drive.
Step 1. Download, install, and launch FonePaw iOS Transfer on your computer. Connect both your iPhone and external hard drive to the computer with USB cables.
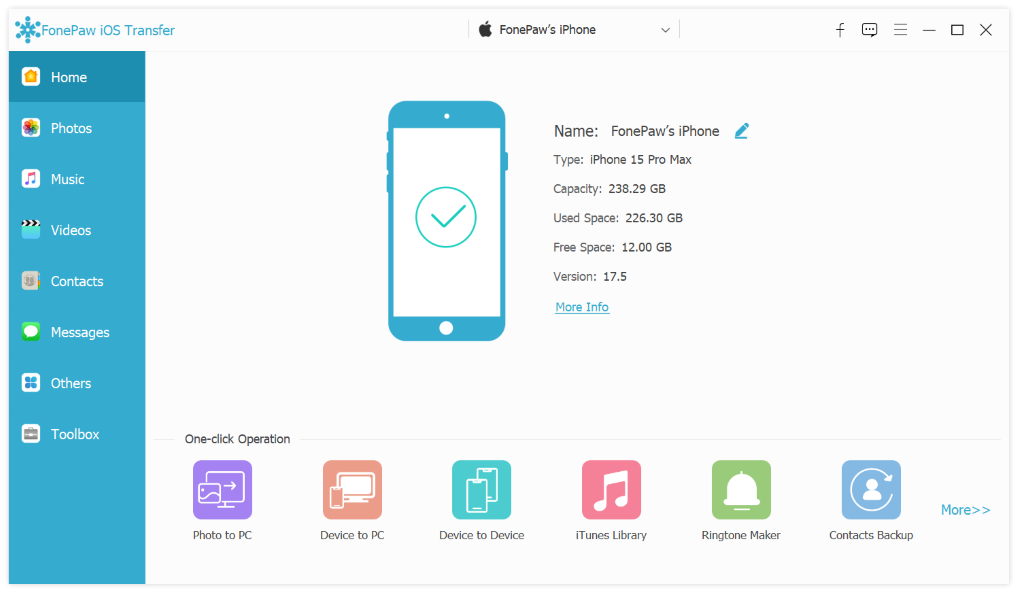
Step 2. Choose "Photos" from the left column, and preview all the photos and albums on your iPhone.
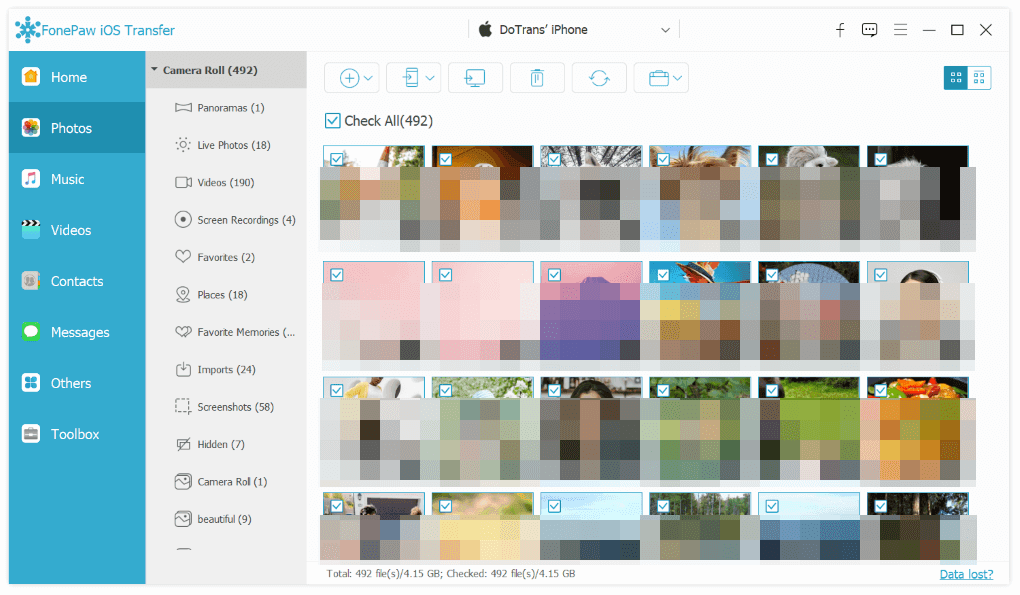
Step 3. Tick the photos/albums you want to transfer, or simply click Check All.
Step 4. Click the Export to PC button.

Step 5. On the pop-up page, choose the external hard drive as the destination. Click "Open", and FonePaw will start to transfer photos from iPhone to external hard drive for you.
Part 2. How to Transfer Photos from iPhone to External Hard Drive on Windows
If you are using a Windows PC, you can use the Windows Photo app, file Explorer, or Apple's official iCloud app to transfer Photos from iPhone to External Hard Drive, and we'll show you how to do each of them below.
1. Use Photos App
The Photos app is a default multimedia managing and editing program preset on Windows systems. And it can be used to import iPhone photos to computer, and then transfer iPhone photos to the external hard drive.
Attention: Please note that the manipulation will be slightly different between Windows 8/10 and Windows 11.
On Windows 8/10
Step 1. Connect your iPhone to a Windows computer.
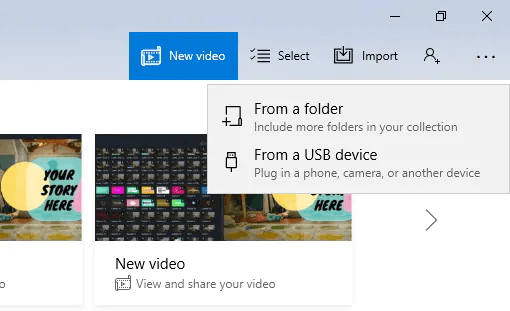
Step 2. Run Photos app >> Import >> From a USB Device to select photos you wish to transfer to the external hard drive from iPhone.
Step 3. Now, plug the external hard drive to your computer. Meanwhile, in the Photos app, go to Import settings >> Change the Import Destination to select the hard drive as the folder to save the iPhone photos.
Step 4. Tap Done to confirm the photos transfer in no time.

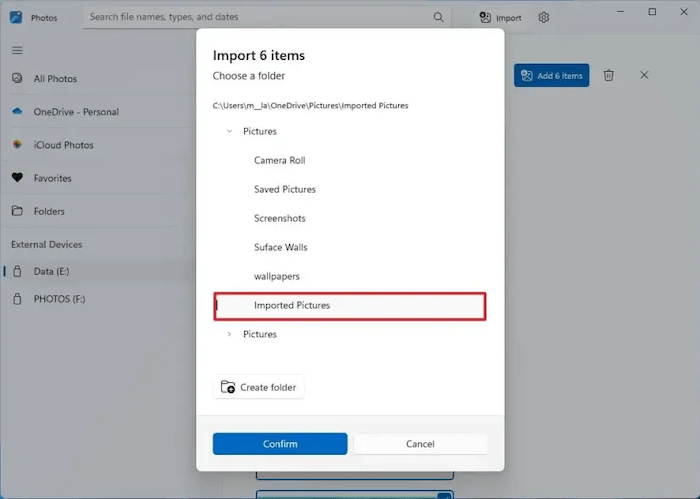
On Windows 11
Step 1. Similarly, connect the iPhone to the Windows 11 computer and also plug the hard drive to the device.
Step 2. Run Photos app and tune to Import >> From a connected device. Meanwhile, you can select the destination folder as the external hard drive.
Step 3. When the app has loaded all photos on your iPhone, subsequently, please select those you wish to transfer and back up to the hard drive.
Step 4. Confirm proceeding with the photo transfer by clicking on the "Import [number] items". Then you only need to wait for its completion!
Troubleshooting: Can't Import Photos from iPhone to Windows 10/8/7 - 10 Solutions
2. Use File Explorer
Compared with the Photos app, another more effortless way to move photos from iPhone to external hard drive on Windows is by utilizing File Explorer. The steps are as follows:
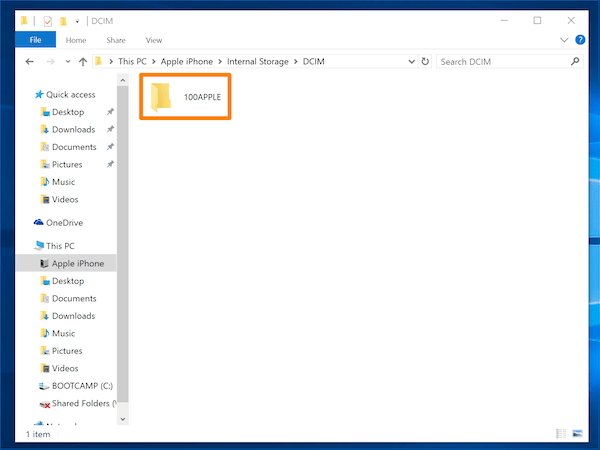
Step 1. Please use a USB cable to connect your iPhone to the computer (remember to authorize access on your iPhone by tapping Allow).
Step 2. In File Explorer, turn to This PC >> Apple iPhone >> Internal Storage >> DCIM >> 100APPLE to access all photos stored on the device.
Step 3. Simply select all those you like and copy them to paste to the external hard drive in no time!
Troubleshooting: iPhone Internal Storage is Empty on Windows 10/8/7, How to Fix?
3. Use iCloud
If you have uploaded your photos from your iPhone to iCloud, it can be easy to transfer photos from iCloud to external hard drive even if you are using a Windows computer.
Step 1. Please go to Settings >> [your name] >> iCloud >> Photos to toggle on the iCloud Photos option for uploading all photos to iCloud.
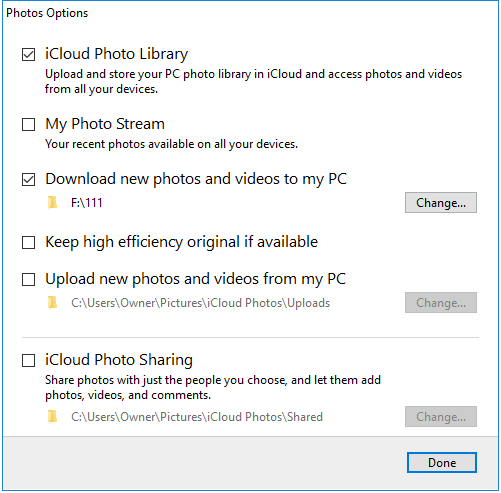
Step 2. On a Windows computer, turn to iCloud and log in with your Apple ID.
Step 3. Direct to Photos and toggle on both the iCloud Photo Library and Download new photos and videos to my PC options.
Step 4. Tap Apply and the photos will be downloaded to your computer in no time.
Step 5. When the photos are downloaded, move them to your external hard drive.
Part 3. How to Transfer Photos from iPhone to External Hard Drive on Mac
After walking through the solutions to transfer photos from iPhone to external hard drive on Windows, the methods oriented for Mac are coming now. If you are a Mac user and finding a way to move iPhone photos to external hard drive, the following methods are also recommended.
1. Use Image Capture
An application for Mac, Image Capture, offers an easy-to-use function to help you upload photos from iPhone to Mac in one shot. When you get Image Capture prepared, follow the procedures below to easily transfer photos from iPhone to external hard drive.
Step 1. First, connect the hard drive as well as iPhone with your Mac with a USB cable.
Step 2. Open Image Capture and tap the Devices option to open your iPhone.
Step 3. Click on the Import to menu and select all photos you wish to transfer to the external hard drive in this step.
Step 4. Click Import or Import All to back up all photos to the hard drive in no time.

2. Use Photos App
The default Photos app on Mac offers another effortless path for you to efficiently transfer photos from iPhone to external hard drive just by clicking. You can follow the procedures below.
Step 1. Connect both your iPhone and the external hard drive to Mac through USB cables.
Step 2. Open the Photos app and scroll down to Devices. Tap your iPhone.
Step 3. Please select Import to and alter the destination folder to be the external drive.
Step 4. Select certain photos or highlight them all to transfer photos to the drive at lightning speed!

Part 4. How to Transfer Photos from iPhone to External Hard Drive without Computer
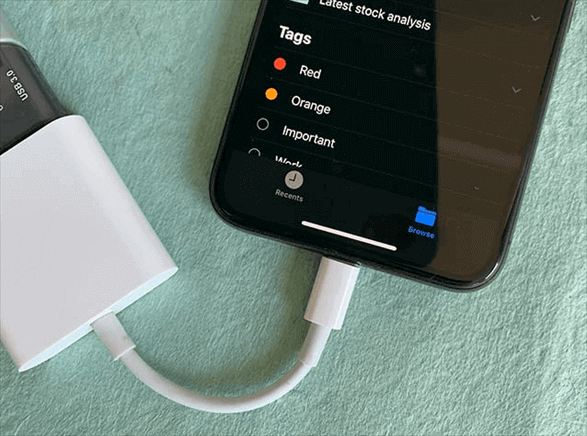
iPhones support direct data transfer to external hard drives via wired connections. You can connect your iPhone and external hard drive using a USB-C cable or adapter and transfer photos directly from your iPhone to the external hard drive, without needing a computer.
Step 1. Connect your iPhone and the external hard drive with the adapter.
Step 2. Open the Photos app and choose the photos.
Step 3. Tap the share button and then Save to "Files".
Step 4. Select the external hard drive as the destination.
FAQs about Transferring Photos from iPhone to External Hard Drive
Can you transfer photos from iPhone directly to external hard drive?
Yes, you can. If you use iPhone 15/16 series models, you can directly connect the external hard drive to your iPhone with a USB-C to USB-C cable, and transfer photos from iPhone to external hard drive.
If you use an iPhone with a lightning port (iPhone 14 and older models), you can also connect the hard drive and your iPhone with a Lightning to USB Camera Adapter and then directly transfer photos from iPhone to external hard drive.
What should I do if my external hard drive is not recognized by my iPhone?
Ensure your external hard drive is properly connected and powered on (if required). Check that you are using the correct adapter or cable. If the issue persists, try connecting the hard drive to another device to verify its functionality. Updating your iPhone's iOS to the latest version may also resolve compatibility issues.
How can I ensure my photos are safely backed up after transferring them to an external hard drive?
After transferring, verify that the photos have been successfully copied to the external hard drive by checking a few files. Additionally, consider creating multiple backups, such as storing a copy on a computer or another external drive, or using cloud storage services for added security.
The Bottom Line
Overall, multiple solutions are functioning to transfer photos from iPhone to external hard drive on Windows or Mac. There is also a bonus tip to process the photo transfer without computer, but to use a lightning adapter. Among all these solutions, if you wish for a stable, fast, and secure way, FonePaw iOS Transfer is definitely the best recommendation.

iOS Transfer