


Picture this: You've just returned from a breathtaking vacation, and your iPhone is bursting with captivating photos capturing cherished moments. However, with limited storage space, you're faced with a dilemma - how to transfer photos from iPhone to flash drives securely and effortlessly.
In this article, I'll unveil 5 simple yet effective ways to preserve your precious memories, ensuring you never miss a shot. From using the built-in feature to exploring third-party apps and leveraging your computer as an intermediary, these methods will empower you to copy pictures from iPhone to USB flash drive hassle-free. Let's dive in!
 Update:
- This article provides methods for transferring iPhone photos to a flash drive which are compatible with the latest iPhone 16 and iOS 18 updates.
Transfer Photos from iPhone to Flash Drive on Windows
Windows users can easily transfer photos from their iPhone to a flash drive using two simple methods. Meanwhile, Mac users can also find a powerful app in this section. Don't skip ahead. Let's explore these efficient solutions!
Photos Transfer Tool
If you are in search of the best iTunes alternative to transfer your photos from your iPhone to a flash drive on Windows PC, look no further! Introducing FonePaw iOS Transfer, the ultimate data management tool that simplifies file transfer between iOS, Windows, and Mac.
With FonePaw iOS Transfer, you can effortlessly move photos, media files, contacts, and messages in just one click. Whether you're creating backups or need to free up space on your iPhone, this feature-rich software ensures high-speed and reliable transfers. What's more, FonePaw iOS Transfer is fully compatible with the latest iOS 18, guaranteeing a smooth and efficient experience in transferring photos from iPhone to flash drive.
Free Download Buy with 20% off Free Download Buy with 20% off
Main Features of FonePaw iOS Transfer
- ● Transfer Diverse Types of Files Cross-platform: Move photos, music, videos, contacts, messages, notes, chats from third-party apps, and more across iOS, Windows, and Mac.
- ● Comprehensive Photo Management Feature: For photo transfer, you are able to preview, rename, move, and delete photos. Selectively transferring photos or moving all pictures from iPhone can never be easier.
- ● Helpful Toolbox Available: With FonePaw, you can even sync the data between your iPhone and iTunes. You can also view the data stored in iTunes. Other handy functions are also featured, such as contact backup and restore, ringtone maker, and HEIC photo converter, making easy transfer convenient.
- ● Great Compatibility: Works smoothly on Windows and Mac, and supports the latest iOS 18.
In addition to the above features, FonePaw iOS Transfer is also equipped with an intuitive interface, letting you easily download pictures from iPhone to flash drive.
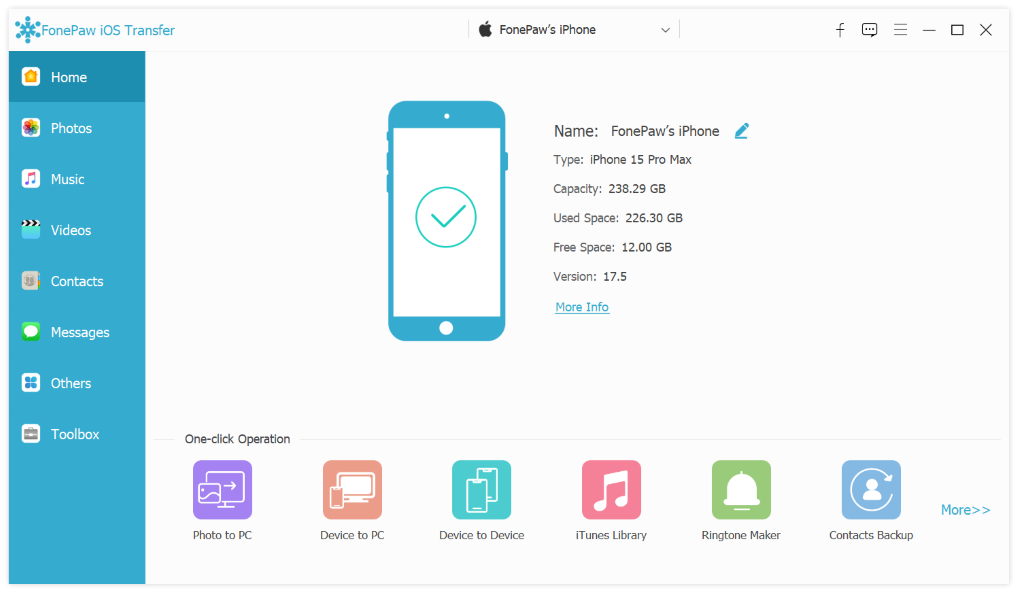
STEP 1. Download and install FonePaw iOS Transfer. Launch the software and connect your iPhone to the computer. Choose "Trust" to trust the computer when you see a pop-up window on your iPhone.
Free Download Buy with 20% off Free Download Buy with 20% off
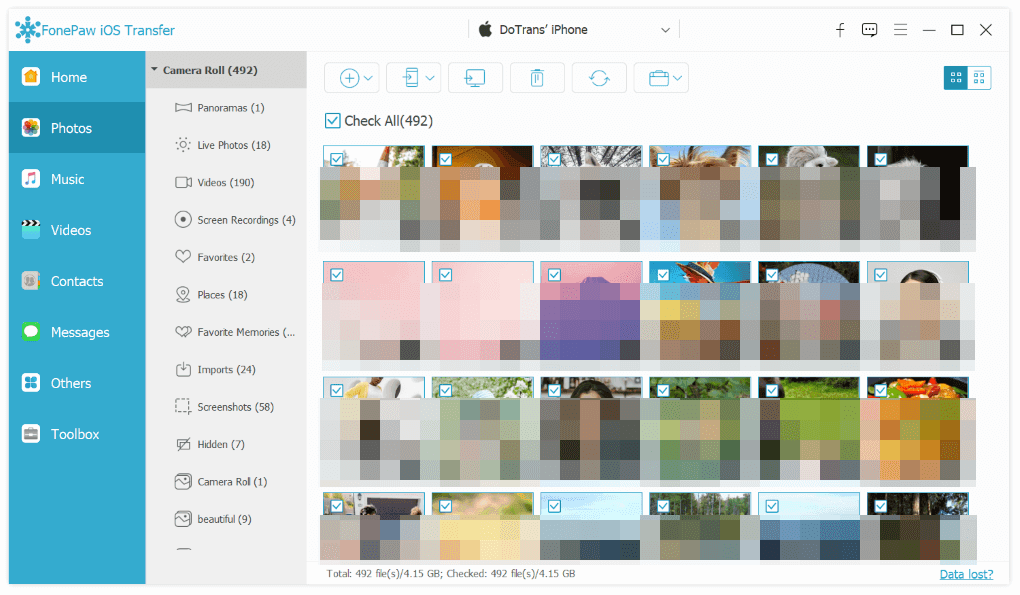
STEP 2. Connect your iPhone and the flash drive to your computer.Then the software will automatically detect your iPhone. You can navigate to the "Photos" section to preview and manage the photos.
STEP 3. Select the photos that you want to save to flash drive. Once finished, choose the "Export to PC" option.
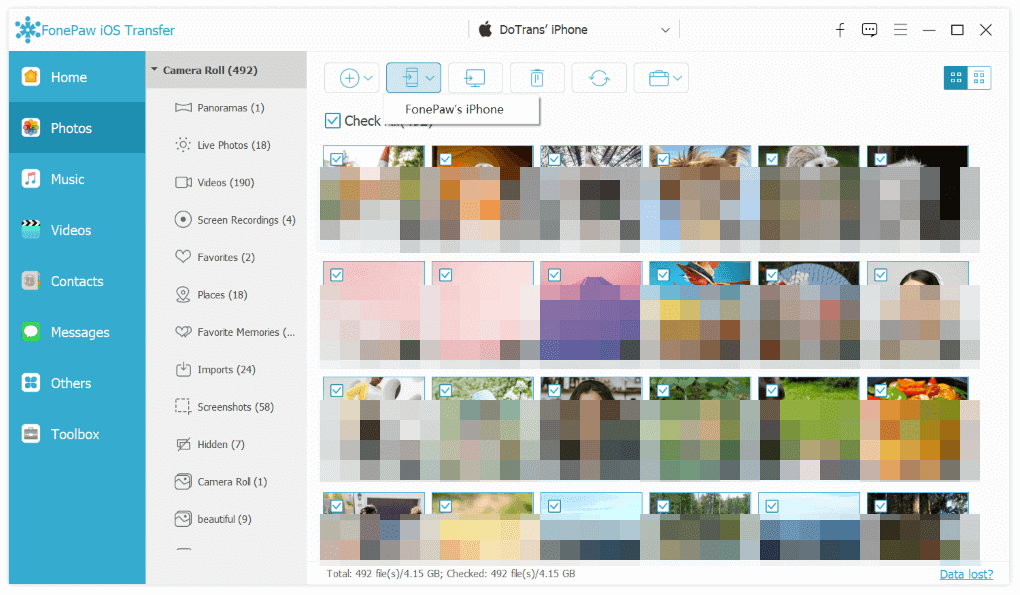
Just wait for a few minutes. When the process is finished, you can move the photos from iPhone to flash drive.
Windows Explorer
Windows File Explorer, a built-in feature of Windows PC, offers a convenient way to manage files, including your precious photos. As Windows File Explorer is integrated into your computer's operating system, it saves you time and effort to look for other tools and will definitely reduce resource consumption on your computer.
If you are interested in this tool, follow the steps below to effortlessly transfer pictures from your iPhone to a flash drive.
STEP 1. Ensure your iPhone is connected to your computer using a lightning-to-USB cable.
STEP 2. If prompted, grant access to your photos and videos by tapping "Trust" or "Allow" and make sure your iPhone is unlocked.
STEP 3. Look for your iPhone under "This PC" in File Explorer (Windows 10) or "Computer" in Windows Explorer (Windows 7). If you can't find it, unplug and reconnect your unlocked iPhone.
STEP 4. Double-click the "DCIM" folder inside your iPhone. There, you'll find your photos and videos stored in folders like 100APPLE, 101APPLE, or 100Cloud, 101Cloud if you use iCloud to store photos.
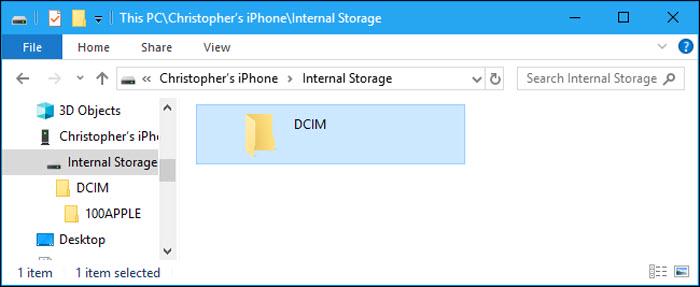
STEP 5. Select the photos that you want to move to flash drive (left click + ctrl can be used to choose multiple photos). Then right click to copy the photos. And paste them in the location of your USB stick.
Move Photos from iPhone to USB Stick on Mac
If you are a Mac user looking to transfer photos from your iPhone to a USB stick, the Photos app and your iCloud are convenient and straightforward methods to do this task.
The Photos App
The Photos, a built-in feature on your Mac computer, is tightly integrated with macOS and iOS, providing a seamless experience for transferring photos. It recognizes your iPhone as soon as you connect it to your Mac, making the process straightforward and user-friendly.
Transferring photos from iPhone to USB flash drive using Mac generally involves two parts. First, upload pictures from your phone to your Mac computer through the Photos app. Second, find and move the pics in the Finder to your USB.
STEP 1. Connect your iPhone to your Mac using a USB cable and ensure you have the latest iTunes version.
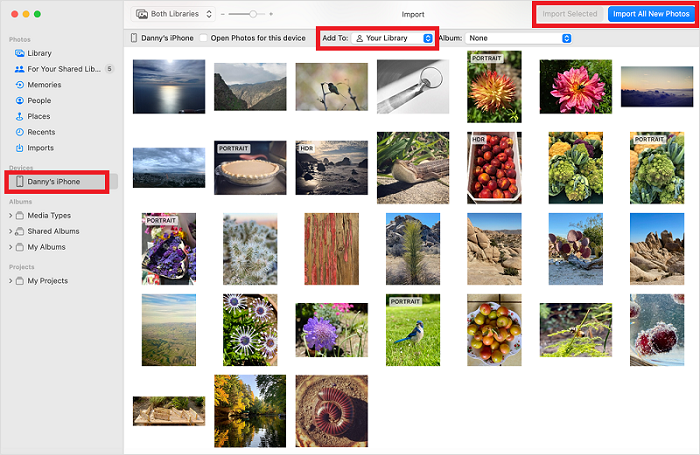
STEP 2. Open the Photos app on your computer, select the pictures you need to move and where to move to. Click Import Selected or Import All New Photos.
STEP 3. Connect the USB flash drive to your Mac, find it in the Finder, and open it.
STEP 4. Copy and paste the selected photos via the Finder > Picture to save photos from iPhone to USB flash drive.
iCloud
If you don't have access to a computer but urgently need to remove photos from your iPhone, you can first transfer the photos to iCloud. Later, when you have access to a computer and a flash drive, you can download the photos directly from iCloud to the computer and transfer them to the flash drive. The iCloud transfer approach may be a little more complicated and time-consuming than the Photos method.
The transfer speed of iCloud depends on the network situation, which can be slow, making it more suitable for transferring a small number of pictures.
STEP 1. Sync your iPhone photos to your iCloud account
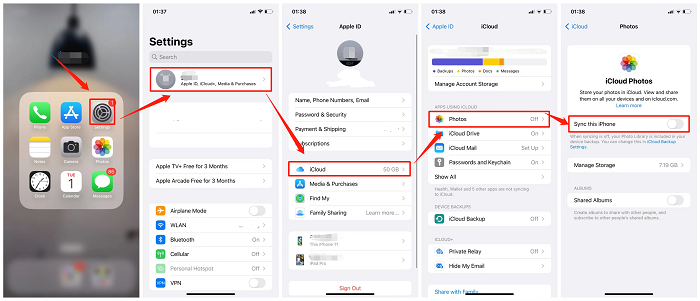
Connect your iPhone to a Wi-Fi network. Open your iPhone's Settings. Tap on your Apple ID and sign in with your Apple ID and password if you haven't already.
Then in the Settings menu, select iCloud. Tap Photos. Turn on Sync this iPhone.
STEP 2. Save photos from iCloud to your computer
Visit iCloud.com. Sign in using the same Apple ID that you use to upload photos from your iPhone. Once signed in, enter the Photos section.
Click the Photos option located at the upper left corner of the interface. Select the photos you want to save by clicking on them. After selecting the desired photos, locate and click Download.
STEP 3. Transfer photos from your computer to your flash drive
Plug your USB flash drive into your Mac and open a Finder window. Locate the USB drive icon in the left column of the Finder window and click on it to access the contents of the USB flash drive.
Navigate to the folder on your Mac where the photos you want to transfer are stored. Select the desired photos, drag and drop the selected pictures to the Finder window displaying the contents of the USB flash drive. Then you are successfully move picutures from iPhone to your USB stick.
Save Pictures from iPhone to USB Flash Drive Without Computer
You can even transfer photos from an iPhone to a flash drive without a computer. However, it can be cumbersome as your flash drive needs to be compatible with iOS devices, such as the Sandisk iXpand flash drive for iPhone and iPad. And such a dedicated USB flash drive often costs more than 40 dollars, which may cause a financial burden.
Otherwise, you would need to purchase a Lightning to USB adapter separately to establish a connection. Therefore, if you have a computer around, it is recommended to perform a cable connection, which is much more cost-effecitve.
If you want to know how to transfer photos from iPhone to flash drive with a dedicated iOS USB flash drive or with the assistance of a Lightning to USB adapter, follow the below instructions.
STEP 1. Connect your dedicated iOS USB flash drive to your iPhone. Or connect your USB stick and iPhone to the Lightning to USB adapter.
STEP 2. Open the Files app on your iPhone. Find the photos that you want to move to USB.
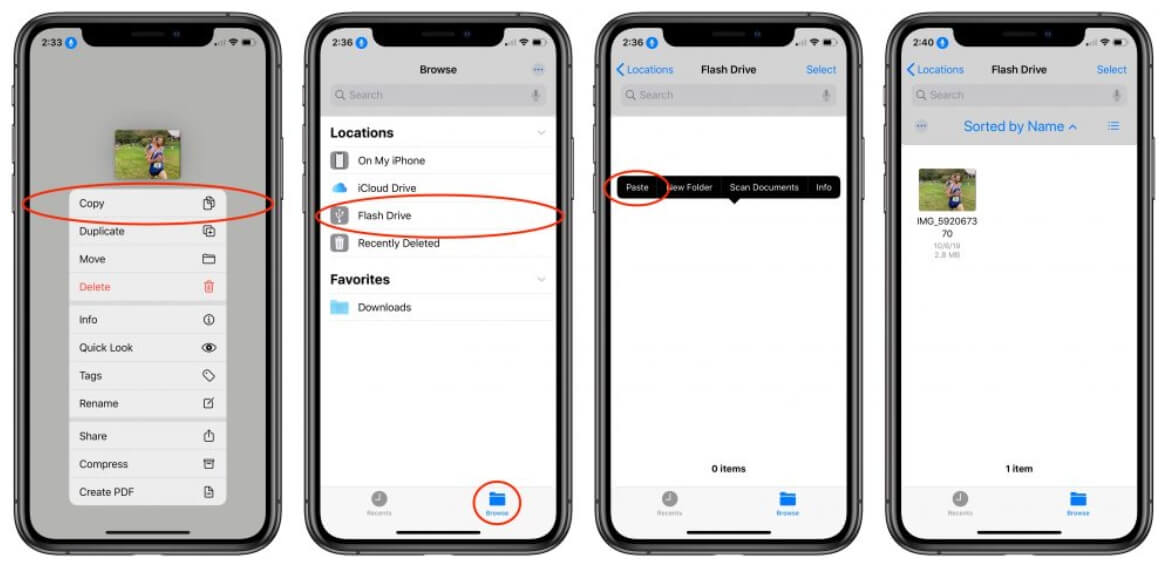
STEP 3. Press and hold the desired photo, and choose the copy option.
STEP 4. Go to "Browse" > the location of your flash drive. Press the screen, and choose "Paste" on the popover.
FAQs about Transferring Photos from iPhone to Flash Drive
Why can't my iPhone recognize the flash drive?
This issue often happens when you download photos from iPhone to a USB flash drive with a Lightning to USB adapter. The reason behind is the incompatibility of file systems between your iPhone and your USB stick.
To solve the problem, you have to make sure your USB only has a single data partition. And you should format your USB to the compatible file system of iPhone: exFAT (FAT64), FAT32, FAT, APFS, APFS (encrypted), or macOS Extended (HFS+). You can perform formatting on your Windows PC or Mac computer.
Can I Check My Saved Pics on Flash Drive?
It may not be possible for all flash drives since many do not support the HEIC format, which is commonly used by iPhones in recent years. If the flash drive doesn't support HEIC, you may need to convert the format to view the photos directly. It is advisable to carefully read the flash drive manual before uploading photos.
If you wish to view your pictures directly without any compatibility issues, I recommend using FonePaw iOS Transfer. This handy tool can effortlessly convert HEIC picture files into commonly used formats, ensuring easy accessibility and seamless viewing of your photos.
Conclusion
In this article, I have presented four effective methods to transfer photos from your iPhone to a flash drive. While all these methods involve using a computer, whether it be Windows or Mac, as an intermediary tool, FonePaw iOS Transfer stands out to be the best option.
This powerful tool not only facilitates seamless photo transfer but also supports the efficient exchange of multiple files between various devices. With this versatile solution at your disposal, you can confidently manage your photo collection and ensure your memories are securely stored and accessible whenever you need them.
Free Download Buy with 20% off Free Download Buy with 20% off