


There are several hotkeys to take a screenshot on Windows, such as:
- Prt Scr
- Alt + Prt Scr
- Fn + Alt + Prt Scr
- Windows logo key + Prt Scr
The hotkeys vary on different computers but are usually the combination of Print Screen keys such as PrntScrn, PrntScr or PrtScr.
You may be familiar with these shortcuts and have used them to take screenshots of your PC all the time. However, have you noticed that when you capture screen on Windows with these keyboard shortcuts, you usually get the whole picture of your screen?
You may wonder how to screenshot part of the screen because sometimes you only need to capture a specific area of the screen. In this post, we will teach you how to take a partial screenshot on Windows in two ways.
Screenshot Specific Area on Windows 10/8/7
To take a partial screenshot on Windows 10/8/7, we'd like to introduce a screen capture tool to you first: FonePaw Screen Recorder (opens new window). It is a screen recorder tool that not only captures a specific area but also edits the snapshot. The steps are simple:
Step 1 Download FonePaw Screen Recorder.
Free Download Buy with 20% off Free Download Buy with 20% off
Step 2 Enable the recorder and open the web page or the video you need to capture the screen of.
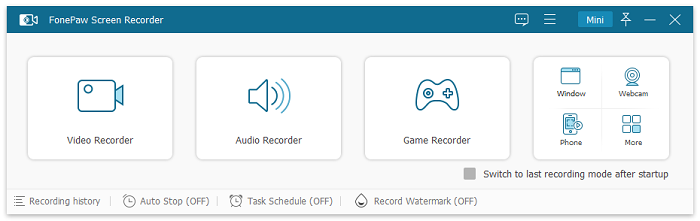
Step 3 Click Screen Capture and use the cross cursor to select the specific area.
Step 4 When the area is selected, you will see a toolbar with several functions like adding line, circle, arrow, text, or label.

Step 5 Click Save to choose the location and you will see the screenshot there.
Except for taking a snapshot, FonePaw Screen Recorder can also record the screen (opens new window), webcam, and audio.
Screenshot Part of Screen on Windows 10
In the past, users of Windows 7/8 have to rely on a third-party app or snipping tool to take a partial screenshot, which is very inconvenient. Now, in Windows 10, you can take a partial screenshot without third-party tools. Or when the snipping tool is not working (opens new window), you can try this keyboard shortcut to screenshot part of the screen.
Let's see how it works.
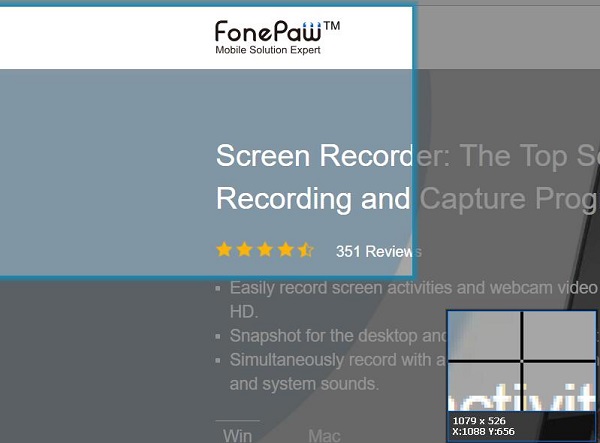
To screenshot part of the screen on Windows 10, just press Windows logo key + Shift +S
You will see a cross cursor on your screen and you can use it to select the area you want to capture.
Release your mouse and the capturing will be done. The thumbnail will be shown in the right corner of your screen for several seconds.
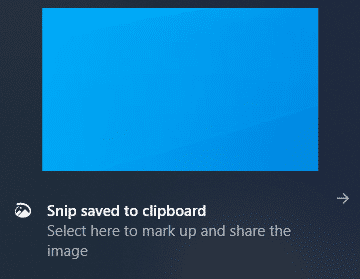
Click it as soon as possible and it will open in the Snip & Sketch app automatically. You can resize the screenshot or add lines in the edit panel.
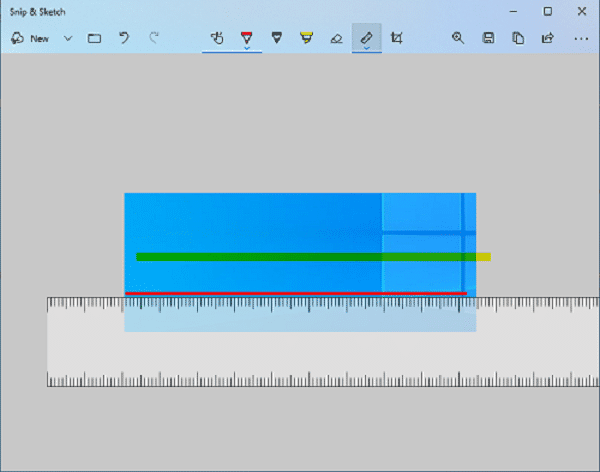
When you finish, click Save as to name the picture and choose the location.
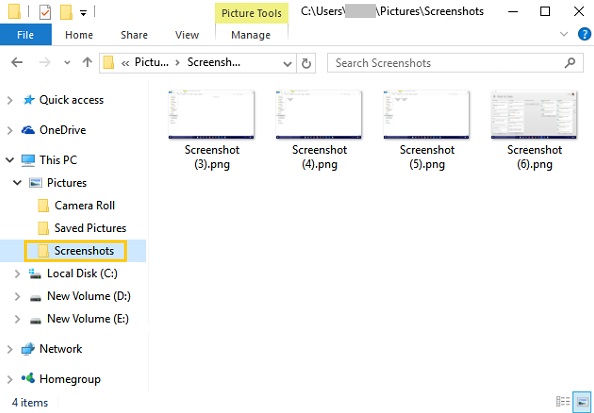
However, if the thumbnail disappears and you are too late to click it, you can go to the default Pictures folder > Screenshots to find your picture.
If you want to edit it, type Paint in the search box to open the Paint app. Press Ctrl + V to paste the screenshot to the clipboard.
If the shortcut doesn't work, you can type Snip&Sketch in the search box in the left corner of the screen and click the app.
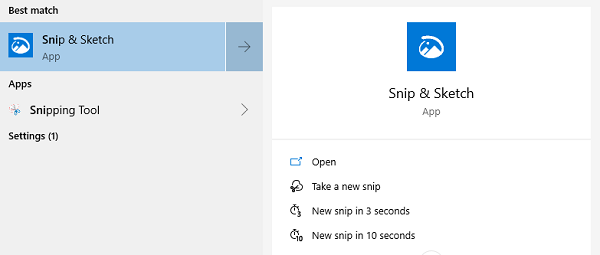
Click New in the upper-left and it will start snipping. You can edit it directly in the clipboard.

In conclusion, there are many ways to take a partial screenshot on Windows. If your computer is running Windows 7/8 or earlier, you can try the Snipping Tool.
If it is running Windows 10, try the shortcut: Windows logo key + Shift + S or just open the Snip & Sketch app.
As for FonePaw Screen Recorder (opens new window), you can use it in Windows 10/8/7, both partial and full screenshot are available.