


Connecting an external hard drive to your computer should be a simple plug-and-play process. However, sometimes you may find yourself facing the perplexing problem of the hard drive not showing up on your computer. There are many reasons for this problem, ranging from small connection issues to hardware failures.
In this article, we'll address why your external hard drive may not appear and provide seven effective solutions to fix this problem. Additionally, for situations where the drive data is not showing up, we'll guide you through the process of recovering your precious data with FonePaw Hard Drive Recovery, a professional recovery tool. Let's explore how to resolve this issue and ensure your external hard drive is recognized by your computer.
Free Download Buy with 20% off Free Download Buy with 20% off
Part 1. Why is the External Hard Drive Not Showing Up
An external hard disk may fail to display for a variety of interrelated reasons. Often, problems can stem from simple connection issues such as a faulty USB port or cable. Problems can also occur with hard disks that require external power if the power supply is insufficient or interrupted.
Another common problem is that the drive is not visible in Disk Management, which usually suggests a need for initialization or proper formatting. Outdated or corrupted drivers can be another invisible thread that causes the system to conflict with the hard disk. Driver drive letter conflicts in the operating system may also lead to undetectability, masking the presence of the hard disk.
Part 2. Fix External Hard Drive / USB Drive Not Showing Up
In the following guide, we'll walk you through several practical methods to troubleshoot this issue, covering solutions applicable to both external hard drives and USB drives. From checking connections to updating drivers and resolving hardware conflicts, these solutions aim to get your devices up and showing up as they should.
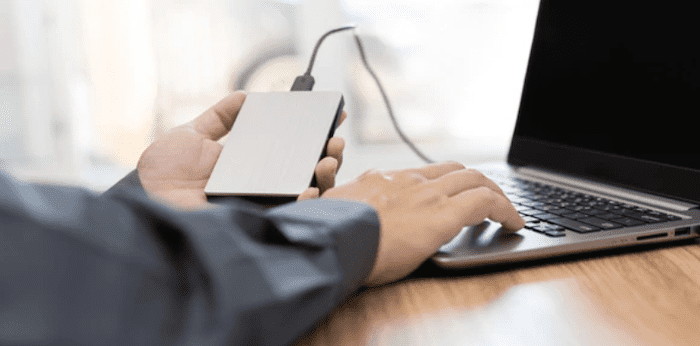
2.1 Try Another Cable, Port, or Computer
A simple yet effective step is to test the connection using another USB port, a different cable, or even an alternative computer. This can quickly determine whether the issue is with the cable, the port, the computer, or the drive itself.
Here are the detailed steps:
- Safely eject the drive from the first computer.
- Try a different USB cable to connect the drive. A new cable can often be the simplest solution to connectivity problems.
- Connect the drive to a different USB port on the same computer. If it's recognized, the original port may be defective.
- If a port change doesn't solve it, consider rebooting your computer with the drive connected to allow the system to attempt re-detection.
- Use another computer to see if the drive is recognized. If the drive shows up on another machine, the issue is likely with the original computer. If it still doesn't show up, the problem may be with the drive itself.

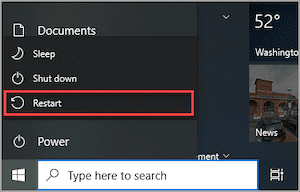
2.2 Reboot Your Computer
Rebooting your computer can resolve many issues, including an external hard drive or USB drive not showing up. This step is especially useful if the drive was initially recognized but suddenly disappeared due to system errors or software conflicts.
Simply follow these steps:
- Use the "Safely Remove Hardware" feature to disconnect the drive before rebooting.
- Go to the Start menu, click on the Power option, and choose "Restart".
- After your computer has restarted, reconnect the external hard drive or USB drive and check if it is now recognized.
2.3 Check Power Supply
The power supply is an essential factor, especially for external hard drives that require external power sources to function. This step is vital as power deficiencies can prevent the drive from being detected by your computer.
You can follow the steps below to check it:
- Confirm the outlet is working by plugging into another device.
- Check the connection of the power adapter to both the outlet and your external hard drive.
- Check for any signs of damage to the power cable or adapter itself.
- If the drive has a power indicator light, check to see if it's lit up. No light or a flickering light could indicate a power supply issue.
- If the drive has a power button or switch, ensure that it's switched on.
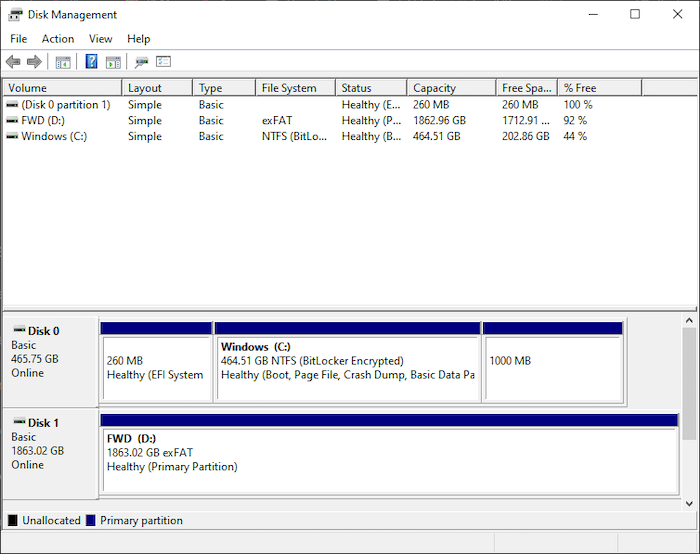
2.4 Check the Drive in Disk Management
If your external hard drive or USB drive is connected and powered up but still not showing up in the file explorer, checking it in Disk Management on a Windows PC or Disk Utility on a Mac is a crucial diagnostic step. This system utility can manage hard drives and partitions, providing a view of all connected drives, their statuses, and tools to manage them.
Here's how to check the drive in Disk Management and what to look for:
- Press Windows Key + X to access Disk Management.
- Once Disk Management opens, look for your external hard drive. It should appear as a disk, like "Disk 2", followed by the size of the drive and its status.
- Check for the following conditions of the drive:
- If the drive says "Offline," right-click on it and select "Online" to make it active.
- If the space appears as "Unallocated", you'll need to create a new simple volume (partition). Right-click on the unallocated space and follow the instructions to initialize and format the drive.
- If the drive is labeled as "Not Initialized", right-click and select "Initialize Disk". You'll be prompted to choose a partition style: MBR (Master Boot Record) or GPT (GUID Partition Table).
- If the drive doesn't have a drive letter, right-click on the volume and choose "Change Drive Letter and Paths", then assign a letter.
2.5 Reinstall USB Controllers
The USB controllers are software components that facilitate communication between your computer's operating system and connected USB devices. If your external hard drive or USB drive isn't showing up, one effective troubleshooting step is to reinstall these USB controllers. This can resolve issues stemming from corrupt or outdated drivers that may be causing detection problems.
Here's how to go about it:
- Right-click the Start menu and select "Device Manager" .
- In the Device Manager, find the section titled "Universal Serial Bus controllers" and expand it to see the list of USB controllers.
- Right-click on each USB controller and choose "Uninstall device". Confirm any prompts that ask if you're sure about removing the device.
- Once all the USB controllers have been uninstalled, restart your computer. Windows will automatically reinstall the USB controllers upon reboot, which can resolve any conflicts or software issues that might have caused the external hard drive to not show up.

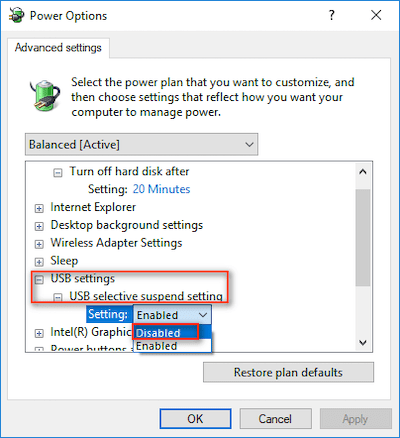
2.6 Disable USB Selective Suspend Setting
The USB Selective Suspend feature is a power-saving setting in Windows that allows the system to turn off individual USB ports when not in use. However, this feature can sometimes cause issues with external hard drives and USB drives not being recognized or showing up correctly. Disabling this feature can help ensure that power is consistently supplied to all USB ports, preventing connectivity issues with external storage devices.
Here's how to disable the USB Selective Suspend setting:
- Search for "Control Panel" in the Start menu and open it.
- Click on "System and Security" then "Power Options".
- Next to your selected power plan, click "Change plan settings."
- In the plan settings, click on "Change advanced power settings" to open the power options dialog.
- Scroll down to "USB settings" and expand it, then expand "USB selective suspend setting."
- Set the setting to "Disabled", and click "Apply" and then "OK" to save your changes.
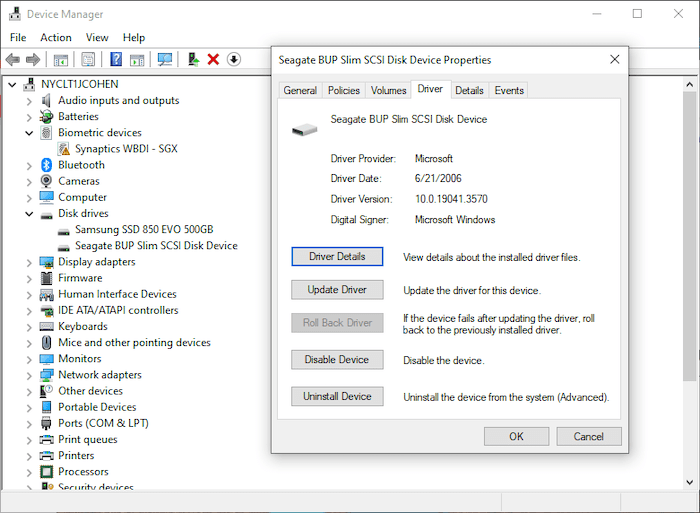
2.7 Update Your Drivers
Updating your drivers, especially for external hard drives and USB drives, can resolve issues with external hard drives not being recognized or functioning properly. Drivers are essential software components that allow your operating system to communicate with hardware devices. Outdated or corrupt drivers might prevent your external hard drive from being detected.
To update your drivers, follow these steps:
- Right-click the Start button and select "Device Manager".
- Expand the "Disk drives" and "Universal Serial Bus controllers" sections by clicking on the arrow next to them.
- Right-click on your external hard drive listed under "Disk drives" and each USB controller, then select "Update driver". Choose the option to search automatically for updated driver software. Follow the prompts to install any found updates.
- After updating the drivers, restart your computer to ensure the changes take effect.
Part 3. Recovery Data from External Hard Drive That Not Show Up
Recovering data from an external hard drive that's not showing up can be a critical task if you have important files on the drive. When the aforementioned traditional methods to make the drive appear fail, or when steps such as formatting the disk or updating the drivers inadvertently lead to data loss, data recovery software becomes a necessary tool. This is where FonePaw Hard Drive Recovery comes into play, helping recover data even from formatted hard drive.
FonePaw Hard Drive Recovery is a comprehensive data recovery solution designed to tackle various data loss scenarios, such as system crashes, partition loss, and more. Compatible with a wide range of hard drive brands and types, it supports recovering over 1000 file formats, including images, videos, audio, documents, and archives.
FonePaw stands out with its user-friendly interface, up to 98% success rate, and free scanning and preview features. This robust tool simplifies the recovery process into just a few steps: select, scan, and recover your lost data, making it accessible for users of all technical levels.
With FonePaw Hard Drive Recovery, you can easily recover data from an external hard drive that does not show up. Here is how:
Step 1. Download and install FonePaw Hard Drive Recovery on your computer. Ensure your external hard drive is connected to the computer.
Free Download Buy with 20% off Free Download Buy with 20% off
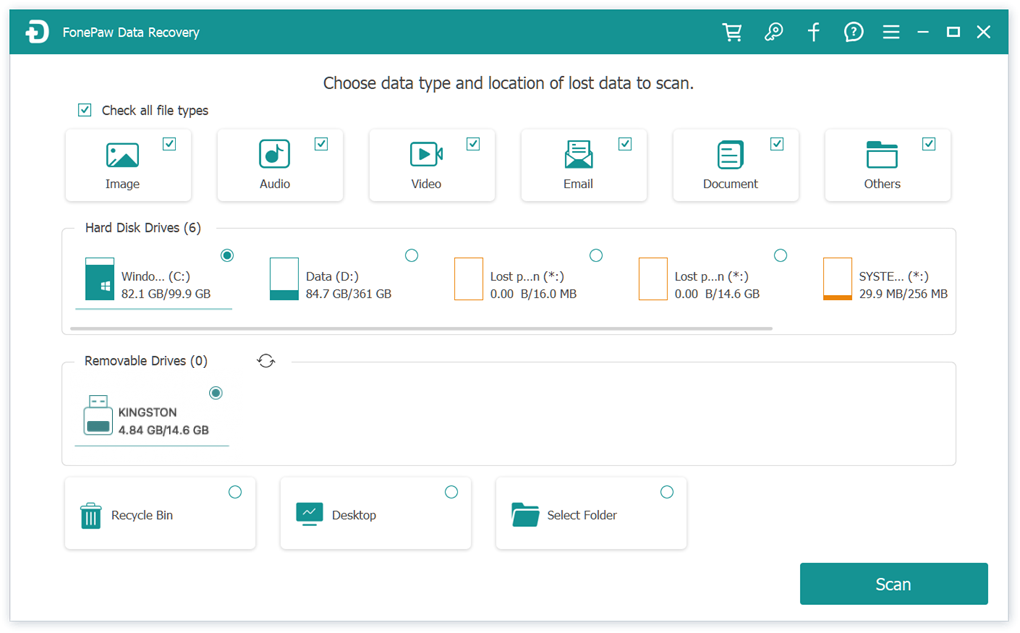
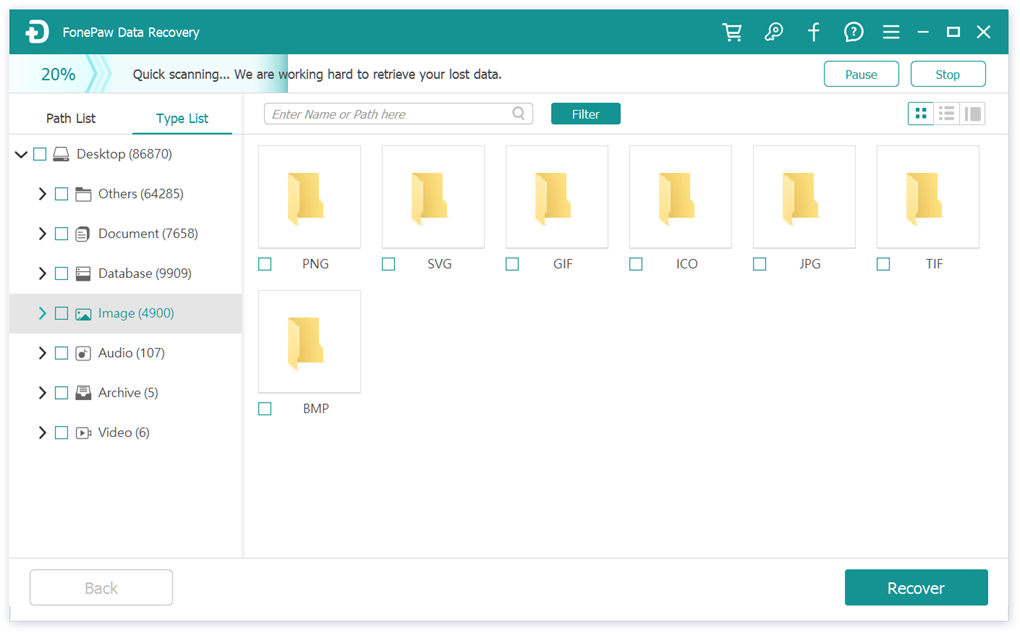
Step 2. Open the software and select the external hard drive from the list of drives. Choose the file types you want to recover, and then click the "Scan" button to get started.
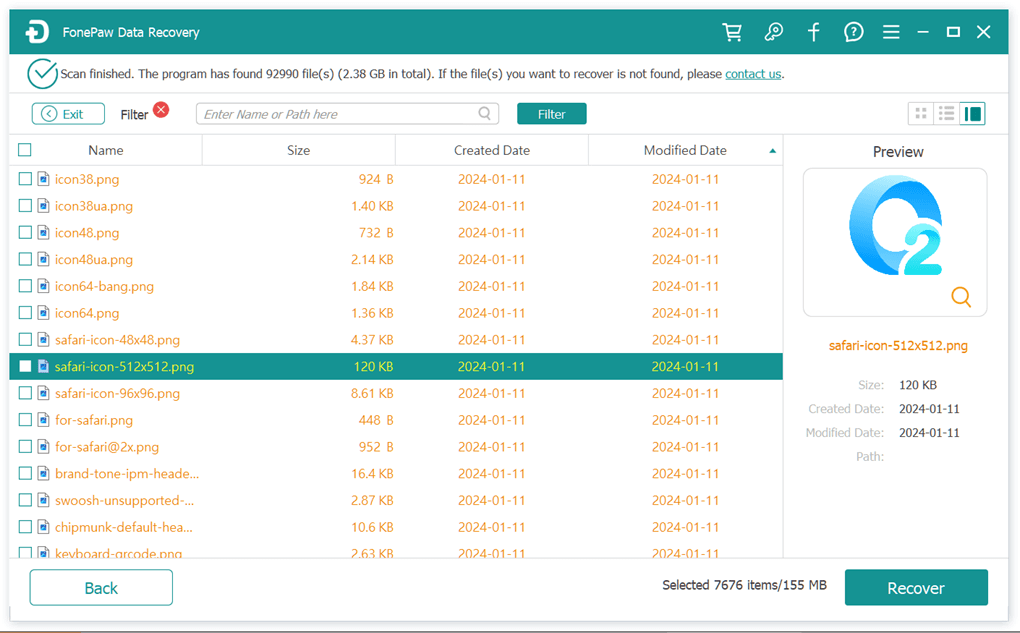
Step 3. FonePaw will search for recoverable files on the external hard drive. Once the scan is complete, browse through the recoverable files, preview them, and select the files you wish to recover. Click on the "Recover" button to save them to a safe location on your computer.
Step 4. Once done, click the "Open Folder" button to find recovered files from the external hard drive.
Conclusion
In conclusion, this guide has explored various effective ways to troubleshoot the common dilemma of external hard drive not showing up on your computer. From initial checks like ensuring proper connection and power supply to more advanced troubleshooting steps including updating drivers and adjusting system settings, we've covered a comprehensive range of solutions to help you overcome this issue.
Among these solutions, FonePaw Hard Drive Recovery emerges as a highly recommended tool, offering a reliable way to retrieve valuable files that might have been lost in the recovery process. Keep in mind that the key to data management is not only solving problems as they arise but also taking proactive measures to protect your data in the future, such as backing up in advance.