


The post has been updated on September 18, 2020.
iCloud Photo Library (opens new window) is an awesome Apple service that allows you not only to manage photos/videos but to transfer photos/videos (opens new window) from iPhone/iPad/Mac/PC to iPhone/iPad/Mac/PC with ease. However, if you want to manage photos on the iCloud Photo Library, the easiest way is to do it on the web. Now, please let's learn how to upload, add, share, download, or delete photos on iCloud with this guide.
People Also Read:
- How to Set Up iCloud? (opens new window)
- How to Backup and Restore iPhone from iCloud? (opens new window)
Part 1: How to Upload Photos to iCloud Photo Library?
You can easily upload multiple photos or videos to iCloud at the same time, however, the rate depends on the size of the transferring files. Let's see the steps.
Step 1. Turn on the computer and open iCloud.com on the browser.
Step 2. Enter your Apple ID to log in to your account.
Step 3. Click the "Photos" app on the panel.
Step 4. Select an album on the left side.
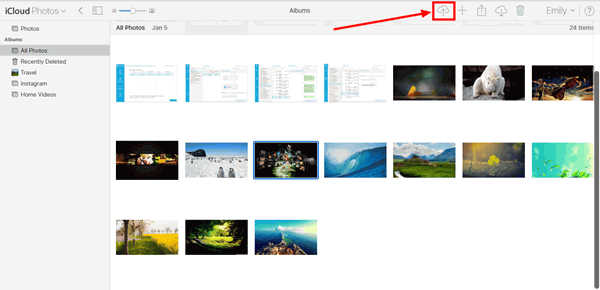
Step 5. Directly drag photos to the web or click the "Upload" button on the toolbar above.
Step 6. Wait until the "Uploading items" process complete and check out photos on iCloud.
Part 2: How to Add/Move Photos to an Album on iCloud Photo Library?
When you're logging in the iCloud.com, you're also allowed to manage photos like moving or adding photos to a specific album so as to well organize the photos.
Step 1. Log in iCloud.com and click to choose "Photos".
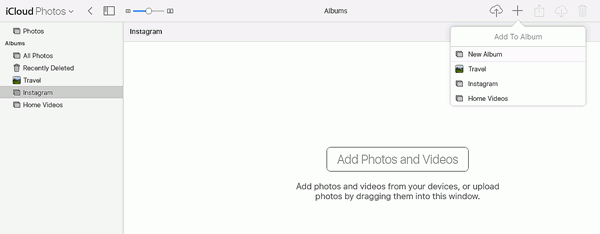
Step 2. If you want to create a new album, please click the "+" button at the top and click "New Album".
Note that new albums will be named with the date they're created. You can rename them when creating albums.
Step 3. As for a new album, you can click the "Add Photos and Videos" button.
Step 4. Now, select the desired images and click "Add" to move your selections to the new album.
Step 5. If you wish to add photos from the computer to a specific album, please choose the target album from the left side, and click the "Upload" button.
Step 6. Select pictures from the pop-up window and wait till the uploading completes.
Part 3: How to Share a Photo through iCloud Photo Library?
Do you know that pictures on iCloud can also be shared through email or Facebook with simple steps? If you'd like to try so, please give it a shot.
Step 1. Open iCloud.com on your browser on the computer.
Step 2. Click to select the "Photos" app from the toolbar.
Step 3. Preview all your photos and make your choices. You can select multiple images with the "control" key being held.
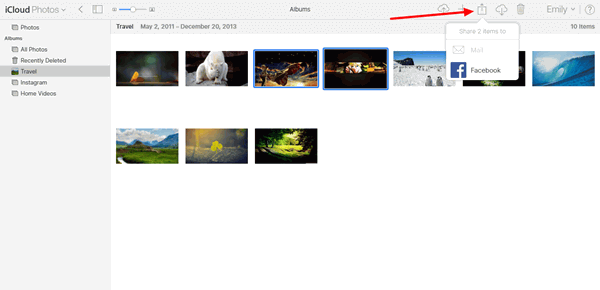
Step 4. Click the "Share" button from the buttons at the top.
Step 5. Select "Mail" or "Facebook" to share your selections.
Part 4: How to Download a Photo from iCloud to Computer?
Some people have complained about the difficulty in photo transfer between iPhone and computer. To be honest, the reason why you find it difficult is that you are not using the correct method. If you're synced photos with iCloud Photo Library, it's a piece of cake to download pictures to your computer.
Step 1. Log in to your Apple ID on iCloud.com.
Step 2. Click "Photos" to check out all the photos.
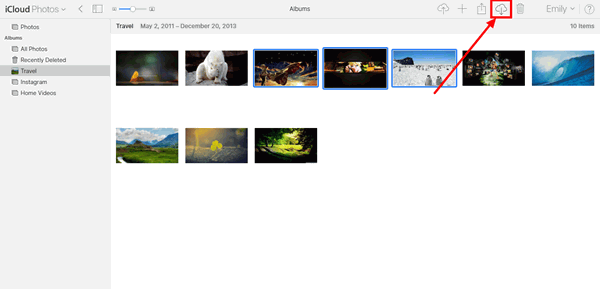
Step 3. Select the album on the left and highlight those you want to download.
Step 4. Click the "Download" button at the upper right of the interface.
Step 5. Select a folder from the window and click "Save" to save photos on the computer.
Note that you can download multiple photos at once.
Tip:
FonePaw iPhone Data Recovery (opens new window)is a good iCloud Photo downloader for you. All you need to do is sign in to your account and check Photos > Start.
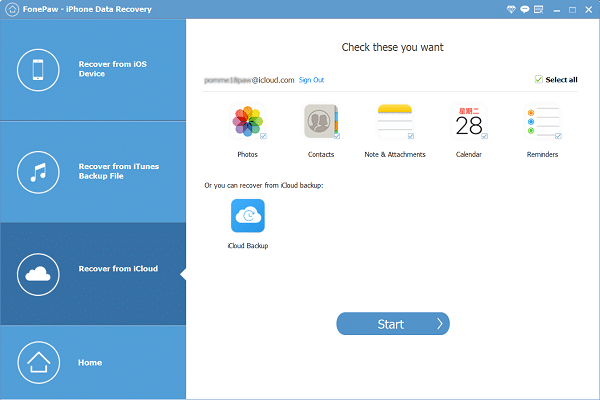
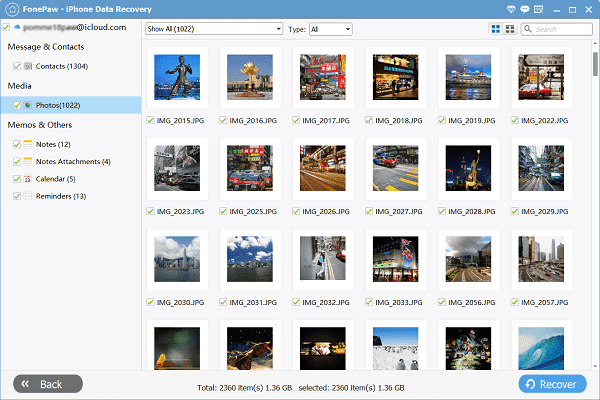
Then the program will scan photos that have synced on iCloud for you. Even better, you can use it to recover the deleted photos. Click Recover and all the photos you want on iCloud will be saved to your computer.
Free Trial:
Free Download Buy with 20% off Free Download Buy with 20% off
Part 5: How to Delete a Photo from the iCloud Photo Library?
If you'd like to remove some unwanted photos from iCloud, it's easier for you to do so on the web especially when you've got a bunch of images. With a bigger screen, you can quickly locate those unwanted and get them deleted.
Step 1. Open a browser and navigate to iCloud.com.
Step 2. Sign in with your iCloud ID.
Step 3. Select the "Photos" option from the panel.
Step 4. Click to choose "All Photos" or a certain album on the left.
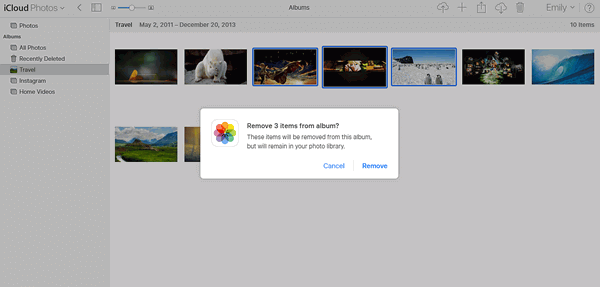
Step 5. Please make your choices with unwanted images.
Step 6. Click the "Trash" icon at the top next to the username.
Step 7. A pop-up will ask you to confirm your step. Please choose "Remove" to deleted selected items.
That's how you use the iCloud Photo Library. It's simple, right? Also, I want to introduce FonePaw iPhone Data Recovery (opens new window) to you, which is able to access and view iCloud backups well as restore data from iCloud backup (opens new window) without a hitch.