


Installing macOS High Sierra, Sierra, El Capitan, Yosemite doesn't always go well. Sometimes, you cannot install a new Mac OS on your iMac, MacBook due to various installation problems. To troubleshoot macOS High Sierra/Sierra install problems, we include 5 common problems and their solutions.
Problem 1: Not enough storage for macOS Sierra/High Sierra, how to fix?
You may have encountered the problem before. After downloading a Mac OS installer, you try to install the OS but the installation cannot continue because it says there is not enough space on Mac for Sierra or High Sierra.
Before you are able to successfully install the macOS, you should know how many space it is needed to install the new update. macOS High Sierra requires 8 GB free space on a drive and for the better performance of High Sierra, it is recommended to have at least 15-20 GB of storage.
- Click Apple Menu > About this Mac >Storage.
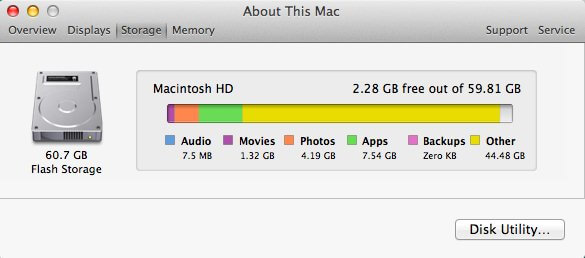
It will shows how much free space is available on your Mac. If the storage is not enough for the update, you may remove some unneeded files and apps to free up space.
Problem 2: The path/System/Installation/Packages/OSInstall .mpkg appears to be missing or damaged
Some users receive this error during the installation of macOS High Sierra, which says: macOS could not be installed on your computer; The path /System/Installation/Packages/OSInstall.mpkg appears to be missing or damaged; Quit the installer to restart your computer and try again.
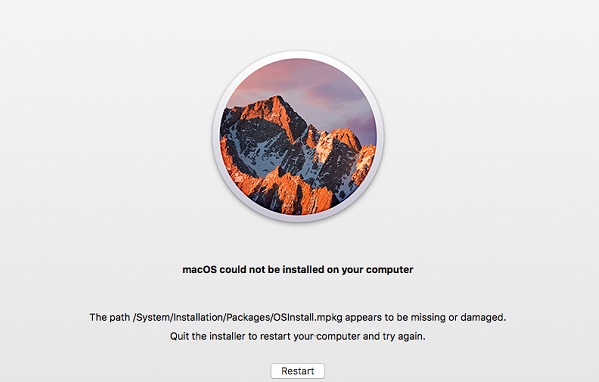
If the macOS Sierra or High Sierra cannot be installed because of this error, here are the solutions.
Solution 1: Boot in Safe mode and re-download OS installer
The first solution that you can try is to re-download macOS installer in safe mode.
To boot your Mac to safe mode, click Apple menu > Restart. As the Mac restarts, press and hold the Shift key until the Apple logo appears.
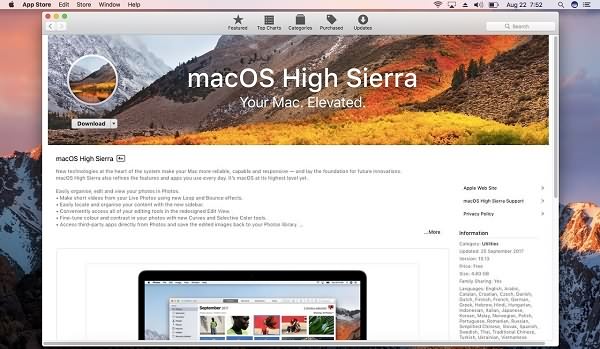
Now the Mac is in Safe mode. You can download macOS High Sierra from App Store and try to start the installation again.
Solution 2: Restart Mac in Sierra
If yo don't have a backup and are afraid of messing up your Mac, you can restart the Mac to its previous version. For example, if you are upgrading mac from Sierra to High Sierra, you may restart the Mac in Sierra, then make a backup and re-download High Sierra to try again.
To restart Mac in Sierra: When you see the "High Sierra could not be installed on your computer" message, instead of choose 'quit the installer and restart', click Apple menu > System Preferences > Startup Disk, select Sierra system and click Restart to start up your Mac in Sierra.
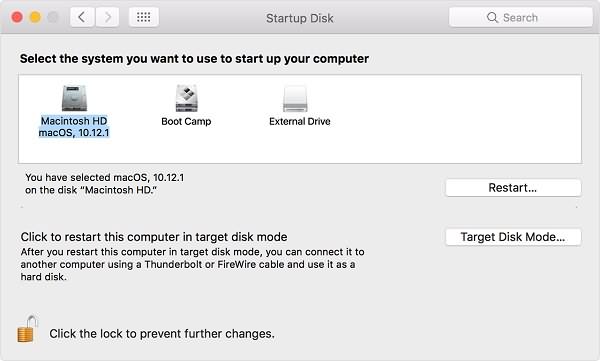
The mac will boots up normally without data loss. You can then reinstall macOS High Sierra.
Solution 3: Mount startup disk
Some users posted this solution on Mac forum to fix the “macOS could not be installed on your computer" error.
- Restart your iMac or MacBook and hold down Command+R to boot your Mac into recovery mode;
- Choose Disk Utility and mount the startup disk.
- Exit the Disk Utility and Recovery mode. It prompts you to select a startup disk, select the High Sierra boot disk. The mac will reboot and install High Sierra successfully.
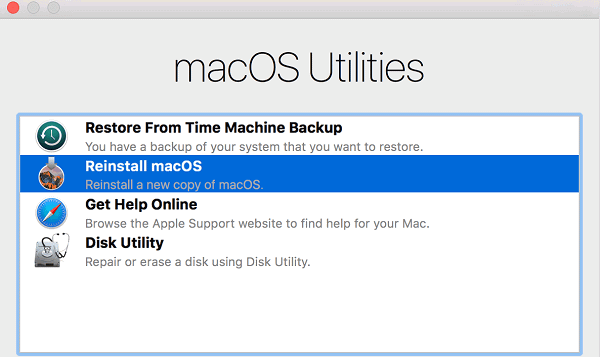
Solution 4: Reinstall macOS in Recovery mode
There are other users who find it helpful to reinstall macOS in Recovery mode: Enter the Mac into Recovery mode and choose Reinstall macOS from the Recovery menu.
Solution 5: Clean install macOS bootable drive
If you couldn't install macOS High Sierra, Sierra, El Captitan, etc. through App Store update, you may create a bootable update drive and clean install macOS on your Mac. Check this guide to clean install macOS on Mac (opens new window).
Solution 6: Find .mpkg files via Terminal
As the error shows, o, the OSInstall.mpkg file is missing. So finding the missing mpkg file and restarting the installation should make the error go away.
Open Terminal and type this command: $ find -f / OSInstall.mpkg | grep OSInstall.mpkg.
If it findss a OSInstall.mpkg on the recovery partition. Copy the file to startup partition according to this path: /Volumes/Macintosh HD/System/Installation/Packages/OSInstall.mpkg. Reboot your Mac and it should display the same Apple installation screen. The installation will continue and complete.
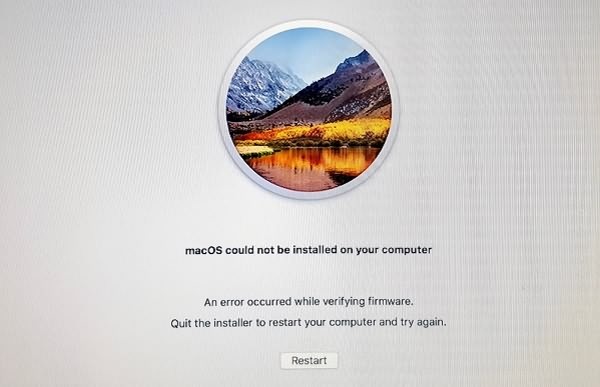
Problem 3: An error occurred while verifying firmware
Another error that often shows up during High Sierra Installation is that: macOS could not install in your computer; an error occurred while verifying firmware. If you are sure that your Mac is compatible with macOS High Sierra and have enough storage space for the update, you can try the following two methods to fix the macOS installation problem.
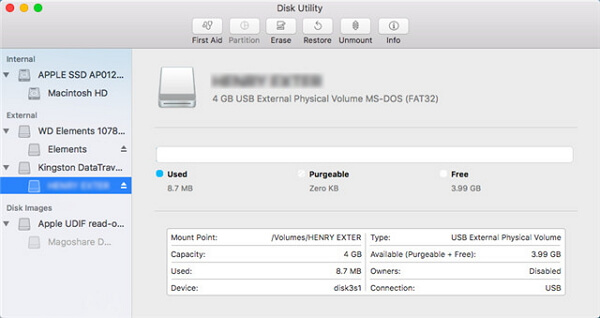
Solution 1: Repair disk
Click Restart. As the Mac boots up, hold down Command +R until you see the Apple logo. Your Mac will enter Recovery mode. Select Disk Utility. Click First Aid > Repair Disk. After repairing the disk, reboot the Mac to continue with High Sierra installation.
Solution 2: Use Terminal command
Some users fix the installation error with two command: diskutil list and verifydisk.
- Launch Terminal and type: sudo diskutil verifyDisk disk0 and enter your password.
- If the result shows an error, such as "Problems were found with the partition map which might prevent booting. Error: -69766: The partition map needs to be repaired because there's a problem with the EFI system partition's file system Underlying error: 8: Exec format error", move on to the next step. If not, the following command line may not work on your case.
- Type: sudo diskutil repairdisk disk0 and type “y" to perform the command. When it is done, continue to install High Sierra.
Problem 4: Unable to unmount volume for repair macOS
If the High Sierra installation is stuck because of the error: Unable to unmount volume for repair macOS, unmount the disk manually.

- Hold down Option + Command + R while restarting your Mac. Your Mac will enter internet recovery mode.
- Open the Terminal and type: diskutil list. Hit Enter key. Mark down the disk number of the drive you need to unmount.
- Then type: diskutil unmountDisk force /dev/disk (Number should be the correct number of the disk needed to be unmounted.) The disk will be unmounted.
- Now choose Disk Utilities and reformat the unmounted drive to APFS. It will erase everything in the drive and you can try to install macOS High Sierra again.
Problem 5: After update to High Sierra, all my files are deleted
"After the upgrade from Sierra to High Sierra my entire hard drive has been wiped. Nothing on my desktop, documents, mail, folders etc."
This post on Apple community has been discussed by many users. Although it doesn't happen a lot, a few users did find that their files are gone after installing High Sierra. For these users, there are 4 tips.
Tip 1: Restart your iMac or Macbook. High Sierra update usually doesn't delete files. It could be a glitch. Just restart the computer and see if the files are back after restart.
Tip 2: Deselect Desktop & Documents Folders in iCloud Drive. If you have enable iCloud Drive, your files may be stored in iCloud Drive. So you want to move the files from iCloud Drive to your Mac: go to Preferences > iCloud > iCloud Drive > Option and uncheck Desktop & Documents Folders.
Tip 3: Restore from Time Machine or clone. You are suggested to back up or clone your Mac before High Sierra update in case data loss like this happen. So if you have followed the suggestion, you can now restore the Time Machine backup or clone you have made before the upgrade.
Tip 4: Recover deleted files with Mac data recovery tool
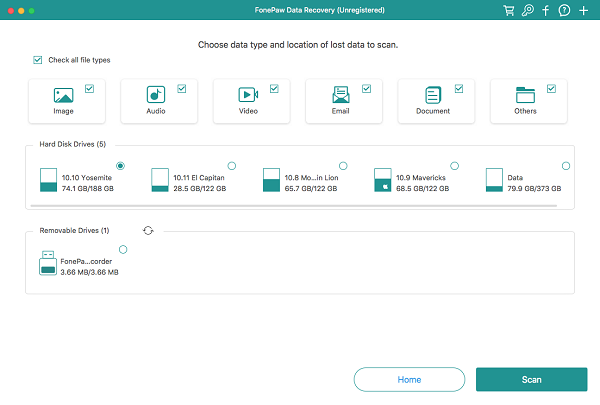
If none of the above tips help, your only option is a third-party Mac data recovery tool - FonePaw Mac Data Recovery. It can recover deleted photos, videos, documents, audio, emails from Mac hard drive, USB drive, SD card, etc. But you should know that the deleted files cannot be recovered if they are covered by new files. So you may want to avoid creating or downloading new files on the Mac and apply data recovery with FonePaw program as soon as possible.
Free Download Buy with 20% off
Note: to recover data from your Mac, FonePaw Data Recovery need to access your system files. So System Integrity Protection (SIP) (opens new window) should be disabled on your Mac.
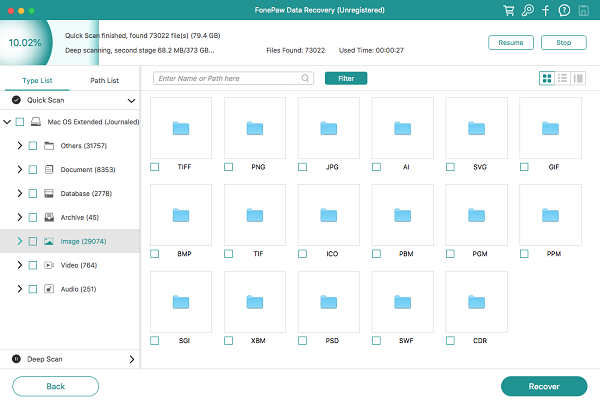
- Open FonePaw Data Recovery. Select the deleted file types and the disk of your Mac. If all files are deleted by High Sierra, check Select All. Click Scan.
- The program will begin to search deleted files on your Mac. After quick scan, you can view the results. If you need more files, click Deep Scan. Deep Scan could take several hours.
- Select files and click Recover to restore the deleted files to your Mac.
Is there anyway i can restore the lost files or am i screwed? I haven't taken a backup in months so this is pretty shocking and depressing.... Do you have other question about installing macOS High Sierra? Leave your question below.