As an Apple user who has both an iPhone and an iPad, sometimes you may find yourself in need to transfer music between these two devices. For better enjoyment on a bigger device with better sound effects or just to keep music in sync, knowing how to transfer music from iPhone to iPad will enhance your music-enjoying experience. So, in this article, we will introduce 5 ways to transfer music from iPhone to iPad. If these are what you need, look no further.
How to Transfer Music from iPhone to iPhone [Ultimate Guide]
How to Transfer Music from iPad to iPhone
Way 1. Transfer Music from iPhone to iPad Without iTunes
If you want to use the simplest and fastest way to transfer your iPhone music, a dedicated transfer tool may be your first choice. FonePaw iOS Transfer can be a solid option in this case. It supports transferring iPhone music and playlists and can categorize your music. You can preview the songs, add new songs to the playlist, and remove any songs you want. Beyond that, it helps to identify duplicate songs. So, you can delete the duplicate ones to keep your playlist clearer and more organized.
Moreover, as a professional iOS data transfer tool, FonePaw also supports transferring other files, such as videos, photos, contacts, messages, etc. For users concerned about data safety, it ensures your data is transferred at a lossless quality and will not be overwritten. Overall, FonePaw iOS Transfer is the best tool for transferring files from iPhone to iPhone, iPhone to iPad, and iPad to iPhone.
- Compatible with music formats like MP3, WMA, AAC, FLAC, etc.
- Supports music transfer from Music, Podcasts, Ringtones, etc.
- Fast transfer speed. & No Internet connection is needed.
- Selectively transfer specific songs.
- Built-in ringtone maker for iPhone.
Next, let's have a look at how to use FonePaw iOS Transfer to seamlessly transfer your iPhone music to your iPad.
Step 1. Download, install, and open FonePaw. Connect both your iPhone and iPad to the computer with cables.
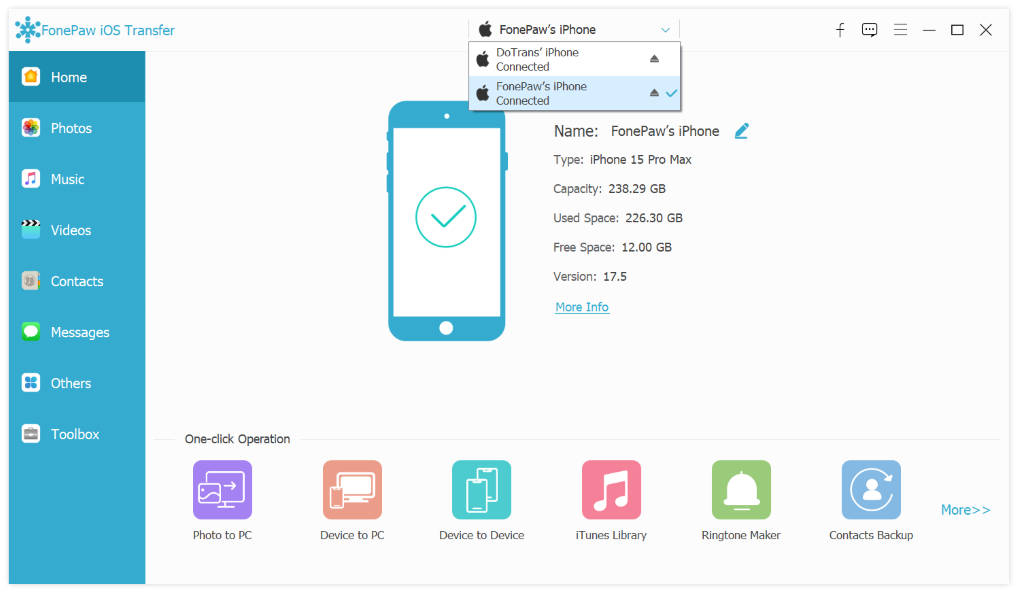
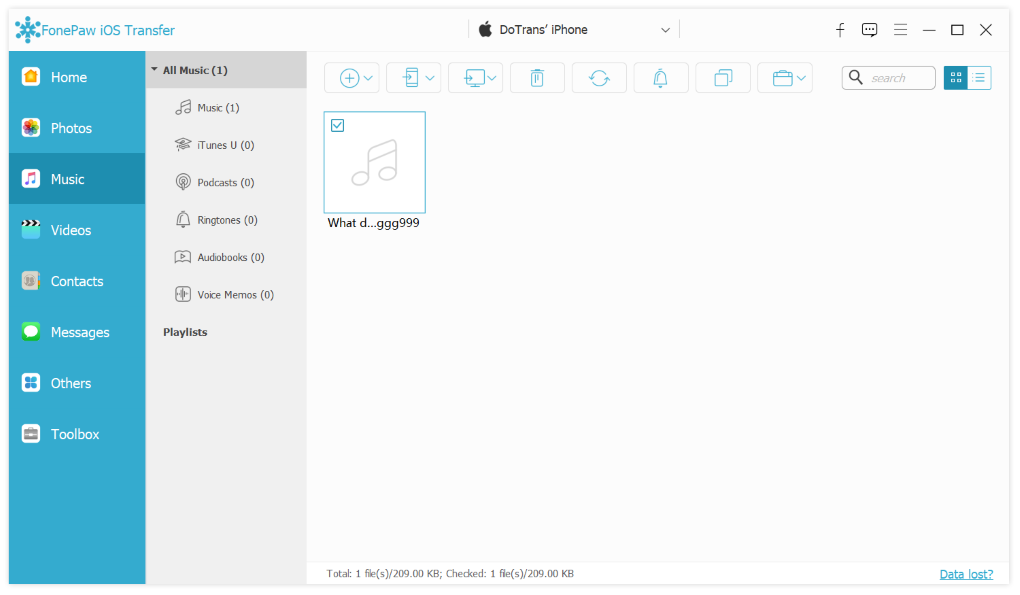
Step 2. Select the iPhone as the source device on the top menu. On the left panel, click on the "Music" button. You will see available songs on the list that you can transfer.
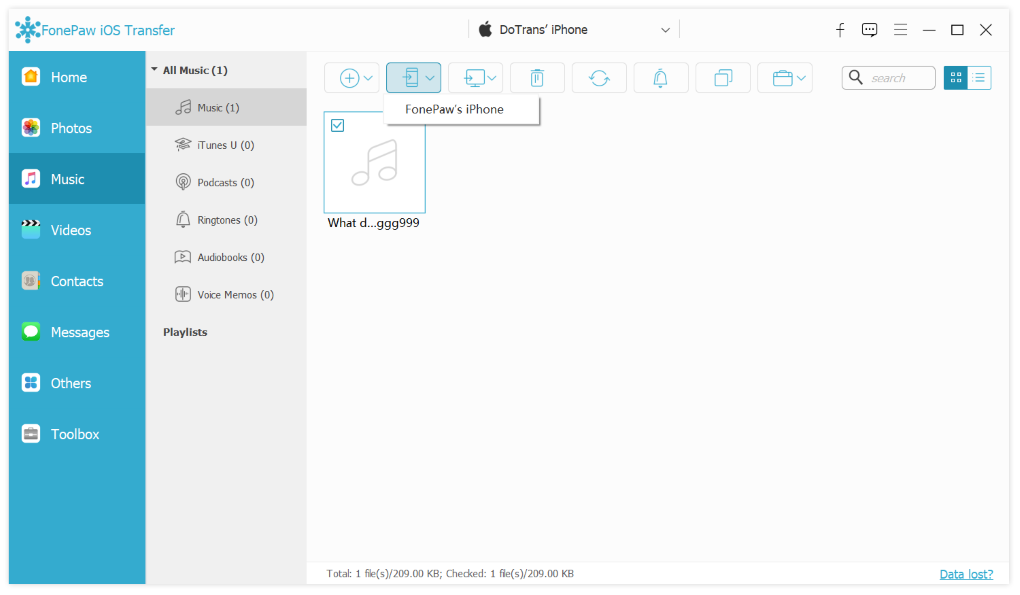
Step 3. After selecting the desired songs, click on the “Export to Device" button. Select the target iPad as the destination. The software will automatically start to transfer your music to your iPad.
Way 2. Transfer iPhone Music to iPad Using iTunes
iTunes is also a good way to transfer your iPhone music. It is a built-in tool for managing your iOS data, supporting syncing files like albums, songs, movies, TV shows, podcasts, photos, etc. So, By syncing iPhone music to iTunes on a computer, you can then sync the music to your iPad. But, it should be noted that you can only use iTunes to transfer purchased Apple music. Here is a step-by-step guide.
- Connect your iPhone to your computer with a cable.
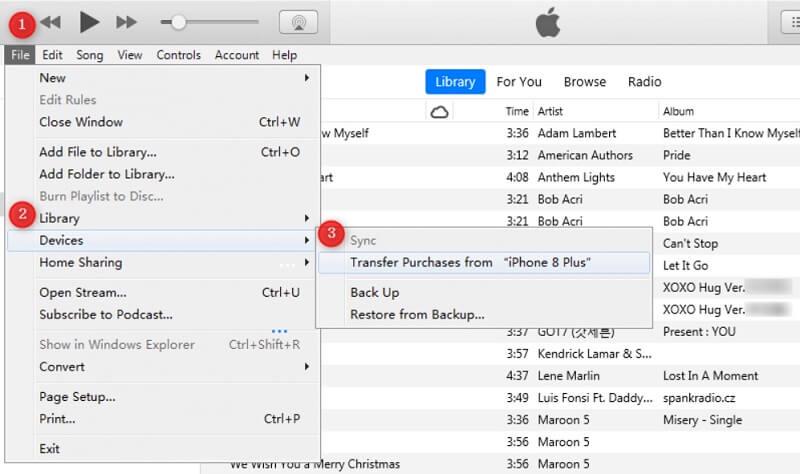
- On the left panel, click "File" > "Device", then choose "Transfer Purchase from...". So, this way your music will be transferred to iTunes.
- Disconnect your iPhone and connect your iPad to the computer using a USB cable.
- Click on the phone icon and then choose the "Music" icon. Click on the "Sync" button to sync your music to your iPad.
Way 3. Transfer Music from iPhone to iPad Using iCloud
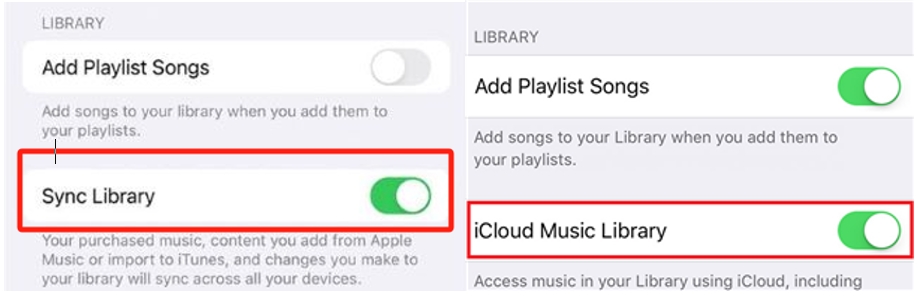
iCloud is an Apple cloud storage service that allows you to back up your data such as iPhone music. It is a good option if your computer is not available. To transfer music from iPhone to iPad, you can use iCloud Music Library. However, it requires you to subscribe to Apple Music, which means a cost for this feature so that you can sync your purchased Apple Music between your iPhone and iPad. Follow this simple guide.
- Go to "Settings" on your iPhone.
- Turn on "Sync Library" (for a device using iOS 13, iPadOS 13, or later). Or, turn on “iCloud Music Library” (For a device using an earlier version of iOS).
Way 4. AirDrop Music from iPhone to iPad
AirDrop is a feature of Apple devices. It can share individual files between Apple devices. Although it may be suitable for individual music file transfer, it is limited to the file size, and you need to transfer it one by one. A large size music file needs more time to transfer, or you can just fail to transfer it, which depends on the internet condition. Here are the detailed steps.
1. Make sure both your iPhone and iPad are within close range so that Bluetooth can be connected.
2. Turn on AirDrop from the Control Center on both your iPhone and iPad.

3. Open your desired song file in the Files app on your iPhone.
4. Long-press the file and find the “Share" option.
5. Tap the AirDrop option and choose your iPad to transfer this song.
Way 5. Transfer Music from iPhone to iPad via Bluetooth
Transferring music from your iPhone to your iPad via Bluetooth is another method. Bluetooth allows wireless file sharing between iPhone and iPad, although it may be slower than Wi-Fi or direct cable connections. Here are the steps.
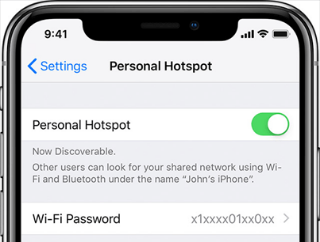
- Open "Settings" on your iPhone.
- Go to "General", then go to "Network".
- Tap on "Cellular" and turn on "Personal Hotspot"
- Go back to "General," then tap on "Bluetooth."
- Open your iPad and go to"Settings".
- Turn on "Bluetooth" as well.
- Let the iPad scan for available devices and then enter a 6-digit code to connect to the iPhone.
- After they connect, go to the music app and select your desired song. Choose "Bluetooth" as the transfer mode.
Final Words
Transferring music from your iPhone to your iPad can be achieved through various methods. As you can see, we have Apple's built-in tools, such as iTunes, iCloud, Airdrop, and Bluetooth. All these are covered with cable, WIFI, and Bluetooth connections that can meet your various needs. However, these methods all have their drawbacks, especially when you have multiple music files to transfer. They can let you suffer from slow speeds and long waiting times. Sometimes, data can be lost during transfer too. Therefore, if simplicity, efficiency, and data safety are your priorities, FonePaw iOS Transfer is your best choice.
iOS Transfer