Quick Start is a new option updated by Apple in iOS 11 and later, which makes it easier for users to automatically set up a new iPhone or iPad from their old iOS devices. You can use Quick Start to transfer settings, app information, photos, and more from the old iPhone to your new iPhone/iPad. Before iOS 12.4, you need to back up your old device to iCloud and then restore data from iCloud to the new phone via Quick Start. And since iOS 12.4, Quick Start allows you to transfer all data between two devices wirelessly or by connecting your old phone and the new one with a lightning to USB 3 Camera Adapter.
Though Quick Start is easy to handle, you may get hit with problems when using it to set up your new iPhone.
- For example, Quick Start screen doesn't appear after turning on your new iPhone.
- Two iPhones don't seem to recognize each other.
In the following article, I will introduce some solutions and you can read through to find the workable one for yourself.
You May Need:
How Long Does It Take to Restore an iPhone from iTunes/iCloud (opens new window)
Move to iOS Not Working or Get Stuck, How to Fix? (opens new window)
How to Quick Start iPhone on iOS 13/12/11
Before using Quick Start, make sure that both devices are running on iOS 11 or later. The version doesn't need to be the same. For example, file transfer between a new iPhone XS using iOS 12.4 and an old iPhone 8 running iOS 12 is also available. However, if you want to use the iPhone migration feature, that is setting up a new iPhone without iCloud or iTunes (opens new window), then both devices should be using iOS 12.4 or later.
Apart from the iOS version of your iPhone, you should also place your new iPhone next to your old one, the Quick Start screen only appears when two devices are close to each other. If you've put them together, then check whether the Bluetooth is opened on your old iPhone or if there is enough charge on your devices. The setup process takes longer and if you run out of charge, the process will be forced to stop.
If you've followed the instructions above but still fail to use Quick Start, try the fixes below.
Fixed: Can't Use Quick Start to Set up iPhone 11/XS/XR/X/8
1. Restart two iPhone/iPad
If one of the devices is stuck in processing and you can't use Quick Start to set up iPhone 11/XS/XR/X/8, try restarting it. To do this, you need only to press and hold the power button and volume button on the side(on an iPhone 8 or earlier model, just long-press its power button) until the power off slider appears.
As for iPad, press and hold the Top (or Side) button. Then drag the slider to turn off your iPhone/iPad. After that, press and hold the button again until you see the Apple logo, and your iPhone/iPad will turn on.
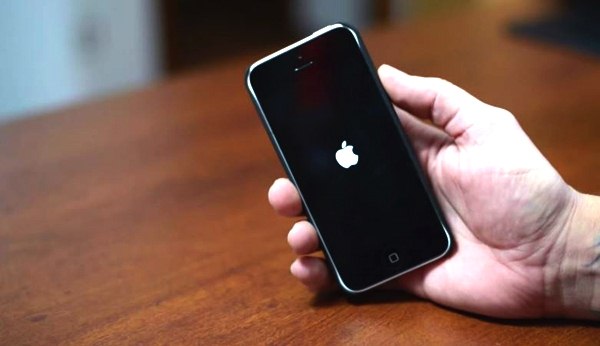
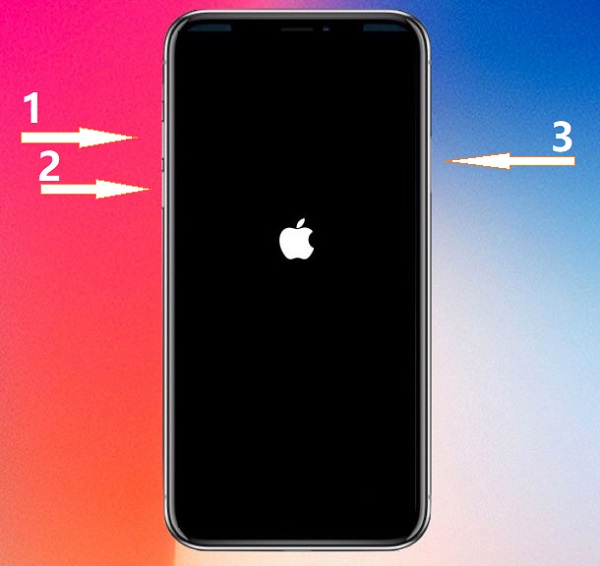
If the iPhone is unresponsive, try to force restart the iPhone. On iPhone 11/11 Pro/XS/XR/X, press and release the volume up button, then press the volume down button and release, finally keep holding the power button until the Apple logo appears. On iPhone 7, press and hold the power button and the volume down button.
2. Change the adapter or cable
If you are using a USB cable and a Lighting to USB 3 Camera Adapter to connect two iPhones while Quick Start feature is not working on your iPhone, check your adapter and cable. Many third-party cables can not work with Apple Products, so make sure that your lightning cable is the one that came with your iPhone or check whether your adapter or cable is fine. If not, you can change the adapter or cable to solve the problem.
3. Manually Set up iPhone/iPad
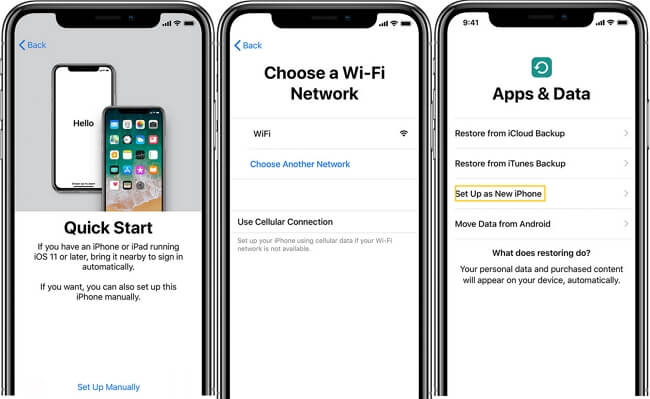
Another workaround to solve the Quick Start not working issue is to manually set up your iPhone or iPad. To set up manually, you don't need to connect the two iPhones, just simply select the Set Up as New iPhone option.
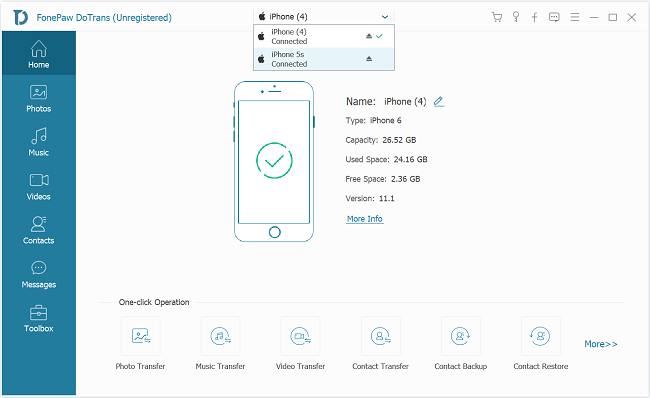
Instead of using Quick Start to transfer all data and settings, you can choose a professional data transfer tool - FonePaw DoTrans (opens new window) to help you selectively move the wanted files to your new iPhone. What's more, you are allowed to transfer data between different devices, such as iPhone and Android, iPhone and iPad with this program. It is simple to use, follow the steps below to transfer your selected data from your old iPhone to your new one.
Set up your new iPhone:
Step 1: Insert your SIM card into the new device first, then turn on your new iPhone and select the default language.
Step 2: Connect the Wi-Fi network and enter the network's password if required. You can also use a cellular connection.
Step 3: Set up your Face ID or Touch ID and create a passcode, which you can use to unlock your phone or purchase. Tap Continue and follow the directions.
Step 4: In the Apps & Data screen, click Set Up as New iPhone, then tap Apple ID and enter the email address associated with your Apple ID. Follow the on-screen instructions to set up.
Transfer data to new iPhone with FonePaw Dotrans:
Step 1: Run FonePaw DoTrans
After downloading and installing the software, run it on your computer.
Free Download Buy with 20% off
Step 2: Connect two iPhone to a computer.
Connect your new iPhone and the old one to your computer with USB cables. When detected by DoTrans, you can see your iPhones are displayed on the screen. Set your old iPhone as the source device and the new one as the destination phone.
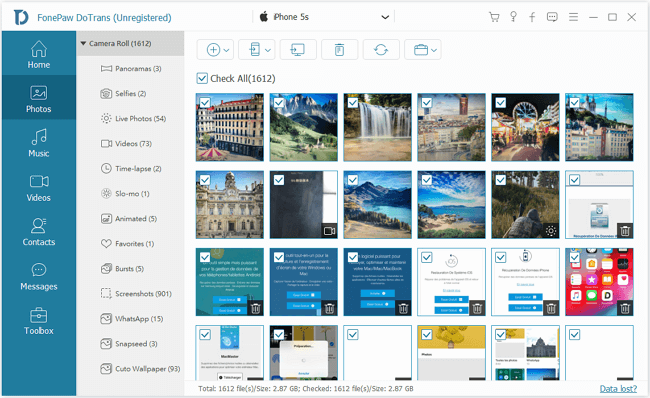
Step 3: Transfer data from old iPhone to new iPhone.
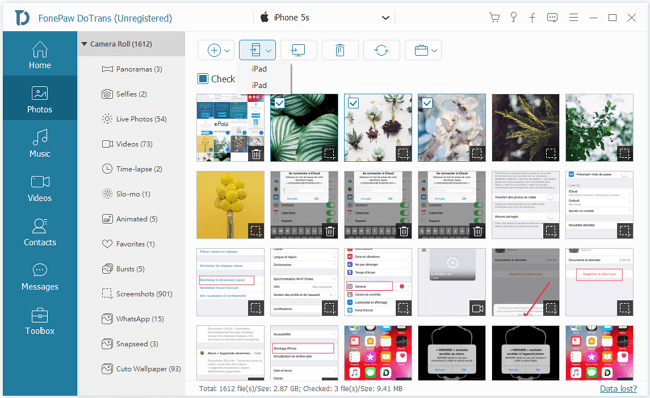
In the interface, you can see different file types, such as Music, Photos, Videos, Messages, etc. Click one of the file types like Photos, then all photos on your old iPhone will be displayed. Tick the wanted photos and then click Export to Device > new iPhone's name to transfer them to your new device. You can also export videos, contacts, and music to your new iPhone with the same steps.
Quick Start is a nice feature but sometimes it is just not working. But methods mentioned above should help you fix the issue and help you use Quick Start smoothly.


