


macOS 10.14 Mojave makes it much easier to capture screenshots and record screen with its new screenshot toolbar. If you often need to record what's on your screen of Mac, such as grabbing a video clip, recording screencast for software demonstration, this is a great tool for you.
As a MacBook, iMac owner, you probably are familiar with two keyboard shortcuts: Command + Shift + 3 (capture the entire screen) and Command + Shift + 4 (take a screen of a selected part of the screen). Now on macOS Mojave, a new shortcut -- Command + Shift + 5 can bring up a new screenshot toolbar that lets you capture screenshot as well as record screen videos.
However, the screenshot toolbar on Mojave cannot record screen with audio and is not suitable for gameplay recording. If you need an HD screen recorderto record screen with internal & external audio, you may try FonePaw Mac Screen Recorder (opens new window), which can film screen with sound at up to 60 kps.
People Also Read:
3 Ways to Record Mac Screen with Audio (opens new window)
Get Snipping Tool for Mac - Snip on Mac (opens new window)
How to Record Screen with Screenshot Tool on Mojave
Here is how to use screenshot toolbar on macOS Mojave to capture screenshots and record video of Mac screen.
Take Screenshot on macOS Mojave
Step 1 Press Command + Shift + 5 combination on your keyboard to call up the screenshot toolbar.
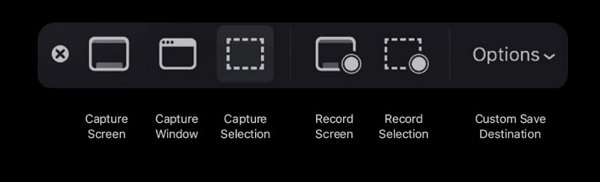
Step 2 The first three buttons are for taking screenshots.
- Click Capture Entire Screen, a screenshot of the whole screen will be taken.
- Select Capture Selected Windows, you can then click on the windows you want to capture. A screenshot of the selected windows will be taken.
- Click Capture Selected Portion, you can then drag the mouse cursor to select a portion of Mac screen to capture.

When a screenshot is captured, it will appear on the bottom right corner of the Mac screen immediately. You may right-click it to view the screenshot and decide whether to save, edit or send the screen capture.
Record Screen on macOS Mojave
The screenshot toolbar also contains video capture options.
Step 1 Press Command + Shift + 5 to launch the screenshot toolbar.
Step 2 There are two options to take screen video: Record Entire Screen and Record Selected Portion.
- Click Record Entire Screen, it will begin to take a video of your Mac screen.
- Click Record Selected Portion, you can select a part of the Mac screen. Once you select a screen area, the screen recording will start.
Step 3 Once what you want to record is finished, click the Stop button to stop the screen recording.
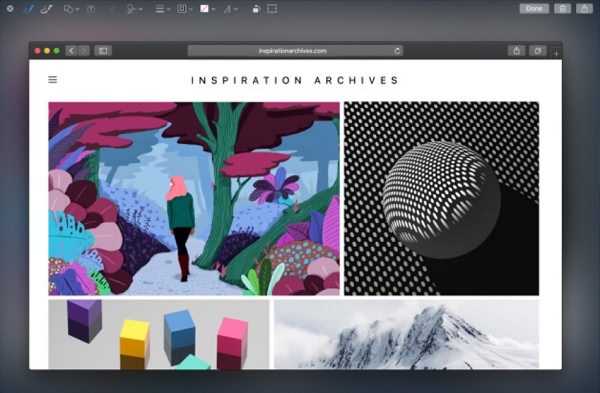
Step 4 The recorded screen video will appear on the bottom right of the screen. Click it to open the screen video on a new window.
Step 5 You can then click the edit button to trim the video capture, draw or write on the video, or share the video.
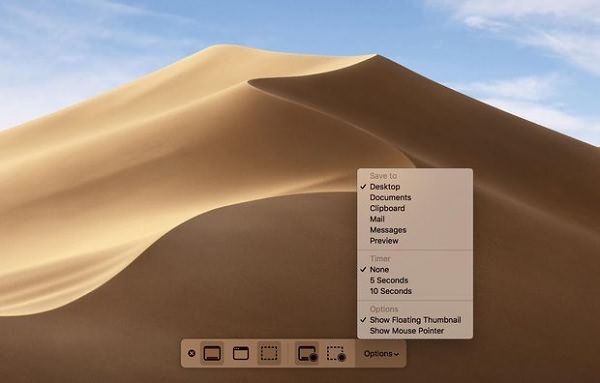
Tip: The screenshot toolbar also has three other options.
- Where to save the screen capture: you can choose to save the video or screenshot to Desktop, Documents, Clipboard, Mail, Messages, or Preview.
- Timer: set 5 seconds or 10 seconds timer to start screen recording automatically.
- Show mouse cursor: whether to include mouse cursor in the screenshot or video capture.
Screenshot tool on macOS Mojave is convenient but lacks some signification features for screen recording, such as the ability to record video with audio, record screen with webcam and more. If you need these features, check out FonePaw Mac Screen Recorder.
Best Screen Recorder for Mac to Record Video and Audio
FonePaw Mac Screen Recorder (opens new window) is a powerful video recorder for Mac that can do almost everything you need in recording screen of Mac. The followings are what it can do.
- Record screen videos with sound from your Mac as well as the microphone;
- Record full screen, fixed region, custom area on Mac in high definition;
- Record your screen as well as your face with webcam;
- Enable or disable mouse actions in recording (when the mouse cursor is enabled, you can also add effect to mouse actions);
- Customize hotkeys to quickly record Mac screen;
- Take screenshots on Mac.
It is a perfect tool to record desktop, gameplay, webinar, computer screen, app screen on Mac. Also, FonePaw Mac screen recorder can not only support macOS 10.14 Mojave, macOS 10.15 Catalina but also macOS 10.13 High Sierra, macOS 10.12 Sierra, Mac OS X El Capitan/Yosemite/Mavericks.
Free download FonePaw Screen Recorder for Mac. Unlike other third-party screen recorders, the free version doesn't add watermark to your video capture.
Free Download Buy with 20% off
Here comes the video tutorial of recording Mac screen with FonePaw. You can also follow the step-by-step guide below.
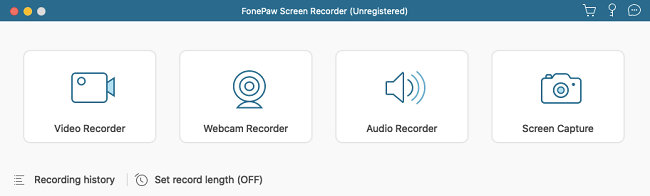
Step 1 Launch the Mac screen recorder. A toolbar will appear.
Step 2 Click the monitor icon to select which screen area you want to record. You can choose to record the full screen, a region in the preset or any area that you select.
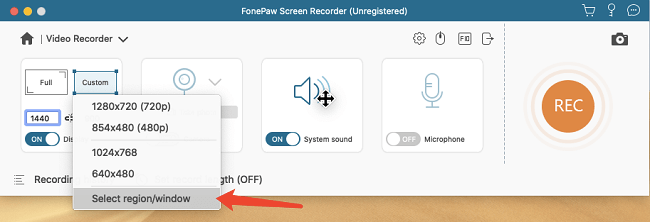
For example, when you need to record a YouTube video on the web, select the preset region -- 854 x 480, which is how large the Windows is when you play a YouTube video on a browser.
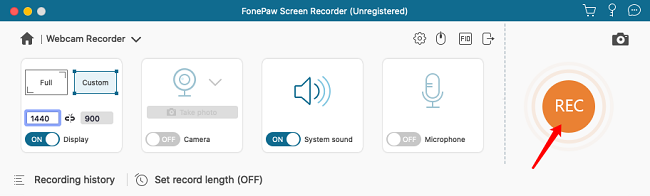
Step 3 If you need to record video via webcam, turn on the camera button. You can select the position of the webcam in the screen recording, for example, place the webcam in the bottom left of the screen.
Step 4 If you need to record video with audio, turn on the System sound and Microphone button to enable sound.
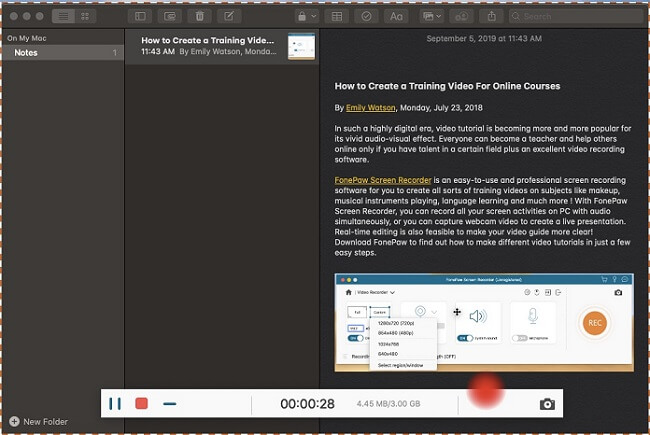
Step 5 When you are ready, click the REC button to start recording. A toolbar will show allowing you to draw, write or highlight something in the screen.
Step 6 When what you need to record is finished. Click the red button again to stop recording. You can then view and share the screen video.
More Tips:
- On FonePaw Screen Recorder, you can quickly start and stop a screen recording with keyboard shortcuts. Go to Preference > General > Hotkeys and enter the keyboard shortcuts you like start, stop recording screen, taking screenshots.
- Go to Preference > Recording > Mouse, you can choose to show mouse action in the recording or not. Also, you can tick Record mouse clicks to enable mouse action effect.