


Screenshots are important files that you probably use a lot in your work and personal life. When you want to explain or demonstrate something to others, a simple screenshot with notes may be easier to understand instead of hundreds of words.
Although you can snip on Mac using keyboard shortcuts, for example, press Shift + Command + 3 to take a full-screen screenshot or you can press Shift + Command + 4 to capture a portion of your screen, you might not satisfy with these screenshots functions and aspire for more high-profile ones. This is why we are going to introduce the 5 best snipping tools for Mac that can help improve screenshot efficiency.
Quick Summary
Mac's Built-in Snipping Tool
- Pros: keyboard shortcuts, easy-to-use, convenient
- Cons: no annotation function, limited versatility
FonePaw Screen Recorder
- Pros: multi-functional, simple operation, customized setting
- Cons: only a seven-day free trial
Snagit
- Pros: best for businesses that use visual instructions to convey information
- Cons: only support trimming, limited versatility
Droplr
- Pros: high-rated, low-priced, high-security
- Cons: have only basic functions
LightShot
- Pros: customizable screenshot, powerful editor, free, lightweight
- Cons: complicated operation
Top 1. Mac's Built-in Snipping Tool
Features
There is no native sipping tool for Mac like Windows Sipping Tool. You can snip on Mac using pre-set keyboard shortcuts and you can even set your own ones according to your preference.
Shortcuts for Using on Mac
Mac allows users to take a screenshot with keyboard shortcuts by default. There are 4 keyboard shortcuts you can use to replace Snipping Tool on Mac.
Command-Shift-3: Captures a snapshot of the entire Mac screen.
Command-Shift-4: Once you press this hotkey, a crosshair will appear instead of the cursor. Then you can select the area you want to capture on the Mac screen and release the mouse once finished.
Command-Shift-4-Space: Take a screenshot of an active window. By clicking Command-Shift-4, a crosshair shows on the screen. Then by hitting the space bar the cross-hair will turn into a camera icon and you can move it on an active window. Select the window to snip.
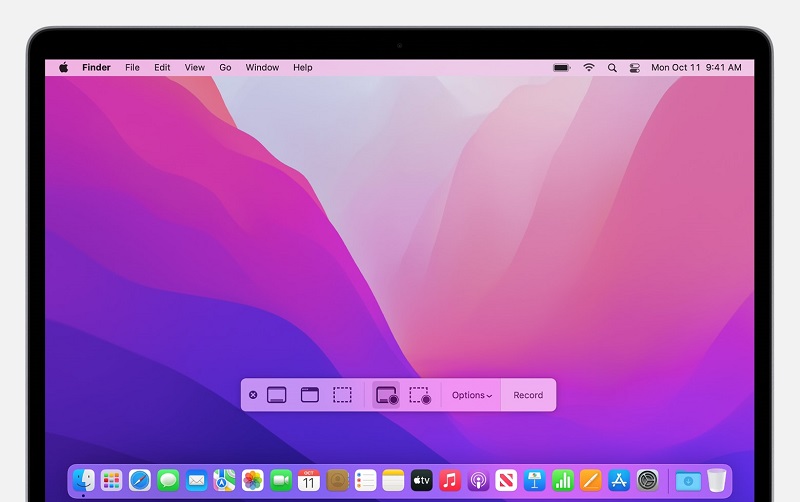
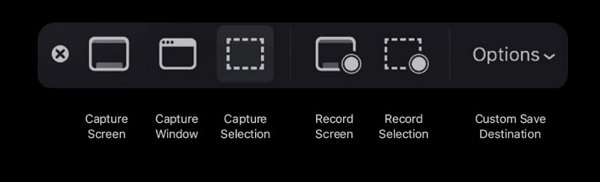
Command-Shift-5: This shortcut activates a screen capture panel, which can capture a static image on the screen as well as recording a video. Similar to the Snipping Tool, you can choose whether to capture the entire screen, a window, or a selected section. The shortcut only works on macOS Mojave or later.
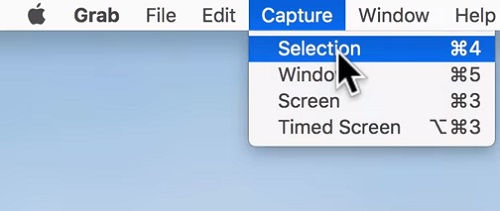
Grab on Mac
Actually, there is also a equivalent on Mac - the Grab. You can capture your screen by Grab and save it as an image file. Like Snipping Tool, Grab for Mac also offers several screenshot modes and supports keyboard shortcuts. You don't need to download any extra software because Grab is available in the latest version of macOS.
When Grab is launched(you can run the snip tool from Applications > Utilities), no window will pop up but you can see at the top of the screen that the menu bar already shows up. Find the "capture" option, you can see in the drop-down menu: selection, window, screen, timed screen.
PNG is also the default image file format in Grab. Grab allows you to save screenshots to JPG, TIFF, GIF, and PDF, but PNG is highly recommended as it's the most popular used lossless image compression format.
FonePaw Screen Recorder
FonePaw Screen Recorder is a multifunctional screen recording program that allows you to take screenshots and record the screen easily and efficiently. Besides recording your desktop activities and capturing screenshots in real-time, it lets you edit the end result of your screenshots or recordings when the recording process is over. You can enjoy a seven-day free trial at first and pay if you would like to continue the service.
Free Download Buy with 20% off Free Download Buy with 20% off
Highlighted Features
Take and customize screenshots: FonePaw provides multiple editing tools that can allow you to edit the screenshots according to your own preference and demand.
Record screen on any occasion: FonePaw is an application designed for any recording situation, such as desktop recording, TV dramas, online meetings, etc.
Real-time annotation: FonePaw lets you highlight important points conveniently during recording.
No watermark: FonePaw can take snapshots or make screen recordings and provide them to you without a watermark.
How to Snip on Mac
Capturing screenshots on Mac with FonePaw Screen Record is very easy. Please download FonePaw first on your Mac.
Free Download Buy with 20% off Free Download Buy with 20% off
Step 1: Launch FonePaw on Mac, click the Screen Capture button.

Step 2: Draw a rectangle around the object you want to screenshot. Then you can add an annotation or text to the screenshot to highlight anything you want.

Step 3: Click Save to save the screenshots, you can choose your preferred format such as JPG, PNG, GIF Image, etc.

Snip Keyboard Shortcut
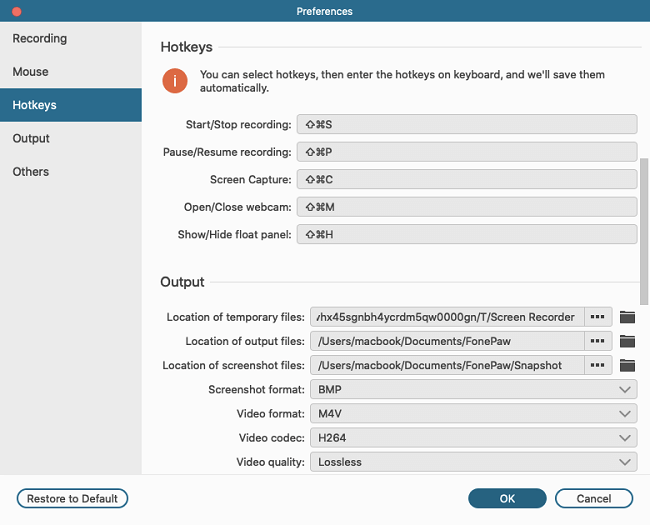
FonePaw Screen Recorder also allows you to set your preferred hotkeys for screen capture. Click the Preferences button on the top of the toolbar and navigate to Hotkeys, you can set the hotkey to take screenshots on Mac. For example, you enter Command + A in Capture screen column, then you can start screen capture by pressing Command + A without activating the main panel.
Tip: FonePaw Screen Recorder should be running on your Mac if you want to take a snapshot with a keyboard shortcut.
Snagit
Snagit is a great choice if you need to frequently take both annotated screenshots and screen recordings, perhaps in a work setting. This software program provides multiple tools and a very easy-to-use interface so that you can enjoy various high-profile features of it without hassle. However, it might be less appropriate for those who would like to make recordings for wide-scale consumption, such as Youtube videos. The reason is that the function of the built-in video editor is somewhat limited.
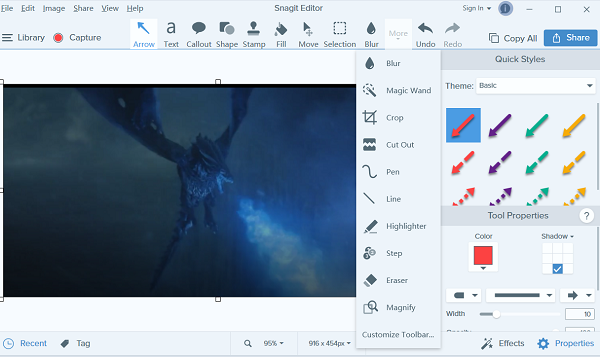
Organize Screenshots with Ease
One high-profile function of Snagit is that it can smartly classify the processed files according to their types such as photos, videos, GIF images, etc., and then collate them orderly according to their labels or other screening approaches.
Droplr
Droplr, as a software program that is compatible with different devices such as Mac, Windows, and Chrome browsers, allows you to capture screenshots and screen recordings instantly and save them to the cloud with a link that you can share with anyone and anywhere. It is appropriate for those business and enterprise customers who look for a high-resolution snipping tool that includes cloud storage, enterprise-level security, and screen recording for a low cost.

Versatile Image Editor
Screenshots: Droplr can capture part of the screen, the entire one, or the full webpage, and then mark it up.
Screen Record: Droplr can record your screen with an optional webcam as a GIF or HD video.
Cloud: Droplr can automatically save screenshots or screen recordings to your account in the cloud and instantly save a link to your clipboard. With such a link, you can share with anyone and anywhere.
Lightshot
Lightshot is a Mac Snipping Tool that can take a customizable screenshot quickly. The software program features a simple and intuitive user interface, which allows you to select any area on your desktop and take its screenshot with just two button clicks. Then if you want to share your screenshots with others, you can do that by saving them to your computer or uploading them to Lightshot's server.

Tips for Choosing the Best Snipping Tool
Pricing
If you don't want to pay for the snipping tool, you can use Mac's built-in snipping tool and the free one called Lightshot. If you are willing to pay for the snipping tool that offers more high-profile features, you can use FonePaw, Snagit, and Droplr.
Custom Area
All the above 5 snipping tools can allow you to customize the area you want to capture, including part of the screen and full screen, etc.
Shortcuts or Hotkey Settings
Some keyboard shortcuts can be used to capture screenshots, which is convenient and easy to use. Mac's built-in snipping tool and FonePaw both allow you to use keyboard shortcuts to capture screenshots.
Upload or Share Via Cloud
All the above 5 snipping tools let you save screenshots on your PC and then share them with others in the form of photos such as PNG and JPG, etc. Compared with all these products, Droplr performs the best in that it enables you to save screenshots to your account in cloud services and provides you with a link so that you share the link with anyone and anywhere.
Editing Options
Among these 5 snipping tools, FonePaw is the most versatile one which provides multiple editing tools to users so that you can edit the screenshots according to your preference and need and add text to them.
Conclusion
Here are the 5 best snipping tools for Mac that can help you capture screenshots quickly and efficiently. You can choose one that is appropriate to you and start snipping on Mac without hassle.