


"I used Bandicam to record my playing BF1 yesterday. In Video Section, I set H.24 -NVENC VBR and CBR 60 fps at 1080p. When I played BF1, everything seemed fine but when I stopped after around less 4 mins long, then again pressed start recording, I get message error stating 'Failed to initialize codec'! How to solve this problem?"
Claiming the "best screen recording software for any occasion", Bandicam is a lightweight but powerful screen recorder for Windows. It can easily capture anything on your PC screen as high-quality video, such as recording a certain area on a PC screen or capturing a game that uses the DirectX/OpenGL/Vulkan graphic technologies like Minecraft, Skyrim or WOW. However, some people complain that they met the "Bandicam failed to initialize codec" issue when recording their games. It can be quite annoying, so how to fix this Bandicam codec failure? Follow the solutions below.
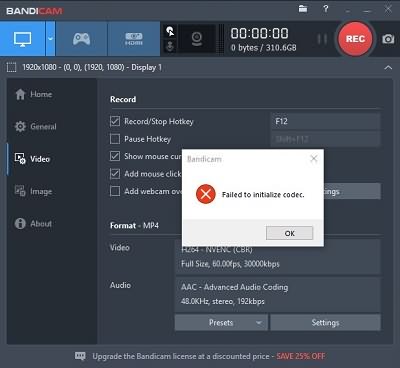
Four Ways to Fix Bandicam "Failed to Initialize Codec" Issue
Update Graphic Driver to the Latest Version
Bandicam may be picky to the operation environment, and it might be a problem with the graphics driver. Updating graphic driver to the latest version may solve the problem. Take Intel as an example.
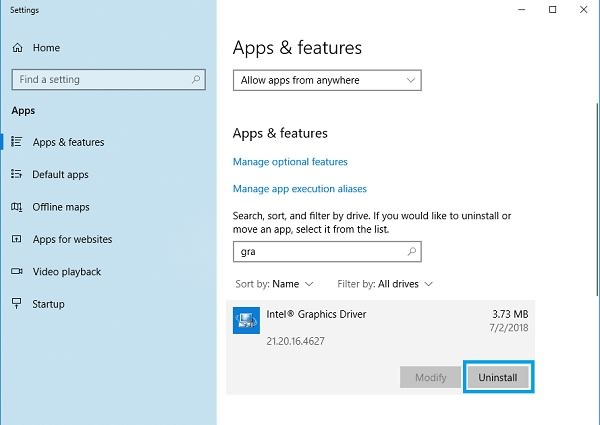
First, uninstall the graphics driver completely from both "Apps and Features" and "Device Manager".
#Right click the Windows menu, click "Apps ad Features", then uninstall the graphics driver.
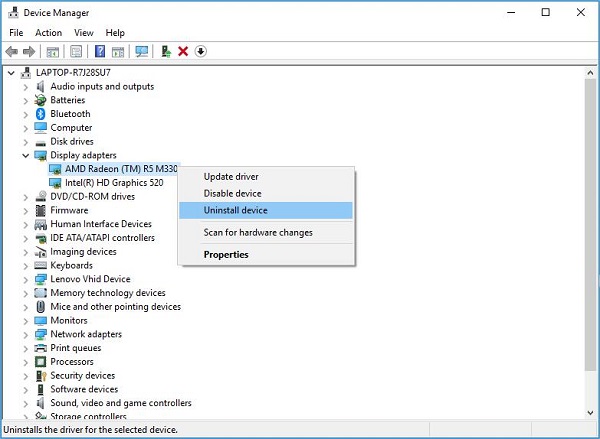
#Right click the Windows menu again, open "Device Manager > Display adapters", then uninstall all the graphics drivers in the list.
Then you can find and install the latest version of the graphics drivers from Intel’s official website. Then you can try recording gaming with Bandicam again.
Change Resolution
Launch Bandicam. In "Video > Settings > Size", select "Full size" or the size fits your resolution. If you don't know what your computer's resolution is, right click your desktop and check it in "Screen Resolution".
Best Bandicam Settings to Record
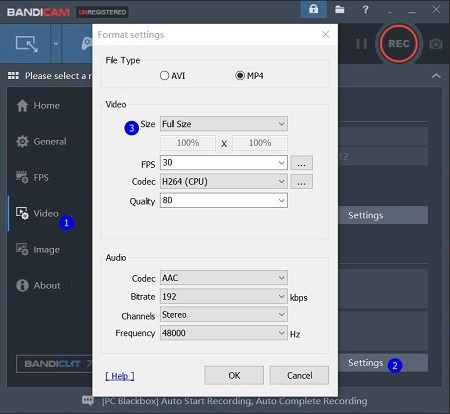
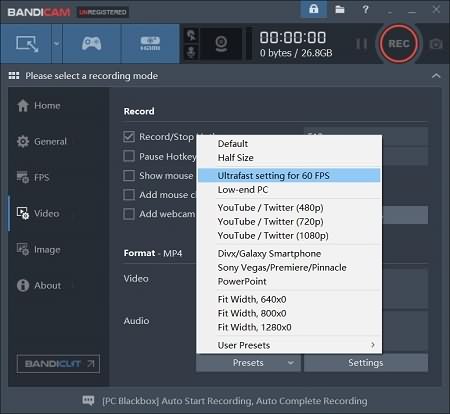
It is true that Bandicam doesn't use too much CPU and supports third-party codecs. However, capturing some big programs with 4K or 1080 60FPS can naturally make your computer overloaded. To make it easier, there are the best Bandicam settings to record screen and games, to improve its performance.
In "Format Settings", you can change the Codec. The H.264 (NVIDIA NVENC) may be a good choice, which is a hardware encoder built into the graphics card and not going to affect your GPU.
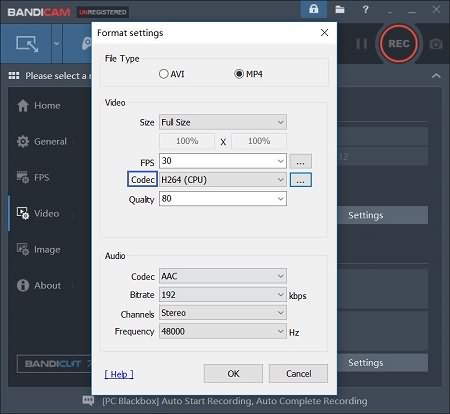
You can also click the button next to the "Codec" to customize the codec you choose. Try "X264" FourCC code and 60 keyframe interval. And if you're having some problems with your GPU and wants to use CPU to encode, you can download x264VFW, a free codec, on the Internet.
Try "Ultrafast" in the preset and 15-20 of "Quartier".
Best Bandicam Alternative to Record Gaming
Though Bandicam is powerful, it may be too complicated to use; what's more, there are some times when everything goes wrong and Bandicam cannot record video or audio. How about trying a simpler screen recorder?
FonePaw Screen Recorder (opens new window) can also easily record screen activities and webcam video with audio in high quality. However, it is much easier to use than Bandicam, with simplified panel and settings, extremely newbie friendly. It can simultaneously record your screen and your webcam to keep your gaming moments. It's possible to capture full screen, or any specific area on screen with or without webcam. Then you can share the recorded videos to social media in just one click. Supporting hardware acceleration technology, the FonePaw recorder can minimize the effect on your game performance during the recording.
Download it and record your gaming in simply 4 steps!
Free Download Buy with 20% off Free Download Buy with 20% off
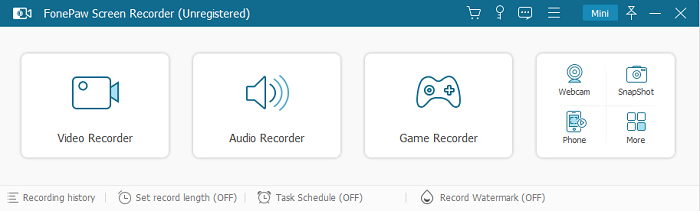
Step One: Get It Installed
Install FonePaw Screen Recorder, then enter the Video Recorder panel.
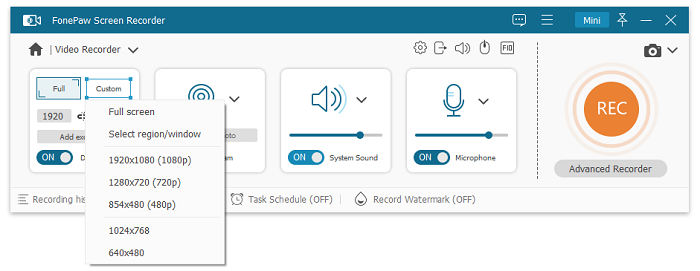
Step Two: Customize Recording Settings
As showed on the recording panel, you can click the microphone button to enable or disable system audio, microphone sound as well as to adjust the volume.
You can pull the dashed line rectangle to adjust the recording area. To record a game, you can choose Lock window mode to record only your gameplay while other actions on your PC won't be captured.
Click webcam button to add webcam overlay. The Webcam window can be moved wherever you want on the screen.
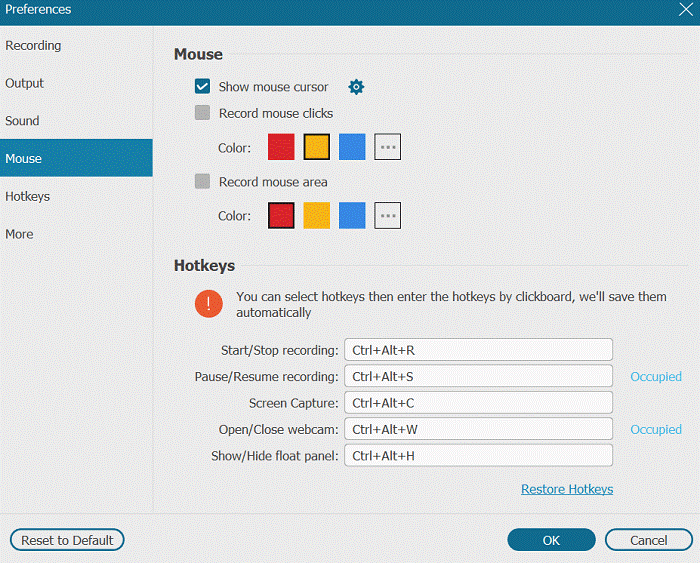
Note: Click the Preferences button and you can access more settings. Like on Bandicam, on FonePaw Screen Recorder, you can also enable mouse click effect, adjust FPS, use hotkeys to initialize or stop recording, automatically stop recording, hide the panel when recording, etc.
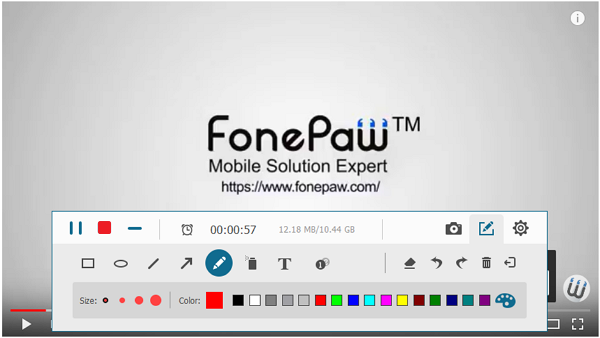
Step Three: Start Recording Gameplay, Video and Audio
Click the REC button to start recording. If you hide the panel when recording, you can find the FonePaw Screen Recorder's icon in the bottom-right corner of your desktop. Right click it to stop recording.
Step Four: Preview, Save and Share
You can easily find all the recording and screenshot files by clicking the media manager, the button at the top-right corner. Then you can share the videos to your friends or to social media like YouTube or Facebook.
All the above is the four ways to fix Bandicam "failed to initialize codec" issue. If you find this passage help, give us a like!