


People who love singing and record it or who often need to edit sound track in work may all have heard or used Audacity. Audacity is an open-source and cross-platform audio software which can both record and edit audio. As an open-source app, it possesses powerful editing functions, however, it often doesn't work in terms of recording. It can be quite irritating if you hear nothing after having spent much time and efforts in recording your fully-prepared singing or some other precious voice.
Here are how to fix Audacity when it is not recording mic or sound on Winodws. If none of the solutions work for you the simplest solution is to install another professional recorder software - FonePaw Screen Recorder (opens new window).
Set Audio Host to MME
MME is the acronym of Multimedia Extensions which is the default audio host for Audacity to make sure sound of any sources on the computer can be input and recorded. But sometimes the default option maybe altered and we need to switch it back on.
- Click the icon of Audacity
- On the homepage, check the option marked in the picture below.
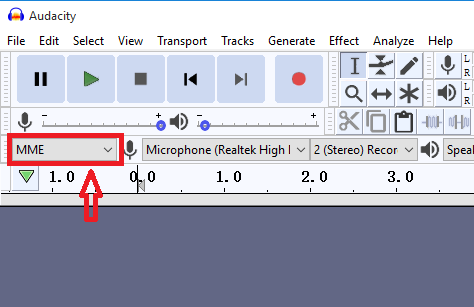
- If it is Windows DirectSound or Windows WASAPI but not MME, just click the down arrow beside it and click MME.
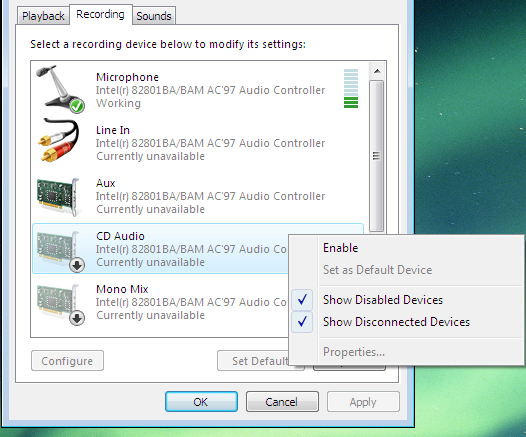
Enable All Disconnected and Disabled Recording Devices
Another way to fix Audacity that cannot record sound on Windows is to enable all disabled or disconnected devices as to ensure all sounds will be input on the computer.
- Right click the speaker icon in the system tray and click "Recording devices" (Or click Windows Start > Control Panel > Hardware and Sound > Sound ).
- Under the Recording devices tab, right click anywhere and select both "Show Disabled Devices" and "Show Disconnected Devices".
- Then you will see multiple devices, just enable them all.
Switch to A Simpler Audio Recorder
If you find none of the above solutions is helpful, the only solution may be just switching to a professional and simple audio recording software.
FonePaw Screen Recorder (opens new window) is usualy used to record screen activities in videos, while it also has a audio recorder that can record sound from system and microphone. Therefore, with this recorder, you can record your voice using a microphone as well as streaming music or other sounds coming from your computer.
And unlike Audacity that comes with so many settings and options, FonePaw Audio Recorder is much more simpler, with only two buttons: turn on system sound and enable microphone voice.
The recorder can record audio on computer in easy 5 steps.
Step 1 Click the button below to download FonePaw Screen Recorder.
Free Download Buy with 20% off Free Download Buy with 20% off
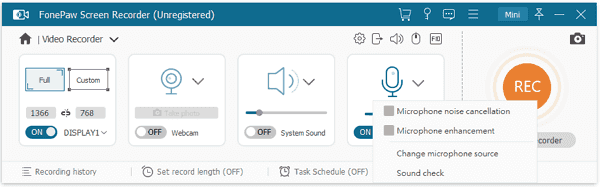
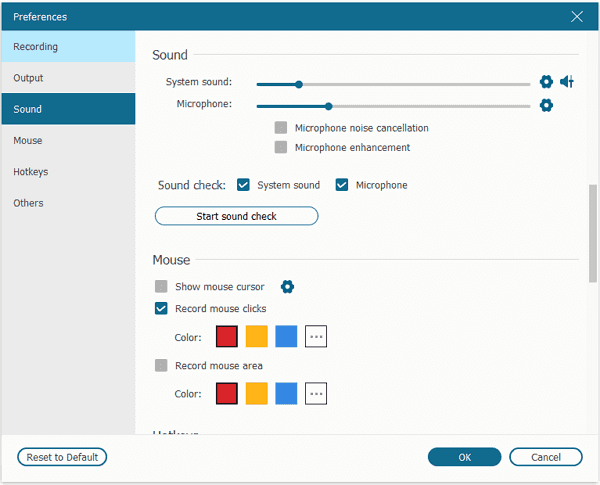
Step 2 Double-click the icon of FonePaw Screen Recorder and you will see a clear and concise interface with three options. If you turn on system sound and microphone option, please enable "Microphone noise cancellation" and "Microphone enhancement" to optimize the sound quality.
Step 3 Click the second loudspeaker icon to start your audio recording.
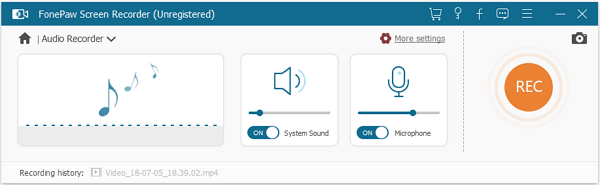
Step 4 In the Audio Recorder setting page, you can choose whether to turn on both system & microphone sound or just turn on one of them by just clicking the switch button below their icon. And you can adjust the volume of them by sliding the volume bar.
Step 5 After the appropriate setting, you can try 20-second audio recording with sound check. Next, hit the orange button REC on the left side and there you go.
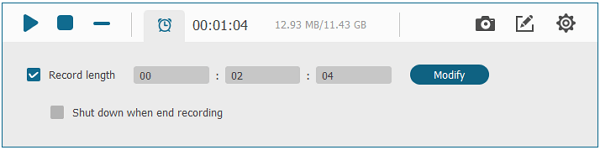
During audio recording, there is a float panel for you either to pause & stop the recording or adjusting the volume of both system sound and microphone sound. Clicking the double-vertical-bar icon can temporarily pause the recording and clicking the icon again will resume it. Clicking single horizontal bar allows you to minimize the float panel into the system tray.
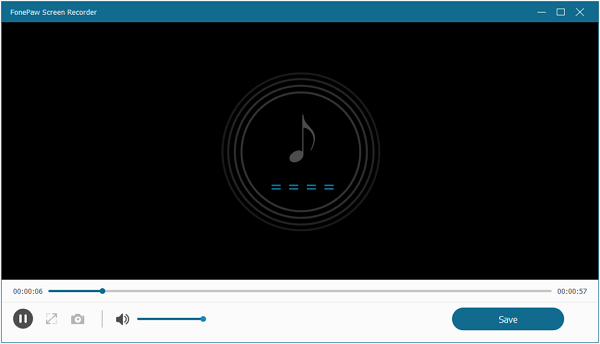
To stop the recording, hit the blue square button. After you hit stop button, a player window will pop up to play the recorded audio and clicking the "Save" on the right bottom corner will show a window for you to select file path for saving. After selecting, click "Next" and your audio will be saved in the selected path.
Another feature worth mentioning is the scheduled recording function. During recording, clicking the clock icon on the float bar enables you to set the recording time. By this way, it will free you from waiting by the laptop when you try to record some online or live streaming audio.
So much for audio recording. If you feel it useful, why not share with your friends?