


Although there are many rooting tools online, some users prefer to root or unroot their Android device manually using recovery mode. Some software may charge for the rooting or unrooting service, but rooting (unrooting) in recovery mode is totally free. And as long as you keep to the right steps, rooting/unrooting in Android recovery mode can be just as easy as using rooting software.
To be noted that this method is suitable for those devices that are installed the customer recovery package, called TWRP. Thus, if your device is equiped with the official one, here suggest you to root/unroot with some apps.
Solution 1: Root Android Phone in Recovery Mode
To begin with, you should get your phone well prepared for the rooting, including:
-
Make sure that your phone is fully charged or at least 60% charged. In low battery, the phone may crash during the rooting;
-
Back up important files on your phone, such as messages, contacts, photos, videos to computer or locally. It is more recommendable that you have a copy of the important files on PC. And Android Data Recovery (opens new window) is the exact tool that can help you to make a thorough backup of your phone data on PC;
-
Completely exit background applications in your phone, especially antivirus and battery checkup applications.
After the above preparation, you may get started with the rooting:
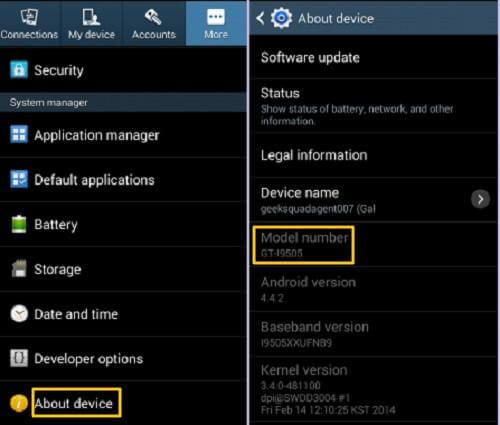
Step 1. Identify the model number of your device. For example, if you are using Samsung S3, you may go to "Settings" > "About phone" > "Model number" and find the model number.
Step 2. Download suitable root package online according to the model number of your device. The package is usually a zip file, which you can often find in forums such as xda-developers.com.
Step 3. Enable USB Debugging on your mobile phone and connect your mobile phone to the computer.
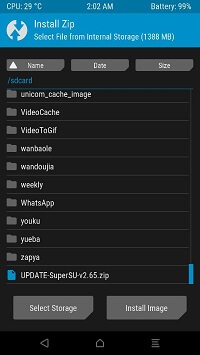
Step 4. Copy the zip file, and place the file in the SD card of your phone. Please don't paste the file into any folder of the SD card. Just place it into the main directory(root) of your SD card.
Step 5. Power off your mobile phone.
Step 6. Put the phone into recovery mode. Take Samsung device as example, keep pressing the "Volume Up" button, "Home" button and "Power" Button at the same time until you see the following page (Tip: other device such as ZTE, LG, OnePlus, Huawei, Nexus may have different button combinations to enter recovery mode).
Step 7. In the recovery menu, use the "Volume Up" and "Volume Down" button to highlight the option "Apply update from sd card". Press the home button to enter the option.
Step 8. Select the zip file that you have downloaded on SD card. The rooting process willl begin.

Step 9. Wait till the rooting is completed. Then select "reboot system now" and press "Home" button to reboot your phone (Tip: When installing some zip files, the phone will reboot automatically).
Now you'll see the Super User has installed on your phone. If you are not sure whether your phone has been successfully rooted, check the root status of your phone (opens new window).
Solution 2: Unroot Android with Ease
Here we will provide two methods to unroot your android phone.
Unrooting Android phone in recovery mode is very similar to that of rooting the phone. Again, you need to back up important files to PC with Android Data Recovery (opens new window), preparing for the risk of data loss and keep your phone fully charged.
Step 1. Download proper unroot zip file to your computer. Then copy the zip file to the main directory of the SD card of your phone.
Step 2. Switch off the phone and put the phone into recovery mode.
Step 3. On the menu of recovery mode, again, choose "Apply update from sd card". But this time, choose the unroot zip file from SD card.
Step 4. Wait till the unrooting process to finish. Then reboot your phone.
Unroot with SuperSU is strongly-recommended since it is relatively safe while the former method may cause some errors in the process of removing root. Actually, you must have installed the root manager after rooting. Thus, the following steps must be a practical means for you.
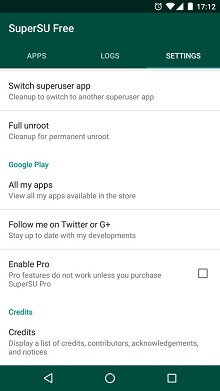
Step 1. Launch the app and move to "SETTINGS" to find out "Full unroot" so the process will begin.
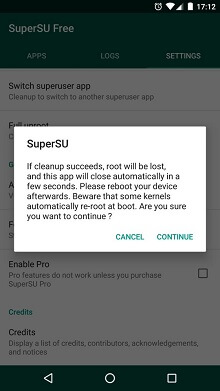
Step 2. Tap it and there is a pop-up to inform you that root will be lost if the cleanup succeeds. Just hit "CONTINUE" to fix it.
With the above method, you are able to customize your phone to the way you like. If you find this post helpful, share it with friends. If anything comes up during the rooting/unrooting process, feel free to leave a messages below.