


Usually, when we connect the external hard drive to the computer, it will show up in "My Computer" or "This PC".
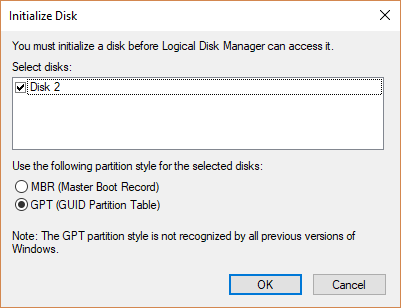
However, there is an issue that is most seen on Windows 7. When users insert an external hard disk to the computer, it does not show up and the Disk Management shows the error message: "You must initialize a disk before Logical Disk Manager can access it."
It may be caused by the wrong installation of the external hard disk or other reasons.
If you store nothing on your brand new hard drive, you can initialize it directly. But if you have lots of important data on the hard drive and are asked to initialize it, you should think twice because it will lead to losing data. Here are five effective solutions to fix the problem without losing data.
1. Initialize a disk MBR or GPT
The most effective way is to select MBR or GPT in the prompt and click OK to initialize the drive. However, initializing only makes the computer recognize your disk. To gain access to your hard disk, it will further create partitions and format the partitions after initialized. Here comes the problem: formatting will erase the data on your disk. Thus, if you want to save those important files on the external hard drive, you need a data recovery program like FonePaw Data Recovery (opens new window) to rescue the data after initializing.
Here are the specific steps:
First, initialize the external hard disk.
Select the disk style between MBR and GPT then click OK. When it finished, it will show up in This PC or My Computer.
Second, recover data from the external hard disk.
After initialized, both of your computer and the data recovery software can detect your hard disk.
Step 1 Download and install FonePaw Data Recovery.
Free Download Buy with 20% off Free Download Buy with 20% off
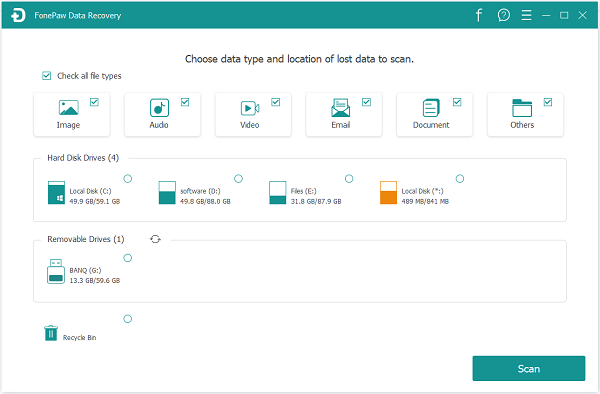
Step 2 Scan the files from the initialized disk. Launch FonePaw Data Recovery and you will see the file types and location. Choose the file types and the initialized external hard drive you need to recover. Then click Scan.
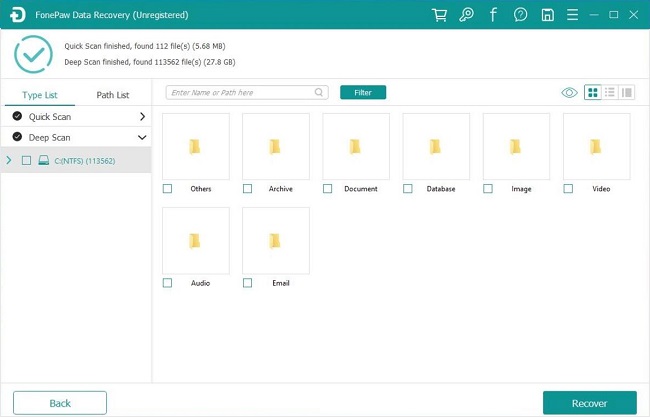
Step 3 Check the scanning result. You can find your data through the Type list or Path list on the left panel. Also, you can search the files' name in the input box. If you cannot find the files you need, try a deep scan.
Step 4 Recover the lost data from the external hard drive. Select the files and click Recover, your files will be recovered within minutes. Save your files to a different disk on your computer. Using data recovery software like FonePaw Data Recovery (opens new window) after initialized is the most effective way to fix a disk that needs to be initialized without losing data.
It can recover images, videos, audios, and documents or any accidentally deleted files from external hard drives like HDD/SSD/USB and the crashed PC.
Third, format your disk in Disk Management.
Step 1 Right-click the unallocated space and choose New Simple Volume. Click Next to continue.

Step 2 Follow the instructions to specify the settings then format the partition (opens new window).
If you are still worrying about initializing will erase the data, here are four more ways that can help you.
2. Update USB Driver Software
If you have a USB flash drive that won't show up and get "You must initialize a disk before accessing it", you can try to fix it without initializing the drive by update the USB driver software in Device Manager.
Step 1 Click the Start button and type Device Manager.
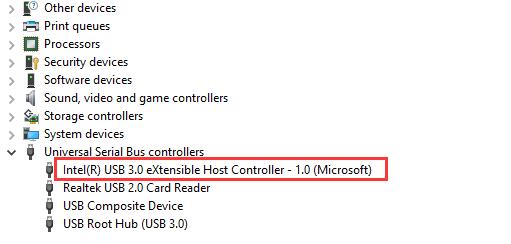
Step 2 Expand Universal Serial Buts controllers.
Step 3 Find your hard drive and right-click. Select Update Driver Software.
Step 4 Choose to Browse my computer for driver software.
Step 5 Check the Include subfolder box and click Browse. Select the C:\windows folder and click OK.
Step 6 Click Next and it will be done.
3. Reinstall the USB device driver
If updating USB driver software doesn't work, try reinstalling the USB device driver.
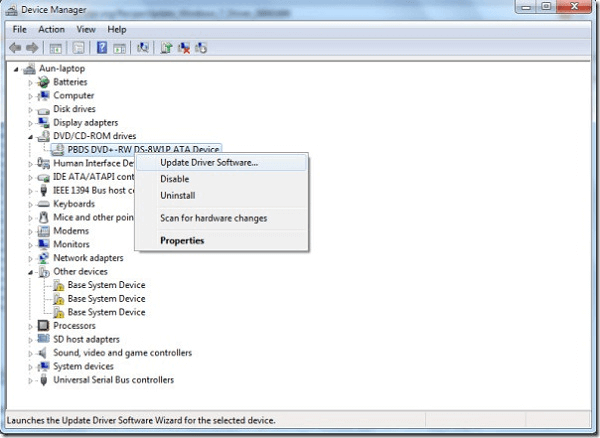
Step 1 Go to Device Manager and find your hard drive in Universal Serial Buts controllers.
Step 2 Right-click and select the Uninstall device.
Step 3 Once you uninstall the device, go to Action in the taskbar above and select Scan for hardware changes.
![]()
Windows will automatically detect and reinstall the hard drive.
4. Delete the USB filter drivers
Step 1 Click Start and type Regedit in the search box.
Step 2 Go to HKEY_LOCAL_MACHINE > SYSTEM > CurrentControlSet > Control > Class
Step 3 Under the Class key, click {36FC9E60-C465-11CF-8056-444553540000}.

Step 4 In the right panel, look for registry values titled file UpperFilters and LowerFilters. Right-click and select Delete.
Step 5 Confirm the selection and restart your computer. After that, you can open My Computer and check if your USB drive shows up now.
5. Reinstall the USB controllers
Step 1 Type devmgmt.msc in the search box.
Step 2 In Device Manager, expand Universal Serial Bus controllers.
Step 3 Right-click on the Host Controller and select Uninstall. Repeat and uninstall all Host Controller.
Step 4 Restart the computer and the system will reinstall all USB controllers automatically.
Above all, the first method might be the most effective in fixing a hard drive that must be initialized before accessing it. If you are scratching your head about the initializing problem, why not give it a try?