


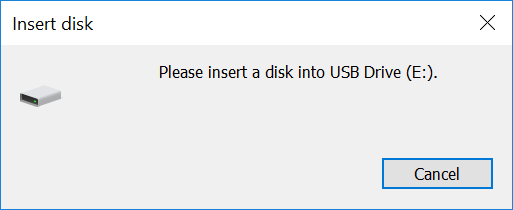
USB drives are portable and easy to use, but sometimes unexpected errors hamper their working. You may have experienced such a situation wherein you plug your USB flash into the computer, it got detected and showed up as a drive, but when trying to open it, an error pops up, saying that "Please insert a disk into USB drive (removable drive)".
This is a common error associated with USB drives. If you are troubled by this issue, you should read this article to learn how to remove the error and how to access files from your USB drive when it's inaccessible.
# What does please insert a disk mean?
If you're aware of the causes of the error, then you can bring your USB drive back on track. Below are some possible reasons for the error "Please insert a disk into USB drive".
- The voltage of the front/rear USB port is unstable.
- The drive has been damaged and unreadable.
- The USB manufacture's firmware can't be loaded by your computer controller, causing the drive to boot in fail-safe mode.
- Your drive tries to get a drive letter that has been assigned or reserved.
- Windows is unable to increase the drive.
If you are still obsessed with this error and fail to access your files, then read the following solutions we provided to fix the issue.
# Access files from the USB drive(removable disk)
When you encounter this error and can't access to multimedia files in your USB device, you can use the advanced hard drive recovery program, FonePaw Data Recovery (opens new window), to save some important data before repairing the hard drive. This professional tool can recover almost all file types from raw or inaccessible hard drives like USB, external hard drive (opens new window) and memory card. It works with Windows 10/8/7.
Free Download Buy with 20% off Free Download Buy with 20% off
To access files from your removable disk:
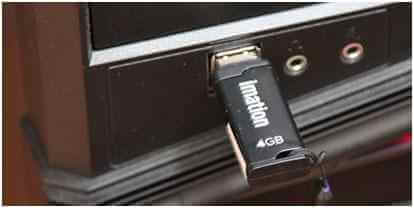
Step 1: Plug your USB flash into the computer.
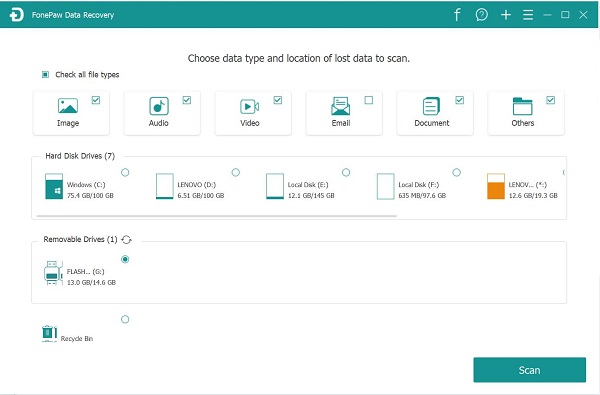
Step 2: Launch FonePaw Data Recovery. Select file types that you want to retrieve and then choose the inaccessible hard drive under Removable Drives.
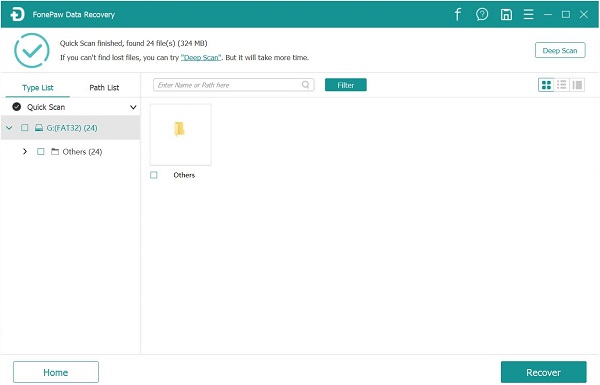
Step 3: Click Scan to scan data on your USB device, then picked out the files you need.
Step 4: Click Recover and save the files in a safe location on your PC.
# Change USB ports
In most cases, you would insert your USB flash drive into your computer via one front USB port. There is no technical difference between the front and rear USB ports. But there are minor differences.
The front ports are designed for convenience and connected to the motherboard with supplied pins rather than soldered directly to the motherboard. While the rear USB ports are soldered directly to the motherboard, which is usually of superior quality and more stable compared to the front USB ports.
Therefore, connect your USB device to your computer via the rear USB port to see whether the issue is fixed. If not, you can also consider changing the USB cable.
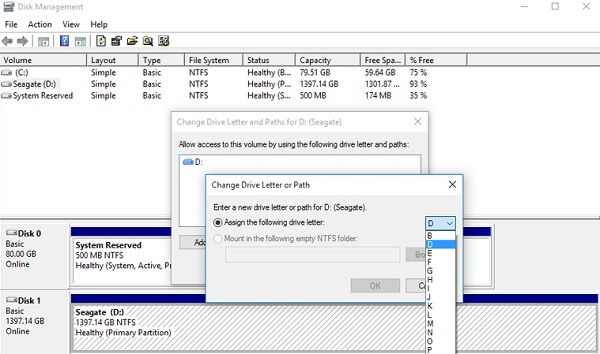
# Assign a new drive letter
This USB drive error could happen when your USB flash tries to occupy the drive that you've assigned with the same drive letter. If you find there is a conflict in the drive letter, use the following methods to manually assign a new drive letter to your USB.
- Log in Windows as Administrator account or any other account with administrative privileges.
- Then press Windows key + X and click Disk Management.
- Right-click your removable drive partition and click Change Drive Letter and Paths.
- Change the drive letter to some other drive letter that has not been assigned in Windows, like X:, Z:, or H:.
# Heat up or cool the drive
- Connect your USB to the computer and heat it with a hairdryer.
- After a few minutes, remove your USB and plug it in and out a couple of times.
- If it is still not working, do the same thing to cool it with compressed air.
If it starts working, copy the files at once since it may stop working suddenly.
# Run hardware and Device troubleshooter
To resolve this issue, you can also use the built-in Hardware and Device Troubleshooter on your Windows. This automated troubleshooter will try to identify some hardware and external device-related issues and then solve the problem.
- Click Start menu > Settings > Update & Security > Troubleshoot.
- Select Hardware and Devices and click Run the troubleshooter. The troubleshooter will automatically detect the problem and presents you with a report after scanning.
- Tick the problem that you want to fix and click Next.
# Run System File Checker scan
System File Checker tool can help you scan Windows to find corrupted files and restore them.
Step 1: Type Command Prompt or cmd in the Search box, right-click it and select Run as administrator.
Step 2: Type DISM.exe /Online /Cleanup-image /Restorehealth and press Enter to run the Deployment Image Servicing and Management (DISM) tool. (If you are using Windows 7, skip to Step 3)
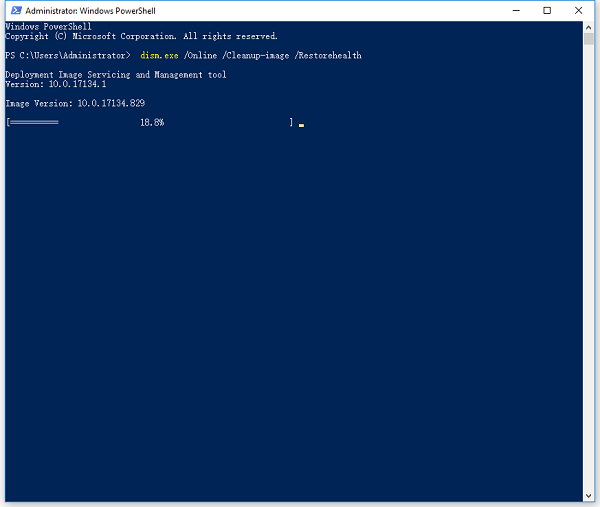
Note: When using this command, Windows Update is necessary. If your Windows Update client is broken, run the following command:
DISM.exe /Online /Cleanup-Image /RestoreHealth /Source:C:\RepairSource\Windows/LimitAccess
This replaces the C:\RepairSource\Windows placeholder with the location of your repair source.
Step 3: Type sfc/scannow in the Command Prompt and press Enter. Close the prompt when the verification is 100% complete.
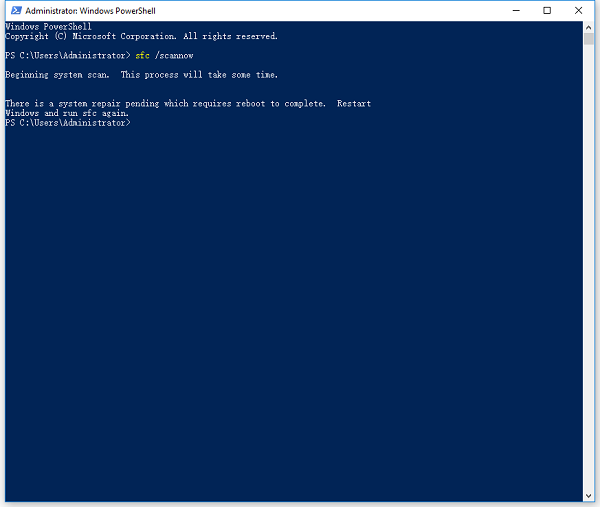
Step 4: After that, you will receive one of the following messages.
- "Windows Resource Protection did not find any integrity violations." This indicates that there are no missing or corrupted system files on your computer.
- "Windows Resource Protection could not perform the requested operation." In this case, you need to perform the System File Checker scan in safe mode and make sure that PendingDeletes and PendingRenames folders exist under %WinDir%\WinSxS\Temp.
- "Windows Resource Protection found corrupt files and successfully repaired them. Details are included in the CBS.Log %WinDir%\Logs\CBS\CBS.log."
- "Windows Resource Protection found corrupt files but was unable to fix some of them. Details are included in the CBS.Log %WinDir%\Logs\CBS\CBS.log." To solve this problem, you need to view details of the System File Checker process to find the corrupted files and then manually replace the corrupted files with a known good copy of the files.
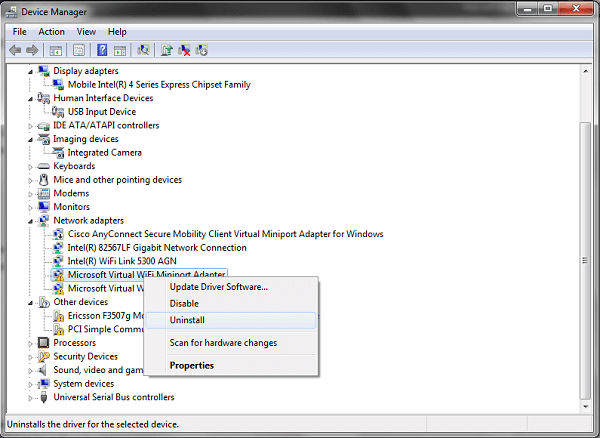
# Scan for hardware changes
You can also remove the "Please insert a disk into removable disk" error by using the feature "Scan for hardware changes". It is used to examine and load the changes you've made to your USB drive so that you can figure out the problem and fix it.
Step 1: Right click This PC, select Manage > Device Manager.
Step 2: Go to Disk drives > your USB drive, then right-click and select Scan for hardware changes.
Step 3: Check whether your USB drive works properly.
# Use the manufacturer's repair utility
Using the manufacturer's repair utility is also an option to resolve the issue. Some USB manufacturers provide repair utilities on their websites, such as Apacer USB Repair Tool (opens new window), HP USB Disk Storage Format Tool (opens new window), which can be used to fix a few problems with their USB drives. You can download them from the websites and run the executable, then follow the instructions to complete the recovery process.