


macOS has been updated to macOS High Sierra. If you have upgraded your iMac or MacBook to macOS High Sierra and don't enjoy it, perhaps because that some apps you rely on no longer work on High Sierra or your Mac runs slow after the upgrade, you can downgrade from macOS High Sierra and revert to the previous version of macOS or Mac OS X.
This post will introduce you three ways to downgrade macOS High Sierra to Sierra, Mac OS X El Capitan, Yosemite or earlier. The methods can also be applied to downgrade macOS Sierra, Mac OS X El Capitan and more.
Restore from a Time Machine Backup
If you have backed up your Mac with Time Machine before the macOS High Sierra upgrade, you can simply downgrade High Sierra by restoring the backup. You should know that restoring a backup from Time Machine erases everything on your startup drive, so back up files that you have since the High Sierra upgrade to an external drive. Otherwise, you will lose the files after getting back to Sierra or other version of Mac OS.
Step 1: Enter recovery mode on Mac
If you backed up with Time Machine to an external drive, connect the external drive to your Mac and click Apple menu > Restart. As the Mac boots up, press and hold Command + R key until you see the Apple logo.
Step 2: Select Restore From Time Machine Backup
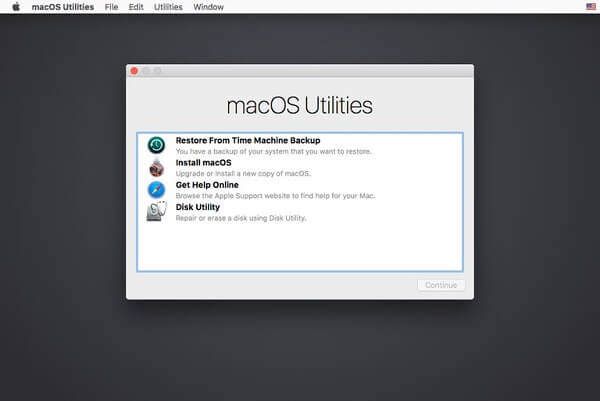
The macOS Utilities menu will appear. Select "Restore From Time Machine Backup" and click Continue.
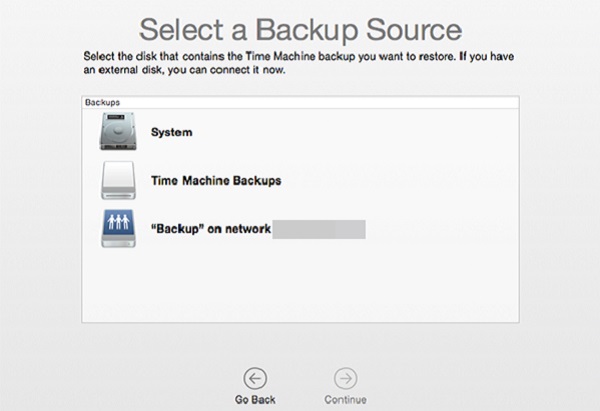
Step 3: Select backup disk
If your Time Machine is on an external drive, select your external drive as the backup disk. If you backed up to a network drive, like Apple's Time Capsule, select the network drive.
Step 4: Choose a backup to revert
All your backups will be displayed. Choose the one that you made before updating to High Sierra/Sierra. Your Mac will get back to the previous version of Mac OS after the restoration.

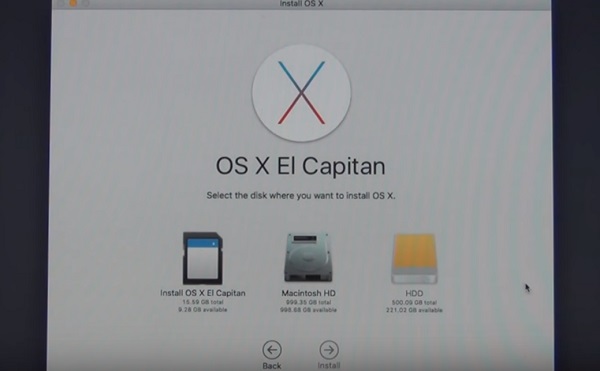
Install OS X El Capitan or Older Version
If you don't have a backup, here is how to downgrade macOS or Mac OS X without a backup. To do that, you will need a bootable installer of the Mac OS that you want to revert to and then use Recovery mode to uninstall macOS High Sierra/Sierra and clean install an older version. Guides to create a bootable installer and clean install Mac OS (opens new window).
Revert to the macOS that Came with Your Mac
macOS Sierra brings a new feature, named Reinstall macOS in macOS Recovery, which can revert your Mac to the OS that it is shipped with. If your Mac is running on macOS Sierra 10.12.4 or higher, use Reinstall macOS to downgrade your Mac to older version of macOS or OS X.
- Restart Mac while pressing the keys combination: Shift + Option or Option + Command + R.
- You'll enter the macOS recovery. Choose the Reinstall macOS (or Reinstall OS X) option from the macOS Utilities menu.
- Click Continue and select your startup disk to install the older Mac version.
- When your Mac restarts, the Mac has been downgraded from High Sierra to the original version that it is shipped with.
How to Recover Lost Data after Downgrading macOS
If any data lost after downloading macOS Mojave, High Sierra, Sierra, you can use FonePaw Mac Data Recovery to restore the lost files. The program is compatible with macOS. It can recover lost photos (psd, jpg, png, heic, gif, etc.), videos, documents (word, excel, ppt, pdf, iWork files, etc.) and more on Mac.
Step 1. Download and install FonePaw Data Recovery on your Mac.
Free Download Buy with 20% off
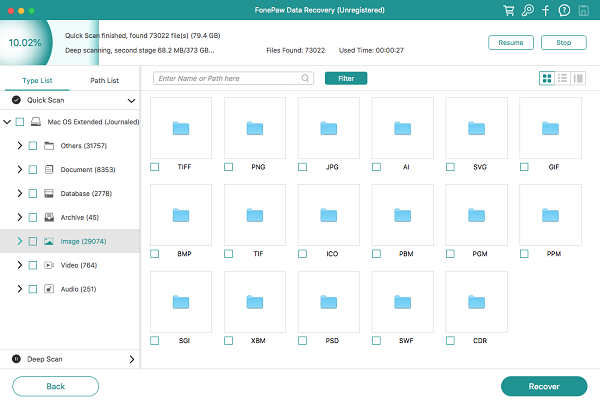
Step 2. Select the drive that are used to store the lost files and check all kinds of files that are lost in the downgrading.
Step 3. Click Scan. And after the scanning, select the lost files and click Recover.
If you have any question about downgrading macOS or OS X, feel free to leave the question on the comments.