


To install macOS or OS X from USB, you need to create a bootable install USB drive for Mac operating system. This tutorial will introduce you three ways to create bootable USB drive for macOS High Sierra, macOS Sierra, Mac OS X El Capitan, Yosemite, Mavericks and more.
Use 'createinstallmedia' Command in Terminal
The most recommendable way to create a bootable install USB drive for Mac OS is using 'createinstallmedia' Command with Terminal application.
Step 1: Download macOS or OS X
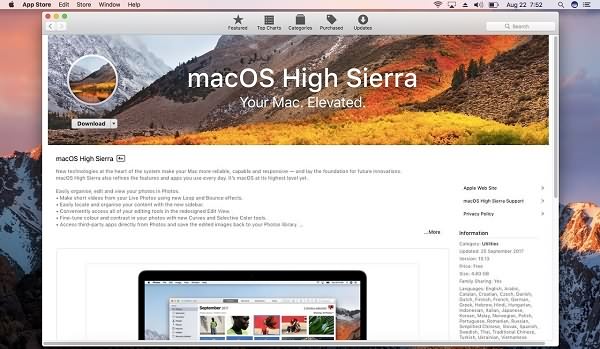
The first thing to do is to download the Mac operating system that you need. To install the latest Mac OS, for example, macOS High Sierra, you can search and download the installer from App Store.
To download the older Mac OS X version, you can go to App Store > Purchases to download the Mac OS X El Capitan, Yosemite, Mavericks that has been previously downloaded.
However, Apple has decided that macOS Sierra and later will no longer be listed in Mac App Store's Purchased. To download the installer of macOS Sierra, go to Apple Support.
Note: After downloading the Mac OS installer, do not install the OS but quit the installer.
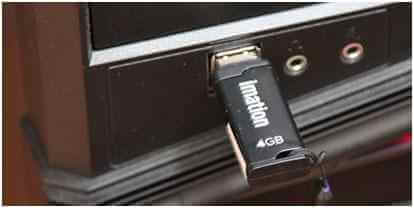
Step 2 Get A USB Drive with Sufficient Storage
You should have a USB drive with at least 8 GB of storage and insert the USB drive into your Mac. If you need to create a bootable USB drive of macOS High Sierra, 16 GB USB flash drive is suggested. In fact, USB drives with larger storage, like 32 GB to 64 GB, tend to show better performance.
IMPORTANT: The contents of the drive will be erased after creating a bootable installer drive. Therefore, make sure there is nothing important on your flash drive before you continue with the following steps.
Step 3 Check the Name of Your Flash Drive
The following command is to create a bootable copy of Mac OS installer on a USB drive named FlashInstaller. If your USB drive has a different name, replace FlashInstaller in the command with the name of your USB drive. If you don't want to modify the command, change the name of your flash drive into FlashInstaller.
Step 4 Create A Bootable USB Drive of macOS/OS X
Launch Terminal enter the following command according to the version of Mac operating system that you are dealing with.

macOS High Sierra Installer
sudo /Applications/Install\ macOS\ High\ Sierra.app/Contents/Resources/createinstallmedia --volume /Volumes/FlashInstaller --applicationpath /Applications/Install\ macOS\ High\ Sierra.app --nointeraction
macOS Sierra Installer
sudo /Applications/Install\ macOS\ Sierra.app/Contents/Resources/createinstallmedia --volume /Volumes/FlashInstaller --applicationpath /Applications/Install\ macOS\ Sierra.app --nointeraction
OS X El Capitan Installer
sudo /Applications/Install\ OS\ X\ El\ Capitan.app/Contents/Resources/createinstallmedia --volume /Volumes/FlashInstaller --applicationpath /Applications/Install\ OS\ X\ El\ Capitan.app –nointeraction
OS X Yosemite Installer
sudo /Applications/Install\ OS\ X\ Yosemite.app/Contents/Resources/createinstallmedia --volume /Volumes/FlashInstaller --applicationpath /Applications/Install\ OS\ X\ Yosemite.app –nointeraction
OS X Mavericks Installer
sudo /Applications/Install\ OS\ X\ Mavericks.app/Contents/Resources/createinstallmedia --volume /Volumes/FlashInstaller --applicationpath /Applications/Install\ OS\ X\ Mavericks.app –nointeraction
Tip: If you didn't download the installer from Mac App Store, you must modify the file path after "applicationpath".
After pasting the command on the Terminal, hit Enter key. You'll be asked to enter your Mac's password. Enter the password and hit Enter.
Then you need to check the name and path of your USB drive. If it is correct, press "y" then hit "Enter". The Mac will begin to create a bootable install drive for macOS High Sierra, macOS Sierra, Mac OS X El Capitan/Yosemite/Mavericks. When it is done, Terminal will shows "Done".
To install macOS or OS X from the USB flash drive, check how to clean install Mac OS from USB (opens new window).
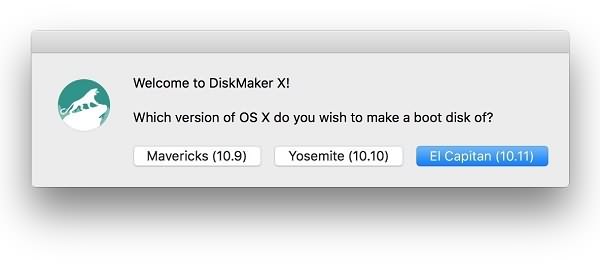
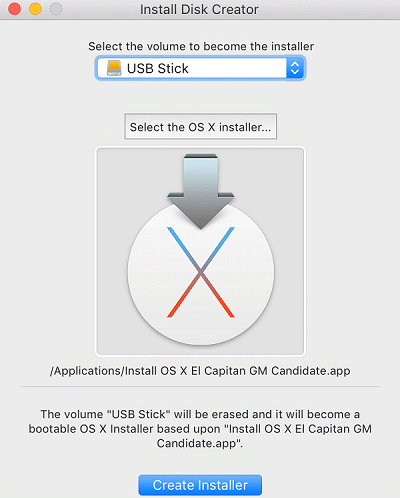
Make A Bootable Installer for macOS via DiskMaker X or Install Disk Creator
If you think it is too much trouble to use Terminal to make a bootable installer on a USB drive, you can use tools like DiskMaker X, Install Disk Creator. Both the tools can make an install drive for macOS Sierra, OS X El Capitan, OS X Yosemite and more.
DiskMaker X: When you launch the application, it will try to find the downloaded macOS or OS X installers program on your Mac. And you just need to follow its on-screen instructions to create a bootable USB drive by clicking a few buttons.
Install Disk Creator: Once you run the application, select a USB drive, choose a Mac OS installer, and click Create Installer to begin to create an install USB drive.
Disk Utility to Create a Bootable macOS/OS X Installer
Before using createinstallmedia command, people used to use Disk Utility to create a bootable installer drive manually. But the process is much more complicated than the Terminal method. So Apple also suggests you make a bootable install drive via Terminal.
Just in case that you don't want to use Terminal, you may follow these steps to build a USB drive for Mac OS X or macOS.
- Mount the Mac OS installer to get .DS_Store, BaseSystem.chunklist, and BaseSystem.dmg. Files from InstallESD.dmg file.
- Use Disk Utility's Restore feature to create a copy of the OS Install ESD image.
- Modify the copy of the OS Install ESD image to make it boot successfully.
Do you have other question about making a bootable USB drive for macOS or Mac OS X? Leave your comment below.