


As a crucial element of modern life, Wi-Fi is indispensable for most of us. A Wi-Fi network interruption for even a second could drive us nuts. For Mac users, that may happen when:
- You could connect your Mac Air to Wi-Fi, but the connection is slow and unstable;
- MacBook Pro/MacBook Air won't connect to Wi-Fi;
- Mac's Pro Wi-Fi is connected but still no internet;
- MacBook won't connect to Wi-Fi but iPhone and other devices will;
- Wi-Fi keeps turning off itself on your MacBook Pro.
For all of your Wi-Fi connection problems on iMac/iMac Pro/MacBook Air/MacBook Pro, we have developed eight solutions for you, each has been tested as workable.
People Also Read:
How Do I Fix iPad/iPhone Wi-Fi Greyed Out (opens new window)
[Resolved] Samsung Galaxy S8 Won't Connect to Wi-Fi (opens new window)
Solution 1: Check Apple's Wi-Fi recommendations
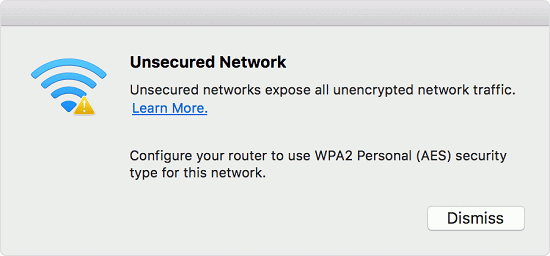
When your Mac tries to link a Wi-Fi network, it searches for issues that prevent it from a fast and stable Wi-Fi connection. If your Mac finds such an issue, the Wi-Fi status menu 6in the menu bar appears: Wi-Fi Recommendations.
Click on "Learn More" to access recommended solutions to solve your problem.
Solution 2: Reboot your router
Sometimes it is your router other than your Mac that causes the Wi-Fi connection issues. To test whether it is your router's fault, shut it down and turn it on again.
Solution 3: Reboot your Mac
Similar to restarting your router, it is also workable to reboot your Mac to improve your Wi-Fi connection.
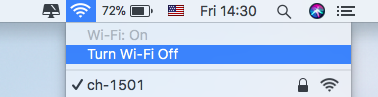
If you still can't connect to Wi-Fi after rebooting, shut the Wi-Fi down (Click on Wi-Fi status icon > "Turn Wi-Fi OFF") and then wait for a few seconds before turning it back on again for available networks.
Solution 4: Disconnect Bluetooth
In some cases, the Bluetooth connection may affect your Wi-Fi connection on your MacBook or iMac, so for some people turning off Bluetooth is workable.
Click on the Bluetooth icon (next to the Wi-Fi icon) at the upper right corner and click "Turn Bluetooth Off".

Solution 5: Forget the network
Once in a while, letting your Mac forget Wi-Fi temporarily do help fix the Wi-Fi problem on your Mac.
Step 1: Click on Wi-Fi icon > "Open Network Preferences" > "Advanced".
Step 2: Select the network you want your Mac to forget.
Step 3: Click on "-" sign to remove it.
Solution 6: Use Apple's Wireless Diagnostics
To solve Wi-Fi connection problems, Apple has already given the possible solutions.
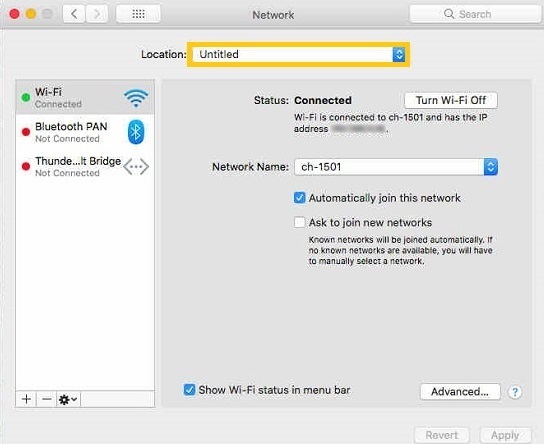
Go to Apple Menu on upper left corner > "System Preferences" > "Network".
If your Mac detects the internet connection problem, "Assist me..." will appear at the bottom of this window. Click on this and you will launch the built-in Diagnostics tool to settle your problem.
If that doesn't help, there’s another tool provided by Apple, Wireless Diagnostics, the built-in app in your Mac.
Step 1: Hold "Option" button on your keyboard while clicking on the Wi-Fi icon in the top right corner. Now you can see an interface like this:
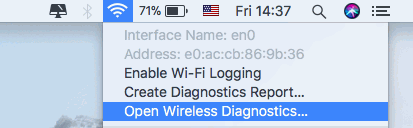
Step 2: Click "Open Wireless Diagnostics…" to tackle your problem.
Solution 7: Delete and reset Wi-Fi network settings
Since this solution will start your existing Wi-Fi settings all over again, you'd better back up your Mac first through Time Machine.
Step 1: Shut down Wi-Fi and browsers.
Step 2: On the menu bar, go to "Go" > "Go to Folder...".
Step 3: Paste the following line: /Library/Preferences/SystemConfiguration/
Step 4: Select the following files:
- preferences.plist
- com.apple.eapolclient.plist
- com.apple.wifi.message-tracer.plist
- NetworkInterfaces.plist
- com.apple.airport.preferences.plist
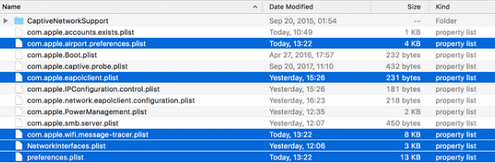
Step 5: Right-click these files > click "Move to Trash" (do not delete them).
Step 6: Reboot your Mac > click Wi-Fi icon > "Open Network Preferences".
Step 7: Turn on Wi-Fi and reselect the Wi-Fi network.
Solution 8: Customize DNS setting for your network
Now comes the toughest part of our post, the DNS settings. Don't be scared by the following steps. We can say they are the most easy-to-follow fix for computer green hands.
STEP 1: Go to Apple menu > "System Preferences" > "Network" > select Wi-Fi.
STEP 2: Click on the bar beside Location and select "Edit Locations...".

STEP 3: Click "+" sign.
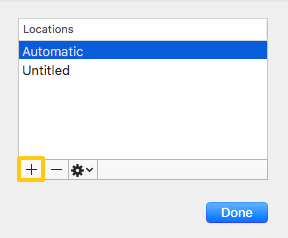
STEP 5: Name a new location, for example, "New Location", then click "Done".
STEP 6: Join Wi-Fi network, with your usual router password.
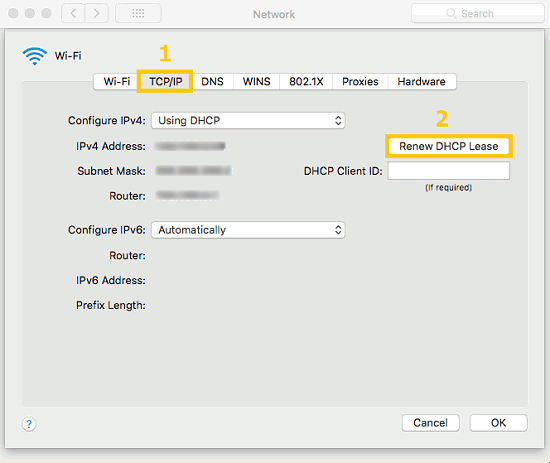
STEP 7: Go to Apple menu > "System Preferences" > "Network" > "Advanced..." > "TCP/IP" and select "DHCP Lease".
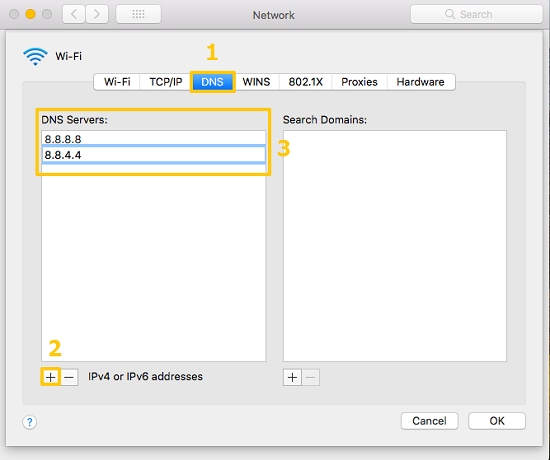
STEP 8: Then go to "Advanced..." > "DNS" and click "+" sign to add "8.8.8.8" and "8.8.4.4" to the "DNS Servers".
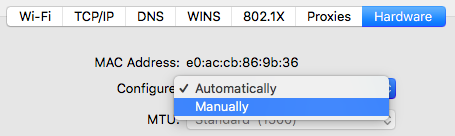
STEP 9: Go to "Advanced..." > "Hardware" > "Configure" > "Manually".
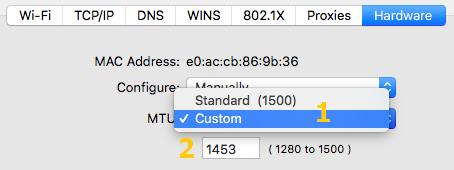
STEP 10: Go to "Advanced..." > "Hardware" > "MTU" > "Custom" and set it to 1453
STEP 11: Click "OK" and "Apply".
That's all about fixes to Wi-Fi connection problem on Mac. Leave your comments if there are questions.