


You probably have a lot of photo taken of family and friends during the holidays. How do you share these photos with them? Instagram is a popular option for photo sharing, but what if your family and friends are not on Instagram? No need to worry, there's surely a better way. In this article we've covered two effective ways to share your pictures right from your iPhone/iPad.
Solution 1: Share iPhone Photos with AirDrop
If you and your friends are iPhone user, then AirDrop is an ideal choice. It makes it extremely easy to share photo with other nearby iDevice users.
- Swiping up from the bottom of the screen to access Control Center. Turn on Wi-Fi network and Bluetooth on your device. (The recipients will need to do the same steps as well.)
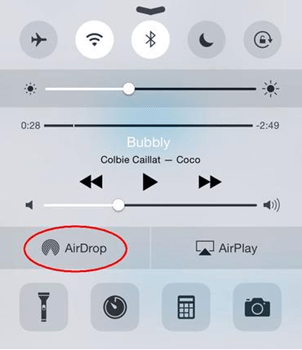
- Tap AirDrop from the pop-up menu, then you’ll see three options to choose:
• Off: Turn off AirDrop.
• Contacts Only: Only your contacts can see your device.
• Everyone: All nearby iOS devices using AirDrop can see your device.

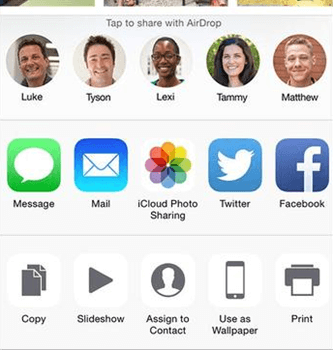
- Now the AirDrop is enabled, you can open the Photos app and select one or more pictures. And finally tap the Share button in the lower-left corner which looks like a square with an arrow coming out the top.

- You should see the name of one or more nearby AirDrop users. Tap the one that you want to share the file with via AirDrop. And the photo will be delivered in an instant.
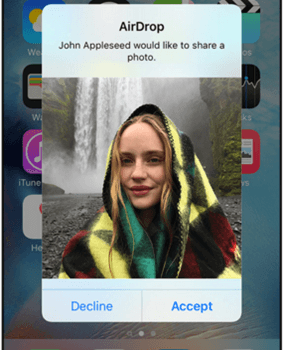
- Wait for the person to accept. The recipient will need to accept the file before it gets downloaded to their device.
There are also other additional options for sharing images with your friends. iCloud Photo Sharing is a rather good one. It allows you to create a shared album and only invited friends will be able to get access to the images and add photo to the album as well.
Solution 2: Share iPhone Photos with iCloud Photo Sharing
1. Set up iCloud Photo Sharing
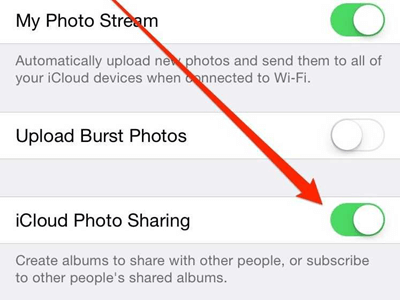
Go to Settings > iCloud > Photos and turn on iCloud Photo Sharing on iOS device.
2. Create a Shared Album
Step 1: Go to Photos > Tap Shared at the bottom of the screen > Select Sharing at the top and choose New Shared Album or Create New Album. Create a name for you album and tap Next.

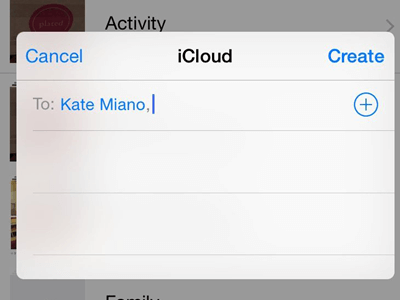
Step 2: Invite the people you want to share photos with by entering his e-mail address or select from the Contacts. Click on + button and then tap Create.
3. Add Photos to Shared Album
Go to Photos > Tap Shared > Select Sharing button > Choose the album you want to add pictures to and then tap the Add button > Select the photo you would like to add, and click Done.
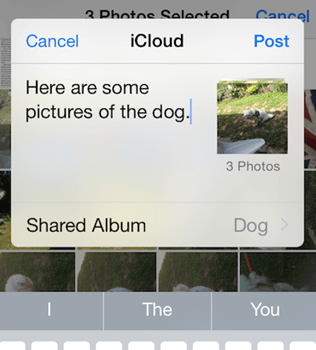
Once set up, you and your friends can share photos and videos by uploading them to the shared album.
To share iPhone pictures with friends, you can also use FonePaw iOS Transfer (opens new window) to transfer photos from iPhone to iPhone (opens new window).
And that's it! Pick up the method you like and try it now!