


While playing a game on Steam, you can capture the highlight moments by taking a screenshot or recording the screen. Thus, sharing the excitement with your game mates. However, you may have no idea where the screenshots have been saved as you can't find the local Steam screenshot folder.
In this tutorial, you'll learn three easy ways to quickly access Steam screenshot folder, including a way via Steam client, a way with online storage, and a way through local storage. If you're stuck with this frustrating situation, please keep on reading.
Find Steam Screenshot Folder through Your Steam Client
Steam client is also called Steam Screenshot Manager, which provides direct access to the screenshot folder in Steam. It is the easiest way to find and manage the screenshots in Steam. What you need to do is to find the screenshots window. Here is how.
STEP 1. Open the Steam client on your laptop.
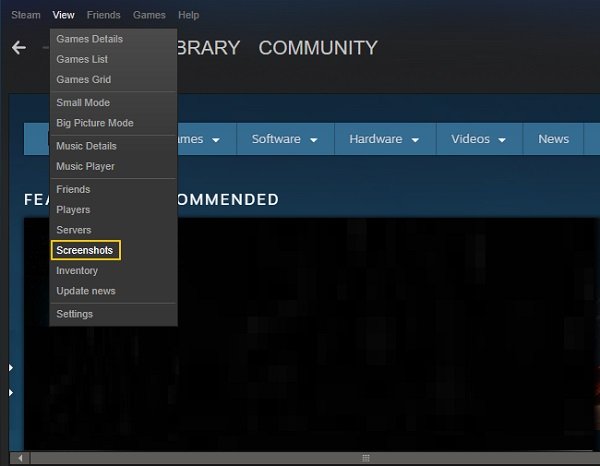
STEP 2. Click the "View" tab on the top menu bar and find "Screenshots" from the dropdown menu and click it
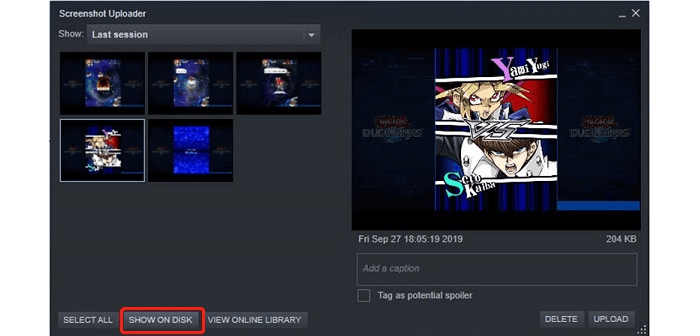
STEP 3. After clicking Screenshots, you can view all screenshots sorted by different games. Click the dropdown menu located after "Show:", which will bring up all screenshots for the game chosen by you.
STEP 4. Then, click "SHOW ON DISK" at the bottom. The screenshot folder will open automatically in a new window, showing you where these screenshots are stored on disk.
This method bothers you to open Steam client but the advantage is that you can view screenshots arranged by games and you needn't look through the whole library of screenshots.
Access Steam Screenshot Folder Online
Steam also provides a convenient online screenshot library to store your screenshot securely. After you press the hotkey (F12 by default), the screenshots will be automatically saved to Steam Cloud. This online Steam screenshot folder comes with 2GB of personal storage for limited accounts and 20GB for unlimited accounts, so that you can save thousands of screenshots of your highlight moments.
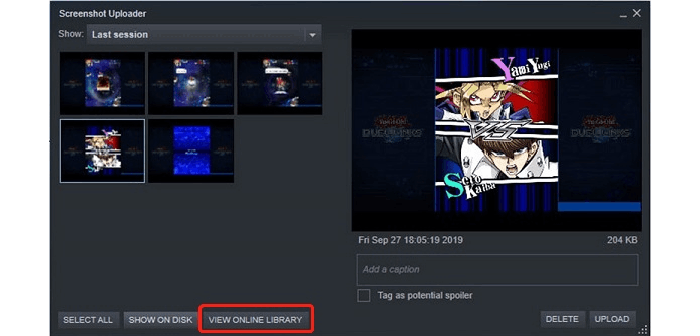
Just follow the path: Steam > View > Screenshots > VIEW ONLINE LIBRARY. As long as you log into your Steam account, you can easily access your screenshots.
Locate Steam Screenshot Folder on Your Local Storage
As you need to launch Steam by using the previous two ways, this method just requires you to input the correct path of the Steam screenshot folder into File Explorer, which is more convenient. But to proceed with it, you need to remember the information of the Steam account and remember where you choose to install Steam.
Find Steam Screenshot Folder on Windows 10
If you installed Steam with the default options, you can locate the Steam screenshot folder on Windows 10 by:
STEP 1. Press the Wins key + E to open File Explorer.
STEP 2. Input the following path into the search box and hit Enter:
C:\Program Files\Steam\userdata[USER_ID]\760\remote[GAME_ID]\screenshots
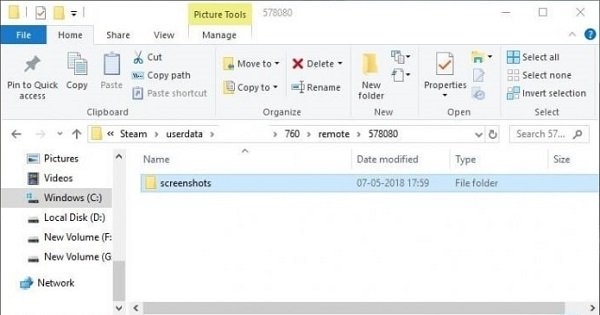
we assume the steam client is installed in the Program Files folder on Disk C so that the path starts with C:\Program Files\Steam. Otherwise, you need to change the header to the actual installation path of the Steam client.
 Note:
Note:
- "USER_ID” and "GAME_ID" are parts that you need to fill in based on your own situation. If you cannot remember it, you can open up the Steam client and click View Profiles and the Steam ID will be the number at the end located in the URL.
Find Steam Screenshot Folder on Mac
If you're using a Mac, you can follow the steps below to locate your Steam screenshot folder.
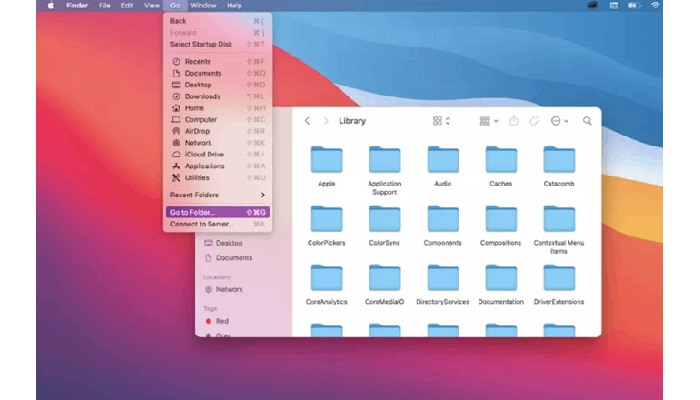
STEP 1. Hit "Go" at the top panel and click "Go to Folder"
STEP 2.Then enter the following path and click “Go”.
~/Library/Application Support/Steam
Then you can access the default Steam screenshot folder.
Extra Tip: Change Steam Default Screenshot Folder Location
Through the ways mentioned above, you can easily know where the Steam screenshot folder is. As we all know, if too many documents and programs are saved on Disk C, the computer will run slowly. Since the default folder of Steam is on Disk C, if you don't want to take up too much space on this disk, you can also change its location to another one in the Steam client. Follow the below steps to change it.
- Launch Steam client.
- Go to View > Settings.
- Click In-Game from the left bar menu on the new window.
- On the right side of the window, find "Screenshot Folder" and click it.
- Select an existing folder or create a new folder where you want to save it.
- Click on "Select" and click on "OK".
FAQs about Screenshots & Screen Records on Steam
Q1: How to download Steam screenshots from the cloud?
As the steps introduced previously, click View > Screenshots on Steam. Select a game you've taken screenshots from in the "Show:" dropdown menu then click the "SHOW ON DISK" button. When the folder is automatically in a new window, screenshots will be saved to your computer.
Q2: What is the maximum number of Steam screenshots?
According to speculation, there is roughly a 26,000±limit of maximum screenshots plus artwork total you can upload. It's hard to name a specific number as screenshots can vary heavily depending on factors like resolution and detail for instance. You will hit a limit if your storage is full.
Q3: How can I record videos on Steam instead of taking screenshots?
If you want to share the excitement with others during thrilling gaming moments, you can try to record a video clip with the powerful screen recorder FonePaw Game Recorder. The program supports recording gameplay in high quality with no lag or flash. It is easy to make.
- Download and install FonePaw Game Recorder on your computer.
- Launch it and click "Game Recorder". You can select the game you want to record by clicking the drop-down arrow.
- Then customize settings such as turning on/off the webcam, system sounds, and microphone.
- Click "REC" to start recording.
- Click the rectangle button to stop recording. Then you can preview and edit your recorded gameplay.
Conclusion
Overall, it's not hard to find the Steam screenshot folder. All three methods described above can help you locate your screenshots easily. In addition to screenshots, if you want to record a video to capture your highlight moments during the gameplay, you can try the screen recording software FonePaw Game Recorder. It is more than a game recorder. With versatile features, you can use it to capture all kinds of screen activities with high quality, meeting your diverse screen recording needs. Just download it and have a try!
