


For recording gameplay, surely players would want a professional gameplay recorder that can work without lag and record the gaming screens with high quality. If you are an Overwatch player and now need to record Overwatch gameplay with the best recording quality, this article offers 3 methods for you to select. Now, compare them and choose the best method to record the highlight gaming moments in Overwatch!
Method 1. Record Overwatch Gameplay with the No.1 Gameplay Recorder
The best recommendation for recording Overwatch gameplay should be the No.1 gameplay recorder. Compared with many other common recording tools, FonePaw Game Recorder can provide the most advanced gameplay recording services. The most distinguishing feature should be that the software can keep long-time, lag-free 4K 60fps recording for you. Even if you have to upload the gameplay recordings to YouTube or Twitch for sharing, the quality will be good for streaming.
Moreover, there’s a built-in trimmer for you to polish your recordings. And FonePaw will not add watermarks to your recordings (customizable watermarks if you need them). Considering all these aspects, it can be the best choice if you want to record Overwatch gameplay with the best quality and most enjoyable experience.
Free Download Buy with 20% off Free Download Buy with 20% off
Key Features:
- Lock the gameplay window to block disturbance.
- Capture and show your mouse cursor and keystroke effects.
- Offer Hardware acceleration to ensure a no-lag recording.
- Cut and edit your highlights with built-in Advanced Trimmer.
Now you can follow the tutorial and learn to use FonePaw Game Recorder to record Overwatch gameplay on your computer with high quality.
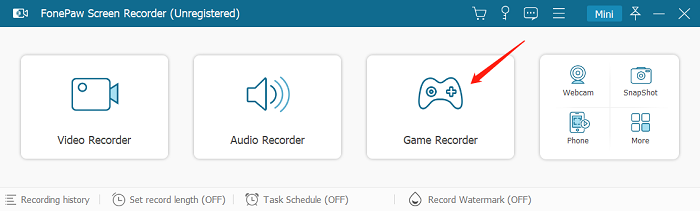
Step 1. Select Game Recorder
Open the installed FonePaw Game Recorder on your computer, then select "Game Recorder" on the Home Screen of the software.
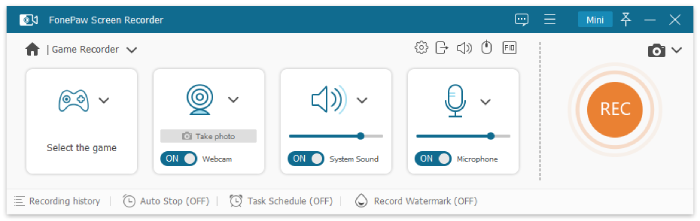
Step 2. Do Recording Settings
In the "Game Recorder" window, select the game you need to record as OverWatch, then also turn on the webcam (if you need) or adjust the volume of both the system sound and microphone.
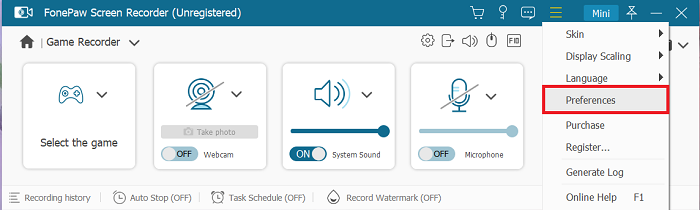
Step 3. Preferences Settings
Then by clicking the "Menu" button, from the list, you can open "Preferences" and do some "Output" settings, such as selecting the format, quality, and frame rate before starting the recording process.
Step 4. Record Overwatch Gameplay
After the settings are finished, click the "REC" button provided on the "Gameplay Recorder" interface and start recording the gaming moments in Overwatch. You can also use hotkeys to control the recording as well.
 Tip:
Tip:
- You need to know that if you hide or exit the gaming window, the recording will automatically be stopped.
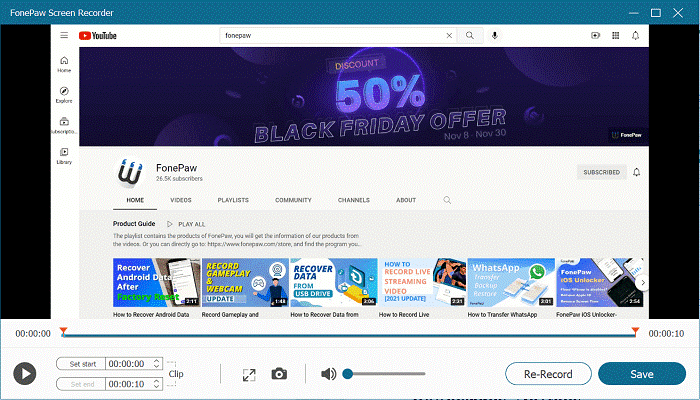
Step 5. Save the Overwatch Gameplay Recording
When the recording is over, just click the "Stop" button to end it. Then on the previewing window, preview the recording and then directly click "Save" to keep it saved offline.
Even if you want to create a gameplay tutorial, FonePaw Game Recorder can also help you do it easily. Some helpful functions such as annotation adding, mouse effect, and magnifying glass effect can be added to the video tutorials as you need flexibly!
Free Download Buy with 20% off Free Download Buy with 20% off
Method 2. Record Overwatch Gameplay with Windows Game Bar
If you are a Windows 10 or Windows 11 user, the built-in Windows Game Bar is a perfect tool you can use to record Overwatch gameplay. This feature is completely free to use, and it is specially designed for gameplay recording not only for Overwatch, but also recording Steam, Fortnite, etc. The output quality and high frame rate will also be ensured. Now you can check this guide and see how to record Overwatch gameplay on Windows 10/11 using Windows Game Bar for free.
Step 1. Firstly, you need to go to Windows settings and then turn the Windows Game Bar feature on in the "Game Mode settings".
Step 2. When you have prepared to play Overwatch, directly press "Windows" + "G" buttons and you can launch the recorder.
Step 3. Then start playing Overwatch and start recording it by clicking the "Record" button on the Game Bar.

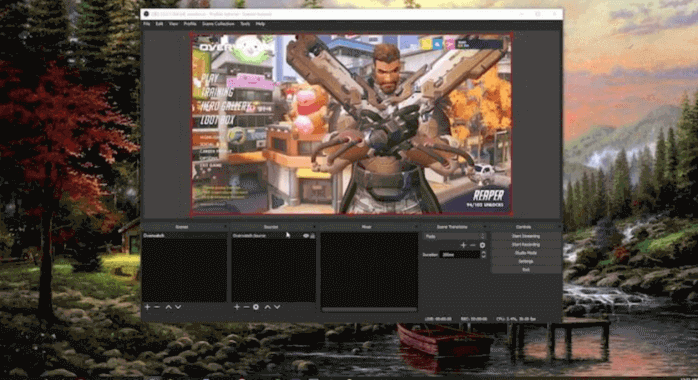
Method 3. Record Overwatch Gameplay with OBS
Another professional and free way to record Overwatch gameplay on computer is using the popular OBS Studio recorder. With flexible high-quality settings, the software can help you capture the gameplay without lag and good quality as well. But just like Windows Game Bar, OBS doesn’t offer editing tools to let you easily edit the recordings after capturing the gameplay. If you need to create video tutorials, it can’t offer you help. Now the way to use OBS Studio to record Overwatch gameplay on computer will be introduced to you.
Step 1. Open OBS Studio and then click the "+" button at the bottom of the panel to create a recording.
Step 2. Then click "Settings" and select an output folder to save the recorded Overwatch gameplay videos.
Step 3. Now, press “Start Recording” to capture the Overwatch gameplay moment.
Step 4. When the game ends, click "Stop" and the recorded video will be saved to the folder you just set.
Also, OBS Studio has connected with some popular social media platforms, so you can directly share the recorded gameplay with them and share it with your friends online. But the operation of OBS Studio would be a little complex, and some new users may have to spend time getting familiar with it in advance.
FAQs about Recording Overwatch Gameplay
How to Watch & Save Overwatch Highlights on PC
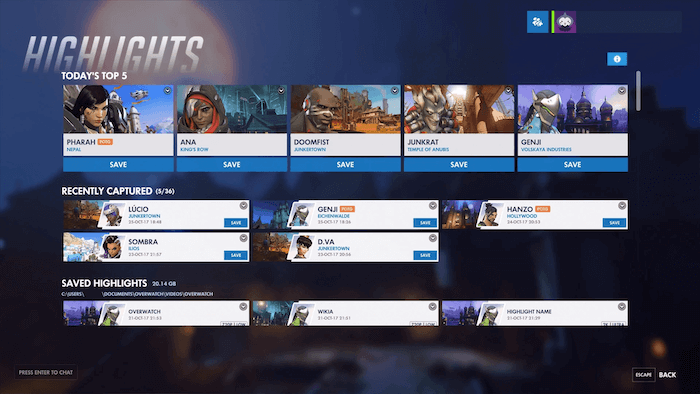
Overwatch has provided an in-built recording function called "Highlights" to save all your highlight gameplay short clips from the previous gameplay. You can access overwatch highlights location and watch by following the steps below.
Step 1. In Overwatch, select "Career Profile" on the main menu and choose "History".
Step 2. You will see the "HIGHLIGHTS" option on the left navigation bar. Click it.
Step 3. From the list, you can see the highlights of today’s top 5. Because they are only saved for 24 hours, so you can’t see the ones stored long before.
Step 4. If you need to save the highlights on the computer, just click the "SAVE" button below the video to keep it as a common video file.
Where Are Overwatch Highlights Stored
If you use the recording feature provided by Overwatch itself, after recording Overwatch gameplay and saving the recordings, you can easily find them back by going to this path:
C:\Users\(Your PC Name)\Documents\Overwatch\videos\overwatch
If you use other third-party tools such as FonePaw Game Recorder or OBS Studio to capture the highlight moment while playing Overwatch, you will need to check the output folder of them to know exactly where you can find the recordings on computers.
Conclusion
If you are finding a high-quality and no-lag recording tool with video editing functions to record Overwatch gameplay, FonePaw Game Recorder will be the first recommended option for you. For simple gameplay recording without editing functions, the Windows Game Bar and OBS Studio are both reliable to try. Just choose the best way according to your needs.
