


Just click the download button on the left to get FonePaw iPhone Data Recovery. Then learn how to use it to recover deleted files from iOS devices with the following tutorial.
Before you start, check the files/data that can be recovered and which format they will be saved as:
- Messages and attachments: CSV, HTML. Message attachments are saved as images and other attachment formats.
- Contacts: CSV, HTML, VCF.
- Call logs: HTML.
- Photos: HEIC, JPEG.
- Videos: MP4, MOV, and other video formats.
- Audios: MP3, M4A, and other music formats.
- Memos and attachments: HTML.
- Calendars: HTML, ICS.
- Reminders: HTML.
- Voice memos: M4A.
- Safari bookmarks: HTML.
- Safari browsing history: HTML.
- Third-party apps and attachments: Chat logs are saved as CSV or HTML.
- App documents: TXT and other attachment formats.
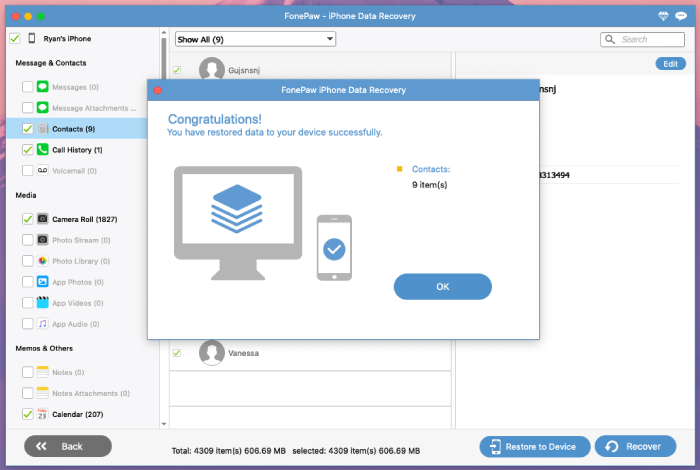
Also noted that only contacts can be recovered to your iOS device, but you can extract the other files/data to your PC/Mac.
Step 1. Download and Install FonePaw iPhone Data Recovery
Launch the program and select Recover from iOS Device from the left navigation bar.
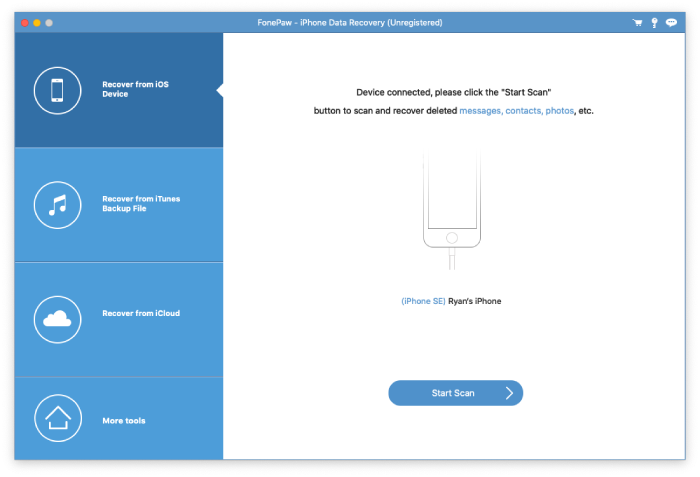
Step 2. Connect Your iOS Device to Computer
Tap Trust this computer on your iOS device and enter its passcode. When FonePaw iPhone Data Recovery detects your device, tap Start Scan to proceed with scanning the device.
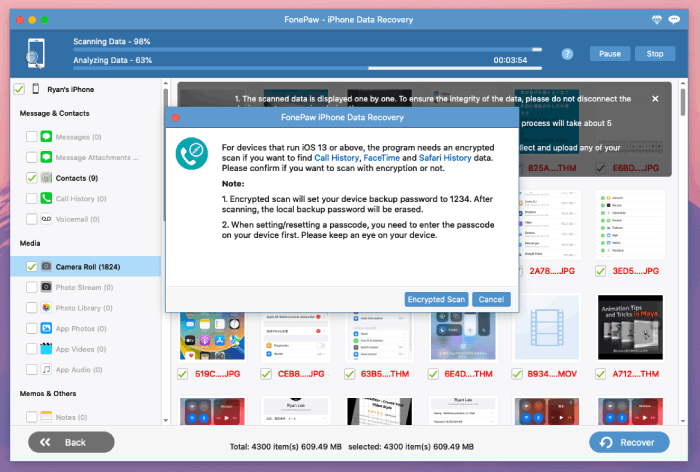
Step 3. Encrypted Scan
On devices running iOS 13 or later, the program needs an encrypted scan to find Call History, FaceTime, and Safari History data. If you have set an encrypted backup password before, skip this part and jump to Step 4. If not, just read on and then jump to Step 5.
 Tip:
Tip:
Click Encrypted Scan on the pop-up window.
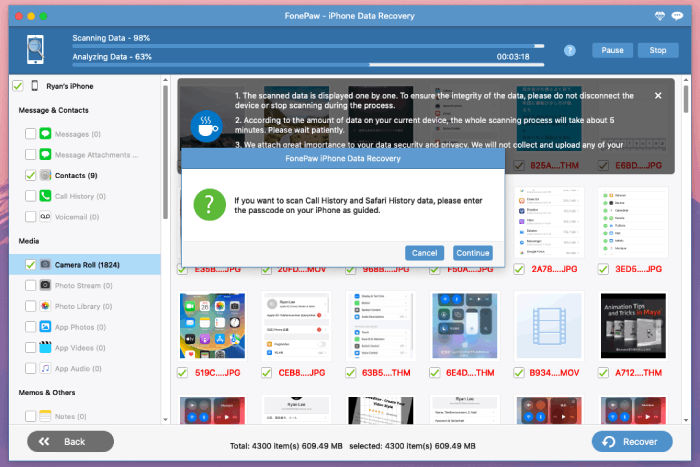
Click Continue to enable the encrypted scan.
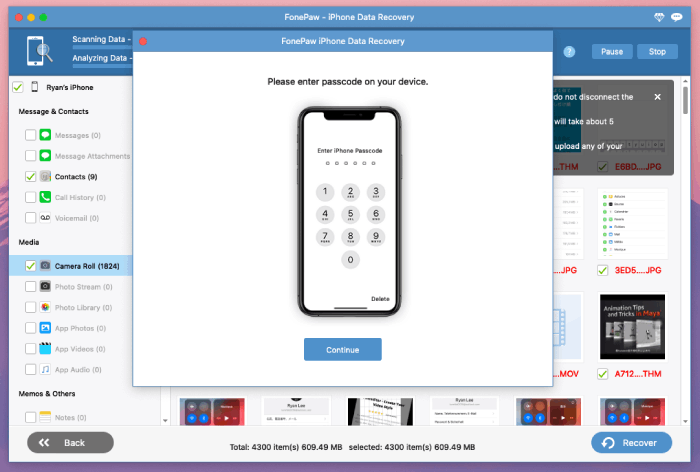
Enter the password on your iOS device and click Continue.
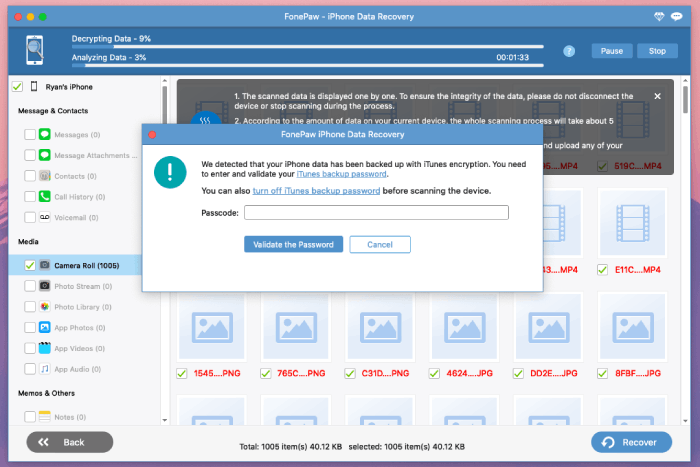
Step 4. Enter and Validate Your Encrypted Backup Password
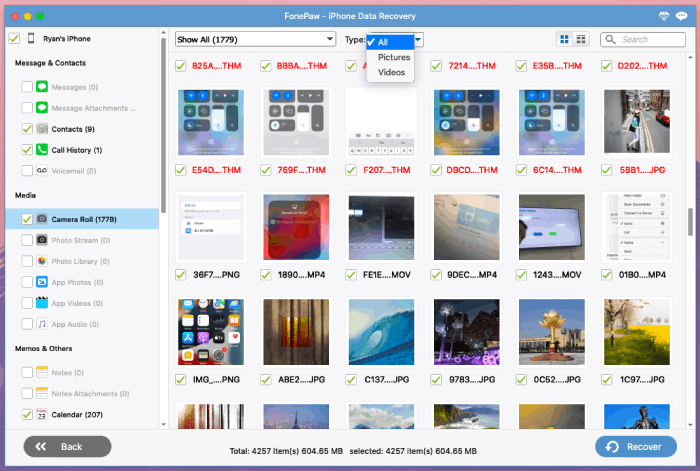
Step 5. Preview and Select Files to Recover
After scanning, you can preview all the files and data on your iOS device. The deleted files will be named in red font. Just tick the files you want to recover.
If you are using a trial version, that's all you can do with FonePaw iPhone Data Recovery. You can buy a registration code to unlock the recovery feature.
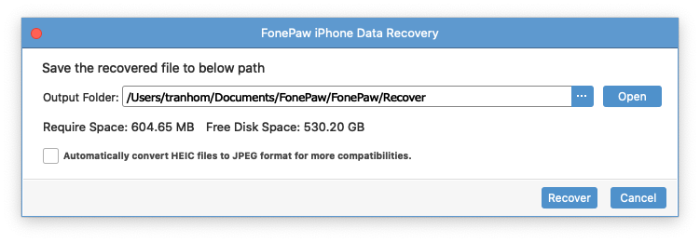
Step 6. Recover Files/Data to Your Computer
Click Recover to extract the selected files. You can choose the path where they will be saved on your computer.
Be aware that only contacts can be directly recovered to your iOS device.
Need More Help?
Questions not answered yet? Contact our support team and we’re standing by.