


The article here provides 5 methods on how to reduce image file size without losing quality, using an online image size reducer like FonePaw Online Photo Compressor being the most convenient one..
Imagine this: you are going to send an urgent email to a client, but the image file is just so large that it exceeds the maximum file size limit. This is one of the many situations where you need to reduce the image file size.
One of the problems in reducing image size is that the reduce is often realized at the cost of quality loss of the image. Thus, you might wonder how to decrease the image size while maintaining the quality. Here we provide five easy ways to reduce image size without losing quality.
Method 1. Online Image Size Reducer
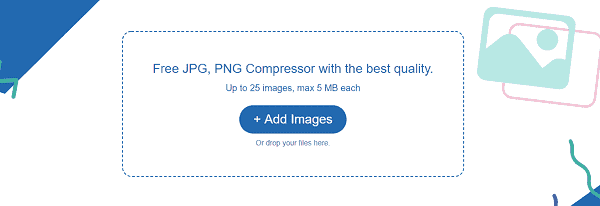
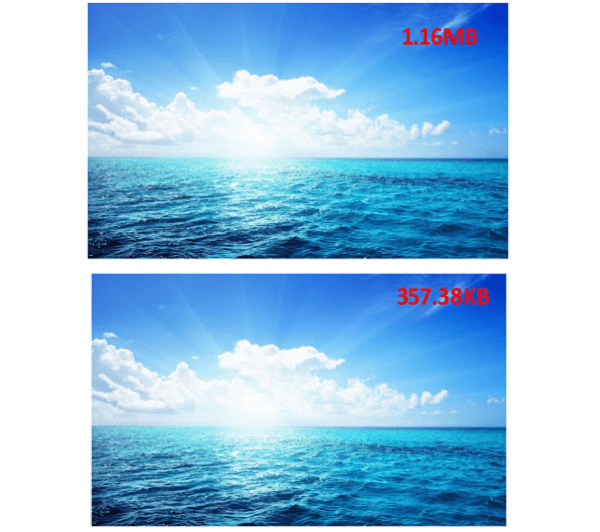
FonePaw Online Photo Compressor is a free online photo compressor which enables you to compress the size of the image without losing the original quality. There is no visual difference between the original image and the one after the compression.
What's more, it supports batch picture processing, with which you don't need to compress the pictures one by one. You can upload up to 25 images, totally less than 5 MB at a time. All the uploaded pictures will be compressed automatically.
Video Guide: [FREE] Reduce Image Size Online Without Losing Quality
To reduce image size on the online image size reducer:
Head to FonePaw Online Photo Compressor.
Click on the blue "Add image" button. Choose the pictures you want to shrink image size from the computer.
The uploading and compression will be automatically on. When it is done, a green "Compressed" bar will show up. Click on the "Download" icon to save the pictures with smaller size to your PC.
You'll notice there is virtually no difference between the original photo and the compressed version.
Method 2. Change Image Format to Shrink Image File Size
There are two common image formats: JPEG and PNG. Generally speaking, JPEG has a smaller file size with large color palette, while PNG is larger in size since it supports unlimited colors.
According to our tests, JPEG and PNG files shrink the most after compression. If the original PNG image doesn't contain many colors, it is suggested to change the image format into JPEG to decrease the file size. You can do that in almost every photo app or image editing app. But remind you that sometimes the format conversion might result in quality loss.
Method 3. Change Image Resolution to Reduce Photo File Size
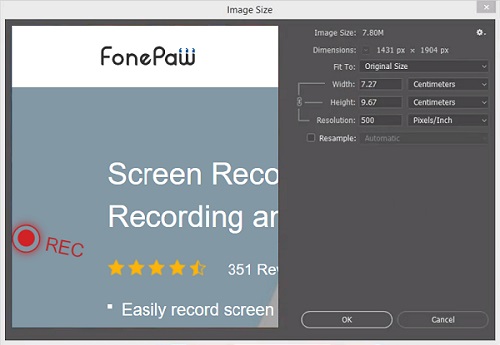
In addition to image format, image resolution also affects the image file size. For example, a picture that is 1920 x 1080 is surely larger than the one with 1280 x 960 resolution.
So changing image resolution can also serve as a way to reduce photo file size. Many image editing applications, such as Photoshop and the built-in Paint program on Windows, provide that function, in which you can enter the resolution value (Pixels) directly. Changing image resolution make the picture smaller, but it won't damage the image quality.
Method 4. Reduce Color Depth
As mentioned above, due to different color compatibility, different image formats have different file sizes. GIF, for instance, only supports several colors, so it has a smaller file size. In this way, by reducing the color depth, the picture file size can also be decreased. Photoshop can help do that:
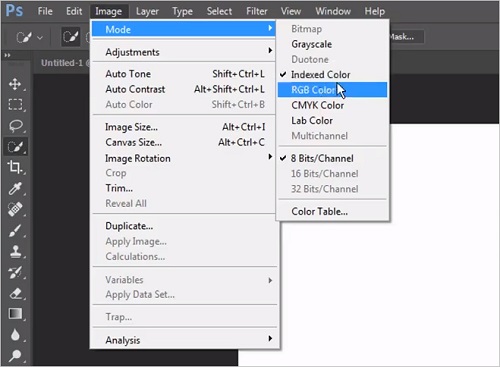
Open the picture with Photoshop. Click on Image > Mode.
Choose the mode according to your need. "Indexed Color" has smaller image file size than "RGB Color", and "8 Bits/Channel" indicates the smallest file size.
However, reducing color will change the quality of the original photos. So if you don't want to affect the quality that much, method 1 is a better choice for you.
Method 5. Crop Image to Make Image Size Smaller
If the picture contains much unnecessary information, it is recommended to crop it to focus the main content, decreasing the picture file size at the same time. To crop an image is quite easy; all you need is the stock image editing program on Windows - Paint:
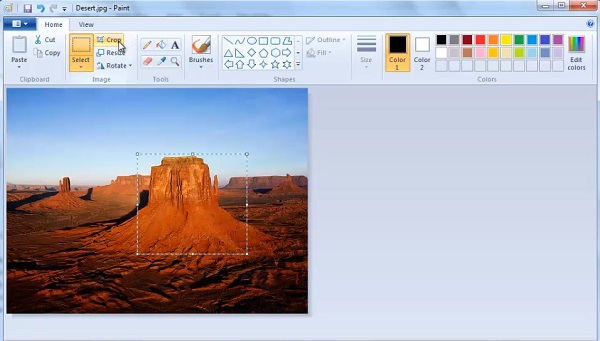
Open the picture with Paint.
Click on Home tab > Image > Select.
Drag the dashed-line frame surrounded the image to crop the size you want.
Right-click on the selected area and choose "Crop".
Save the cropped image and you'll find the image file size reduced.
Wrap-up
Hope you can get more ideas about how to make image files smaller after reading this post. Among the 5 methods, using FonePaw Online Photo Compressor is the most convenient and effective way to reduce image file size without losing quality.