


When you finished the work and saved it to the USB, have you ever got a message: "The disk is write-protected. Remove the write-protection or use another disk"?
Don't worry, the post will show you how to remove write protection from USB in Windows.
What's Write Protection on USB Drive
Write protection is a very common situation. When a drive is write-protected, it means that your system administrator has set limitations on the access privilege. Thus, when your USB or SD card is write-protected, you cannot change, write to or delete files. All you can do is read and copy files.
Normally, USB drive can't be written in because the write protection is actually enabled. However, sometimes, the write protection alert you see is caused by a virus, damaged registry entry or a broken drive. If you want to fix a write protected USB drive, SD card or hard drive, try the following methods.
Remove Write Protection from USB Drive
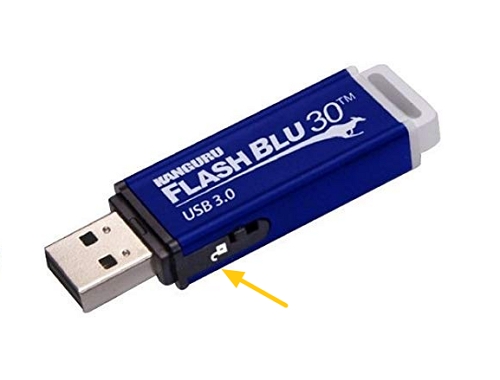
# 1. Turn off Write Protection with Lock Switch
Check whether your USB drive has a mechanical switch that is used to lock or unlock the device. If it has the switch, make sure it is set to unlock position and try to copy files again. But if your USB stick doesn't have this physical switch, try the next one.
# 2. Remove Write Protection From a File
Insert your USB drive or SD card into the computer and then go to the *Windows File Explorer.*
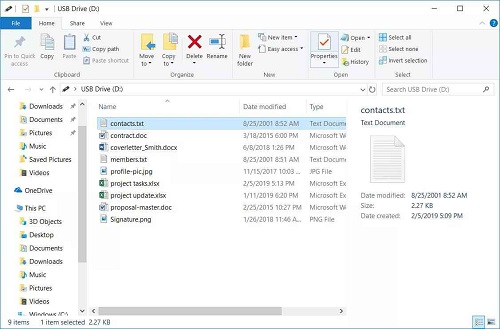
Click on the USB Drive and locate the file you need.
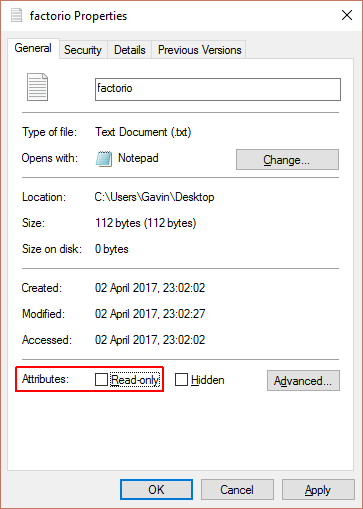
Right-click the drive, then go to Properties > General. Uncheck *Read-only* besides *Attribute* > OK. Now you can write files into the USB drive.
# 3. Remove Write Protection with Diskpart
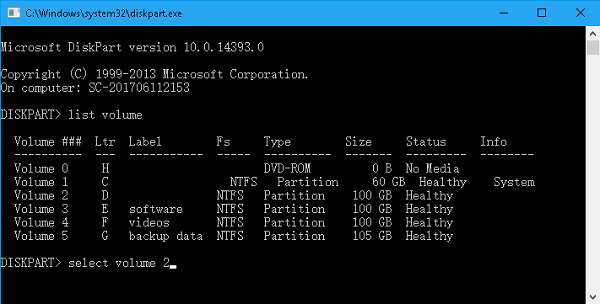
Command Prompt is also a good way to fix the write-protected problem. After you inserting your USB device into the computer, press Windows key + R > Command Prompt.
Type *diskpart* and press Enter. Then type *list disk*. You will see a list of disks. Mark your USB disk number and enter the command: select disk [your disk number].
Next, enter the command: attributes disk clear readonly. Now you will see: Disk attributes cleared successfully.
# 4. Remove Write Protection From USB Drives with Regedit
If you still cannot get your files from the write protected USB drive, try to edit the Windows Registry. But remember to back up the Windows Registry. In case you make any mistake during the process, you will be able to retrieve the Registry and return to the original state.
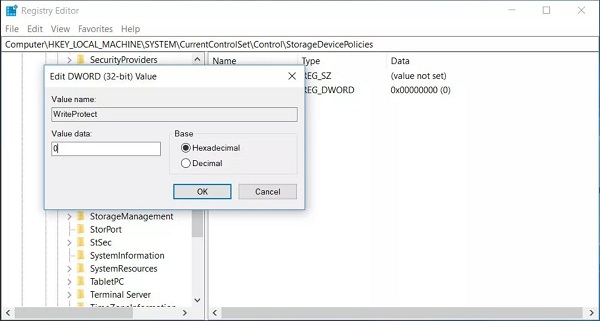
Press Windows Key + R. Type regedit and press Enter. In the registry editor, go to:
HKEY_LOCAL_MACHINE > SYSTEM > CurrentControlSet > Control > StorageDevicePolicies.
Double-click WriteProtect. In the Edit DWORD Value box, set the value to 0 and press OK.
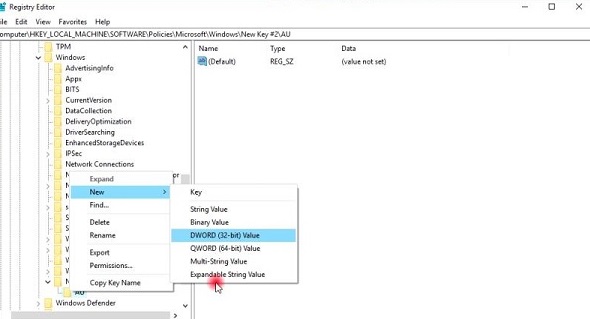
It is possible that when you enter Windows Registry but there is nothing. In this case, you can create a registry key named StorageDevicePolicy by yourself. Then inside the new key, create a new DWORD value and name it WriteProtect.
# 5. Recover Files from Write Protected Drive with FonePaw Data Recovery
Now, with the methods mentioned above, you may remove the write protection from your USB sticks or SD cards and get all the files you need.
However, if none of them works for you, formatting is the last way to remove write protection from USB drive because formatting will make the corrupted bad state back to normal.
To format your USB device or SD card, go to Windows Explorer > My PC(or This Computer). Right-click the USB drive > Select ***Format***. You should be aware that formatting may cause data loss. Thus you should make sure you have backed up the data before and stop using the device after formatting.
If you cannot find the data you want when you fix the write-protected problem but you need the files desperately, FonePaw Data Recovery (opens new window) is a good way to retrieve your files. Download and Launch FonePaw Data Recovery first.
Free Download Buy with 20% off Free Download Buy with 20% off
Video Tutorial: Recover Files from Write Protected Drive
Step 1 Launch FonePaw Data Recovery and connect your external device to the computer.
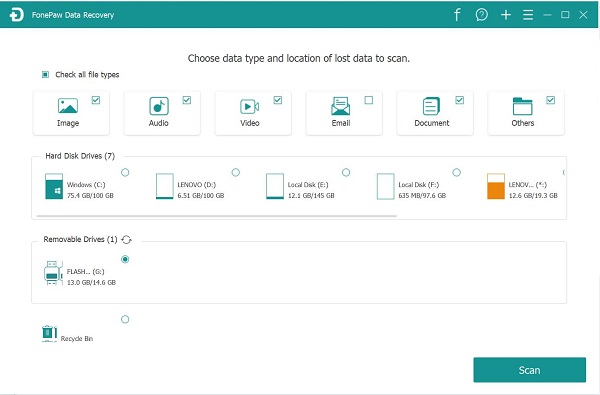
Step 2 Select the device and click Scan.
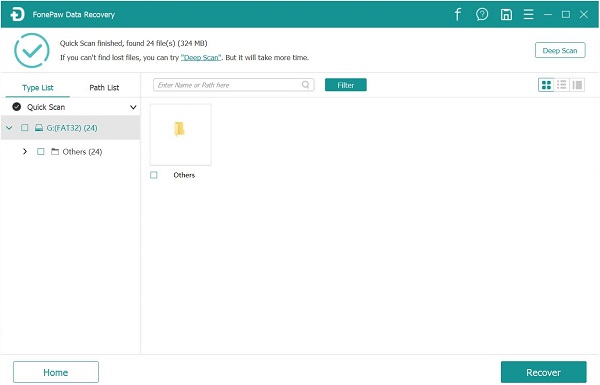
Step 3 When you see the files in the scan result, select the files and hit Recover. If you did not see the files you need, try the deep scan.
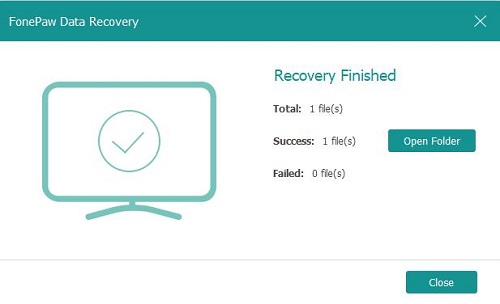
Step 4 Save your files to your computer. DO NOT save the data to your USB or SD card. Now you can get your files back from the write-protected drive.
In all, now you should know how to remove write protection from USB in Windows 10/8/7. If you by any chance lose data after fixing the write-protected USB devices or SD cards, you can try FonePaw Data Recovery (opens new window). It recovers all kinds of files in your USB pen in one click, which saves your time and effort. Besides, it also has a free trial. Just give it a shot.