You must want to enjoy wonderful videos, movies or TV shows on your iPad Pro, iPad Air, iPad, iPad mini. It seems more complicated to transfer videos from Mac to iPad than transferring photos and other files to iPad.
If you have trouble in putting videos, movies, etc. on iPad from Mac, read this guide to learn 2 simple ways to move videos on Mac to iPad Pro, iPad, iPad mini.
You May Need:
How to Transfer Photos from Mac to iPad (opens new window)
How to Put Movies on iPad (opens new window)
Transfer Videos from Mac to iPad without iTunes
If there are non-iTunes videos that you want to transfer to your iPad, or you just don't want to sync your iPad to the iTunes library on Mac, then you must adopt a new way instead of iTunes to transfer videos to iPad.
FonePaw iOS Transfer (Mac) (opens new window) is a third-party tool that you can use to transfer videos from Mac to iPad. It allows you to sync not just video, but photos, podcasts, playlists, books, music and more from MacBook, MacBook Air, MacBook Pro, etc. to iPad and vice versa.
A great advantage of this program is that it can automatically convert the video files to iOS compatible formats.
Free Download Buy with 20% off Free Download Buy with 20% off
Step 1: Attach iPad to Mac via the USB Cable
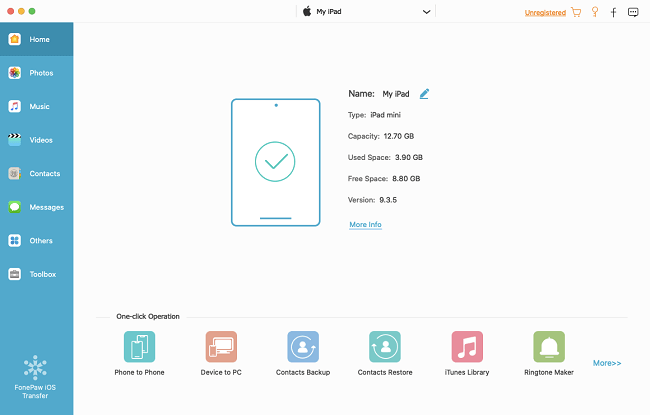
After you download and install FonePaw iOS Transfer, connect your iPad to Mac via the USB cable. Once your iPad is detected by the tool, you will be able to see the main interface as below which shows you the model, capacity, version and the serial number of your device.
Step 2. Select and Export Videos from Mac to iPad
On the left panel, you will see the "Videos" category, tap on it and select "Movies" on the top.
Now you need to go to "Add" > "Add Files" / "Add Folders" and select local video files from Mac to add to the iPad. Finally, click on "Open" and the program will start copying the videos from Mac to the iPad.
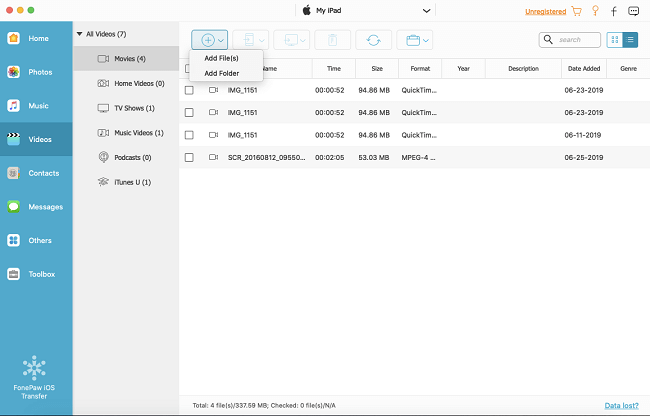
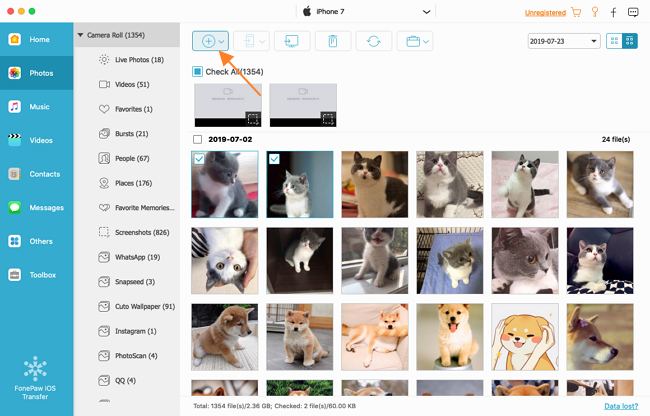
Tip: If you would like to access the videos on the Photos library on iPad, you should add the videos to Photos > Videos on Mac.
Transfer Videos from Mac to iPad with iTunes
iTunes is Apple's official tool for file transfer between Mac and iOS device. Before transferring your videos, to avoid encountering unexpected connecting or transferring problems, make sure to update your iPad and iTunes to the latest version. Here is how to use iTunes to transfer videos from Mac to iPad.
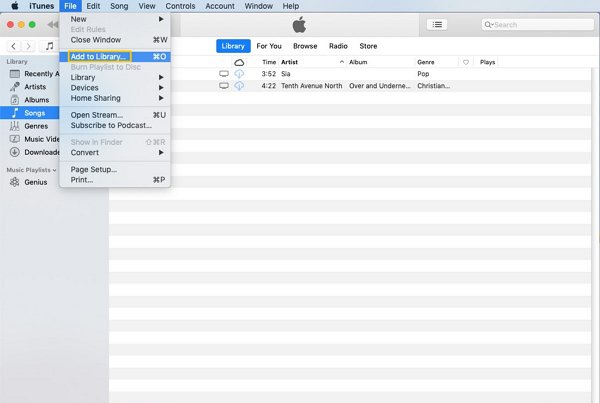
Step 1: Launch iTunes on your Mac. Click File > Add to Library to add the videos you want to transfer to iTunes library.
Step 2: Connect your Mac and iPad with a USB cable, click the iPad icon in iTunes, and then select Summary > Movies. Now you will see all the movies on your iTunes library.
Step 3: Check "Sync Movies", select the movies you want to transfer, and then click Apply.
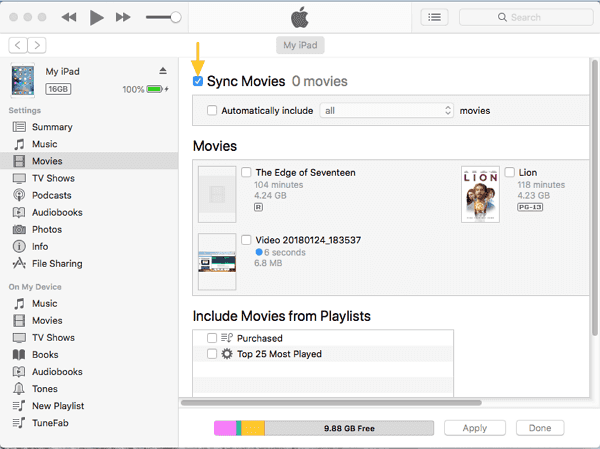
After that, iTunes will start to transfer movies from Mac to iPad.
Should I Put Videos on iPad with or without iTunes?
Now that the two ways of transferring video from Mac to iPad have been introduced, you may wonder which one is better -- with iTunes or FonePaw iOS Transfer (opens new window)? If what you need is exactly transferring files, the answer is FonePaw iOS Transfer.
Although you don't need to download iTunes because it is pre-installed on Mac, it is not as convenient as FonePaw iOS Transfer. On the one hand, iTunes allows only Mac-to-iPad but not iPad-to-Mac video transfer while FonePaw iOS Transfer supports video transfer among Mac, iPad, and iPhone.
On the other hand, iTunes has many other functionalities which means it is not as light-weight as FonePaw iOS Transfer.
What's more, it is very possible to encounter some unexpected problems like "iTunes Could Not Connect to This iPad" when using iTunes. In the latest version of macOS Catalina, iTunes is even removed. So the suggestion is to use FonePaw iOS Transfer rather than iTunes to transfer files from Mac to iPad.


