


When it comes to iTunes, many users' first thought is that iTunes is developed by Apple Inc. and used to sync music, apps, photos, books, playlists, etc. Indeed, iTunes is a great media player and device management program, some users especially new users don't want to copy playlist to their iPhone using iTunes since they are afraid of erasing and syncing their iPhone. To avoid this, you can use FonePaw iOS Transfer (opens new window) to directly transfer playlist from iTunes to iPhone after creating your desired playlist on iTunes.
Now download and install the trial version of FonePaw iOS Transfer and then you're good to go.
Free Download Buy with 20% off Free Download Buy with 20% off
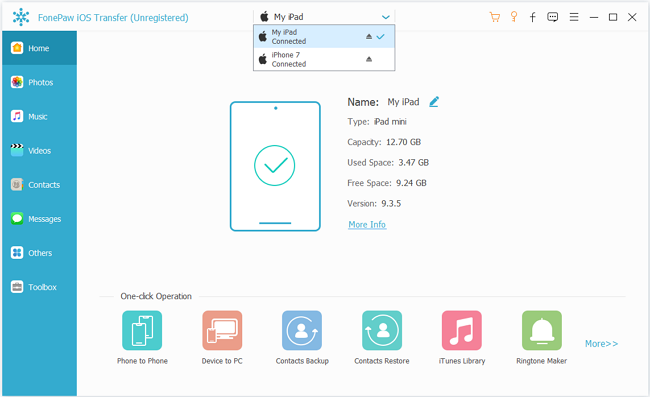
Step 1. Connect iPhone 7/7 Plus/SE/6/6s/6s Plus/5/5s/5c to PC
Connect iPhone to your computer, then FonePaw iOS Transfer will detect your device once it's successfully connected. The following image shows the interface, from which you can find the information like capacity, iOS, serial number, and more.
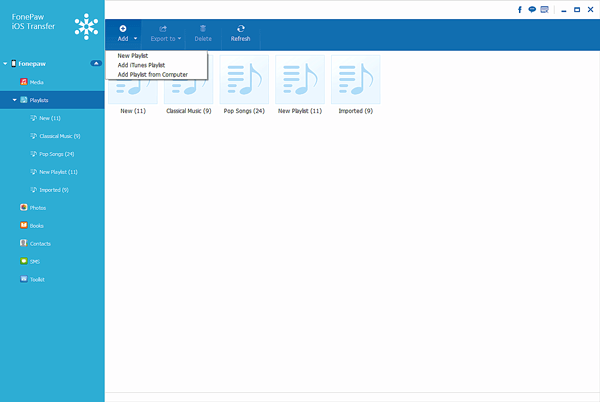
Step 2. Add A iTunes Playlist to iPhone
Click on "Playlist" under your device name. Next, click the inverted triangle near "Add" button. Then choose "Add iTunes Playlist", and select the playlists you want from iTunes.
Voila – all the playlists you add with FonePaw iOS Transfer appears in your iPhone. If you create some playlists on iPhone and want to transfer playlists from iPhone to iTunes, you can also do it by this full-featured application.
FonePaw iOS Transfer (opens new window) can manage music, photos, contacts, books, text messages, etc. on all iPhone models running from iOS 6 to iOS 9. iPad and iPod are also supported.
Free Download Buy with 20% off Free Download Buy with 20% off