


"I want to back up all of my iMessages/SMS messages on my MacBook Pro. Is there a way to transfer an entire chat log to the Mac so that I can print iMessages from Mac?"
You may want iPhone messages on Mac for two reasons:
- Sync iPhone messages to Mac so that you can view, send, receive messages on Mac.
- Transfer iPhone messages to Mac for backup or printing.
This post is going to help you transfer iPhone messages to Mac in two ways. To use or view iPhone messages on Mac, you may refer to method 1. To back up iPhone messages on Mac, go to method 2.
Method 1: Sync Messages from iPhone to Mac with iCloud
You can now sync iPhone messages with Mac via iCloud. Once you have enabled Messages on iCloud for both your iPhone and Mac under the same Apple ID, all messages you send or receive on iPhone will be synced to Mac. And if you delete a messages on iPhone, the messages will disappear on Mac as well.
To use Messages on iCloud to sync iPhone messages to Mac, you'll need:
- iPhone on iOS 11.4 or above;
- MacBook, iMac running on macOS 10.13.4.
After you make sure that your devices are compatible, you can then follow these steps to enable Messages on iCloud for Mac and iPhone.
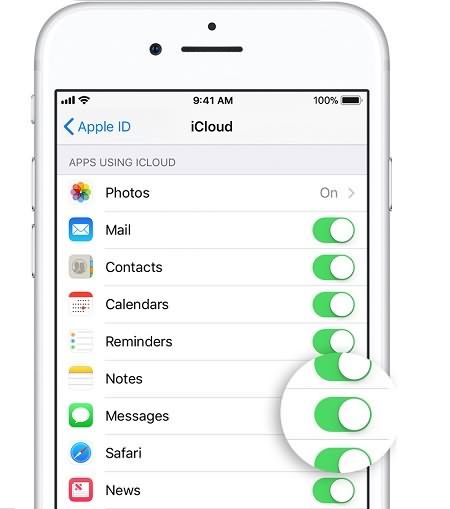
STEP 1 Open your iPhone. Go to Settings > Apple ID > iCloud. Turn on button next to Messages to allow iPhone messages to save in iCloud.
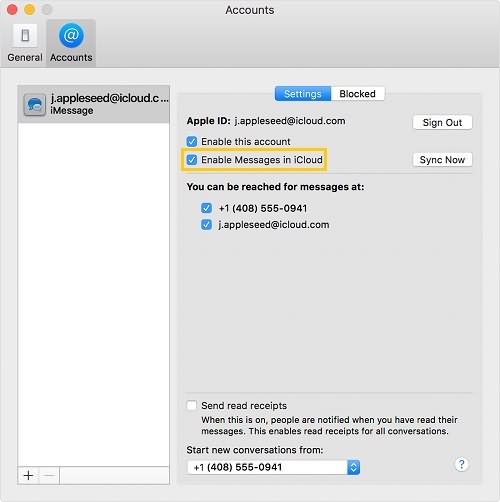
STEP 2 Open MacBook or iMac. Launch Messages app. Go to Preference > Account > Enable Messages in iCloud.
Method 2: Transfer iPhone Messages to Mac without iCloud/iTunes
If you don't need to use messages on Mac but would like to transfer iPhone messages to Mac for backup or printing, you can use FonePaw iOS Transfer, which can transfer messages from iPhone to Mac in csv, txt, html files. It can also transfer photos, music, contacts, etc. between iPhone and Mac.
What you need:
- A MacBook/MacBook Air/MacBook Pro/iMac;
- An iPhone X/8/8 Plus/7/7 Plus/6s/ 6 Plus/iPhone 6/iPhone 5s/iPhone 5c/iPhone 5/iPhone 4s/iPhone 4/iPhone 3GS;
- The USB cable came with iPhone;
- FonePaw iOS Transfer (opens new window);
Free Download Buy with 20% off Free Download Buy with 20% off
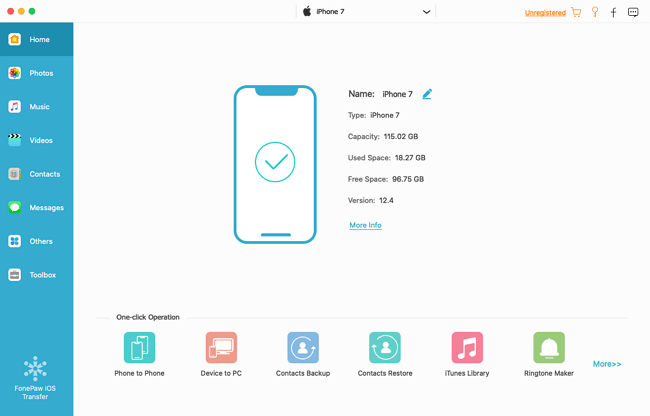
Step 1. Connect iPhone to Mac
Plug your iPhone into Mac. If iTunes pops up automatically, turn it off since you don't need it this time. Now launch FonePaw iOS Transfer, which will recognize your iPhone in seconds.
Step 2. Transfer SMS from iPhone to Mac
At the left side menu, you can see "Media", "Playlists", "Photos", "Books", "Contacts", "SMS" and "Toolkit".
Choose "SMS", tick those messages you need and click "Export to" to save them on your Mac. Here you can choose the format of exported messages: CSV, HTML and TXT.
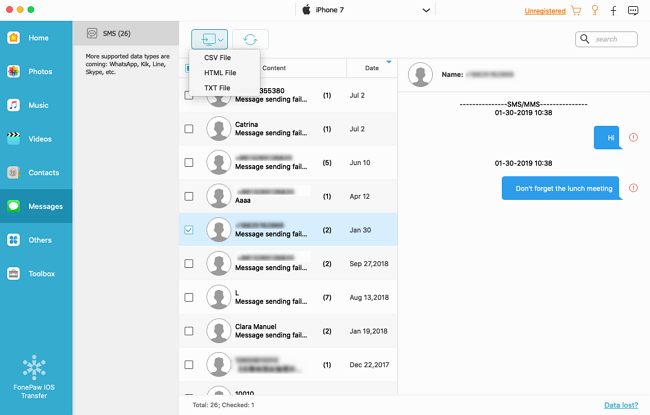
Note: It may take a few minutes to load your messages depending on the number of your messages.
When the transfer is done, your messages with information like date, time, images etc. are on your Mac. If you need to backup iPhone to Mac, you can also rely on FonePaw iOS Transfer (opens new window). Got other tips to transfer messages from iPhone to Mac? Leave your thoughts below.
Free Download Buy with 20% off Free Download Buy with 20% off