


Syncing your iPad with your computer is essential, whether you're looking to streamline your workflow, free up space on your device, or simply ensure that your precious memories are safely stored. While syncing your iPad to a Mac is relatively simple thanks to Apple's built-in tools like Finder and iCloud, syncing to a Windows PC can be a bit more complex, often requiring iTunes or third-party software.
This guide will provide 3 straightforward methods to connect your iPad to your computer, catering to different needs and preferences. Let's explore these options to keep your data synchronized and easily accessible across all your devices.
Method 1. How to Sync iPad to Computer via iTunes
Using iTunes is a traditional and reliable method for syncing your iPad with a computer. This method is especially useful for users with Windows or older macOS versions (macOS Mojave or earlier). iTunes allows you to manage your media, backup your data, and ensure your iPad and computer are in sync.
Using iTunes to backup and transfer data generally does not lead to data erasure. However, incorrect operations or choices can result in data loss. For instance, the "Erase and Sync" warning may appear if the iPad was previously associated with a different iTunes library, automatically deleting existing content. Choosing "Replace" instead of "Merge" during synchronization can overwrite existing data on your device.
In addition, restoring from an outdated backup will erase all current data and replace it with the older version, potentially causing the loss of recent entries. To reduce these risks, always back up your iPad before syncing, review sync settings to ensure you're not overwriting content, and disable automatic syncing. If you are looking for a simpler way to sync your iPad to your computer without iTunes, scroll down to the following sections.
Here are the steps to sync iPad files to sync your iPad files to computer with iTunes:
Step 1. Ensure the latest version of iTunes is installed on your computer.
Step 2. Connect your iPad to the computer using a suitable USB cable.
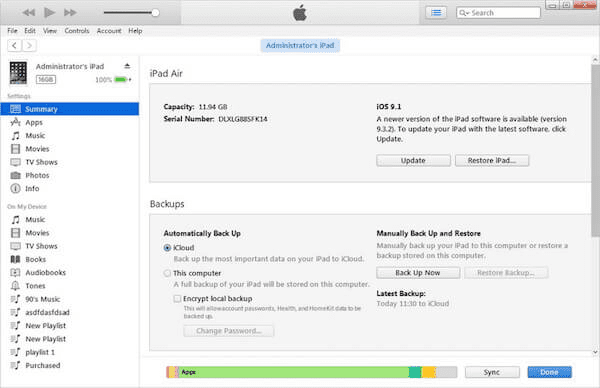
Step 3. Open iTunes and select your device from the list.
Step 4. Choose the types of content you want to sync under the settings for your device.
Step 5. Click the "Sync" button to start transferring the selected content from your iPad to your computer.
Method 2. How to Sync iPad to Computer Using Data Transfer Tool
Using a professional data transfer tool is one of the most efficient and user-friendly ways to sync your iPad to your computer. These tools are designed to simplify the syncing process and offer a range of functionalities to cater to various user needs. Among so many options on the market, FonePaw iOS Transfer stands out as the best choice.
FonePaw iOS Transfer is a versatile tool designed to make syncing and managing data between your iOS devices and computer straightforward. It excels in syncing iPads to computers, offering a seamless experience that surpasses traditional methods like iTunes.
This tool is particularly useful for its ability to directly manage and sync all types of iPad data, including photos, music, videos, contacts, messages, and more. It supports direct transfers and provides a user-friendly interface that simplifies the process of both backing up and updating files across devices, ensuring that your data is always accessible and secure.
Free Download Buy with 20% off Free Download Buy with 20% off
- Works seamlessly with both Windows and macOS systems.
- Supports transferring a wide range of data including photos, videos, contacts, music, and more.
- Allows you to select and transfer multiple files at once with no size or quantity limitations.
- Simplifies the process with a single click to transfer data from device to device or device to computer.
- Ensures data is transferred without risk of loss or overwriting.
With all these powerful features, you can easily use FonePaw iOS Transfer to sync your iPad to your computer. Here is how:
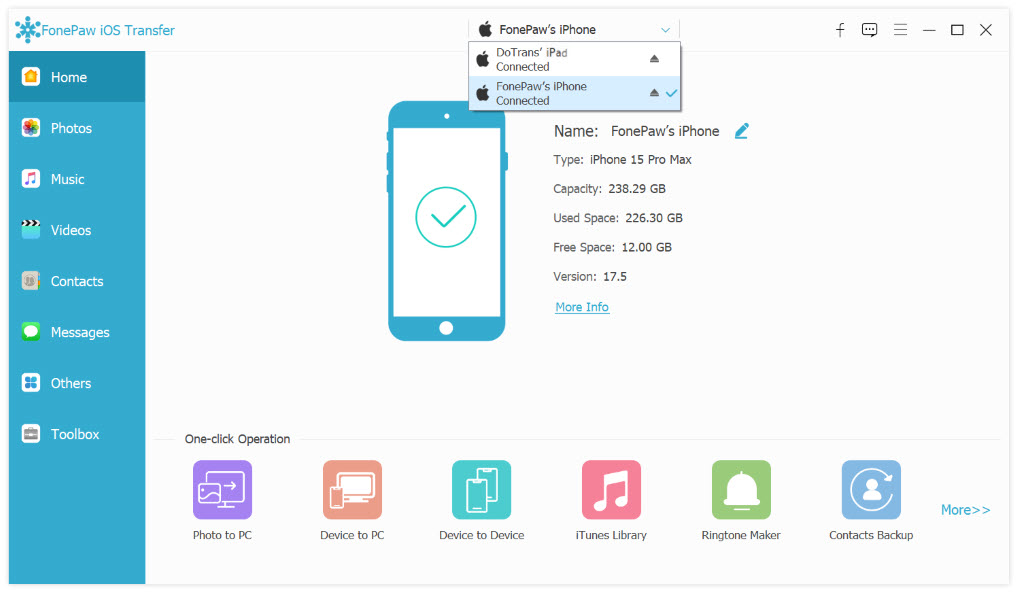
Step 1. Download and install FonePaw iOS Transfer on your computer, then launch it. Use your USB cable to connect your iPad to your computer. The tool will automatically detect your device.
Free Download Buy with 20% off Free Download Buy with 20% off
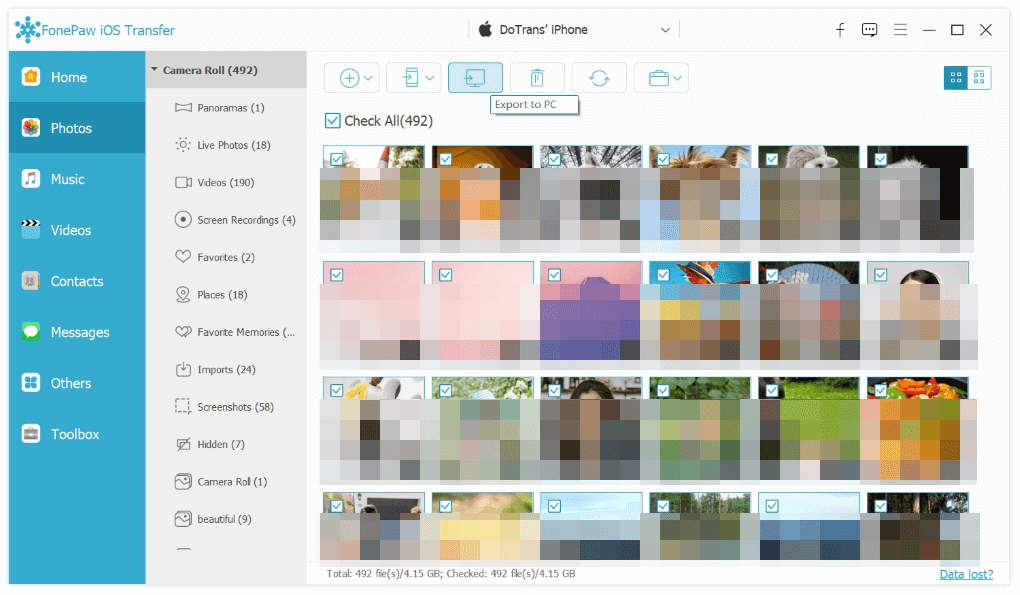
Step 2. The software will display your iPad's data sorted by categories (like Music, Photos, Contacts). Choose the data you want to transfer.
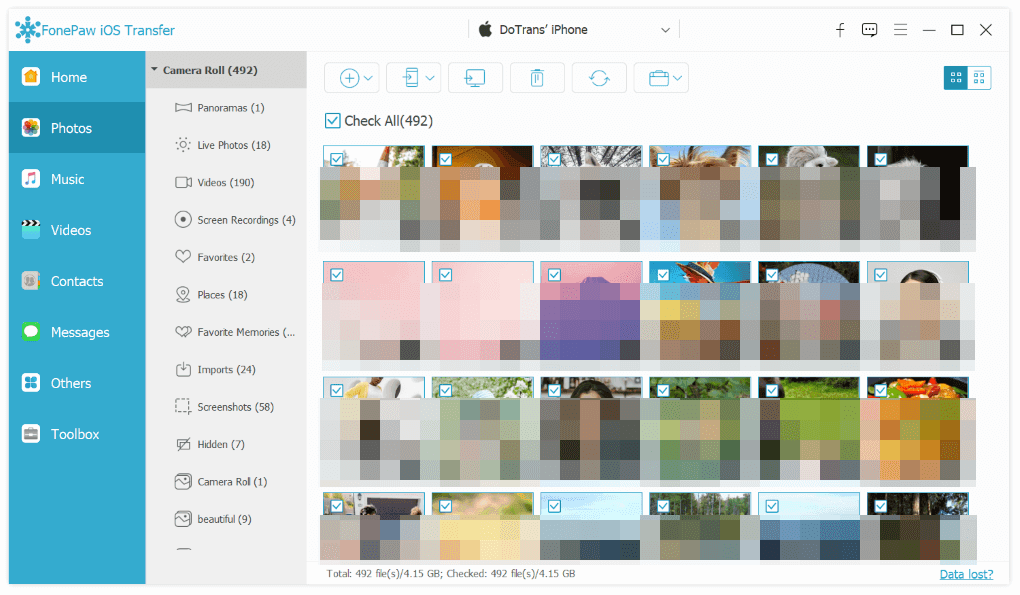
Step 3. Click on the "Export to PC" option to start syncing the selected data to your computer.
Method 3. How to Sync iPad to Computer with iCloud
Syncing your iPad with your computer using iCloud is a wireless method that keeps your data synchronized automatically across all devices sharing the same Apple ID. It is compatible with all iOS devices and can be accessed from any computer through iCloud.com or the iCloud app on Windows. This method is especially convenient for users who prefer not having to deal with cables or manual transfers.
While this method is so convenient, it has some limitations. Free iCloud accounts come with 5GB of storage; additional storage requires a subscription, which could cost a lot. What's more, this method requires a stable internet connection for syncing.
To sync iPad to Mac:
Step 1. Go to "Settings" > [your name] > "iCloud". Activate the toggles for the data types you want to sync (e.g., Photos, Contacts).
Step 2. On your Mac, go to "System Preferences" > "Apple ID" > "iCloud" and sign in with your Apple ID. Ensure the same data types are selected to sync.
Step 3. Once set up, any changes or updates on your iPad will automatically reflect on your Mac as long as both devices are connected to the internet.
To sync iPad to Windows PC:
Step 1. On your iPad, go to "Settings" > [your name] > "iCloud". Turn on the sync options for data types like Photos, Contacts, Calendars, etc.
Step 2. On your computer, you can access this data either through the iCloud website or by using the iCloud software for Windows.
Step 3. Ensure that the iCloud settings on both your iPad and computer are configured to sync the same categories of data.

FAQs about How to Sync iPad to Computer
How do I enable Wi-Fi syncing in iTunes?
To enable Wi-Fi syncing in iTunes, first connect your iPad to your computer with a USB cable. Open iTunes and select your device. In the Summary tab, locate the "Options" section and check the box for "Sync with this iPad over Wi-Fi." After applying the changes, you can disconnect the USB cable. Your iPad will now sync with iTunes over Wi-Fi whenever they are on the same network and iTunes is open on your computer.
How can I prevent iTunes from erasing data on my iPad during syncing?
To prevent iTunes from erasing data on your iPad during syncing, ensure that your iPad is configured to sync with only one iTunes library at a time. Always initiate syncing manually rather than automatically when connecting to iTunes to avoid unintended syncs. It's also a good practice to back up your iPad data regularly, either through iTunes or iCloud, to safeguard your information in case something goes wrong during the syncing process.
What should I do if my iPad is not recognized by my computer?
If your iPad is not recognized by your computer, check your USB cable and ports for issues, and ensure both devices are using the latest software. Restart both the iPad and computer, and make sure to unlock your iPad and select "Trust" when prompted. If the issue persists, especially on Windows, check the Device Manager to see if you need to update or reinstall any drivers.
Final Words
Syncing your iPad to your computer can be done through various methods, each with its own pros and cons. Using iTunes offers detailed control but can be complex and risks data loss if not configured properly. iCloud provides the convenience of wireless syncing but requires a stable internet connection and may need paid storage upgrades.
In comparison, FonePaw iOS Transfer stands out with its user-friendly interface, fast transfer speeds, and comprehensive data management features. For a seamless and efficient synchronization experience while avoiding the risk of data loss or high subscription fees, FonePaw iOS Transfer is highly recommended.
Free Download Buy with 20% off Free Download Buy with 20% off