iPhone had been long not supporting to preview and play GIFs directly on the device. By now, iOS 11 has made it feasible to check out GIFs on iPhone, so you might have stored quite a number of cute and interesting GIFs. However, it's strongly recommended to transfer GIFs from iPhone to Mac in case of data loss.
Don't Miss Out:
Actually, Mac is unable to play GIFs directly. Therefore, I'd like to introduce some tricks to preview GIFs on Mac with no need to download third party apps. Please keep reading and learn your way around.
How to Transfer GIFs from iPhone to Mac with Ease?
FonePaw iOS Transfer (opens new window), as the name implies, specializes in data transfer between iPhones or from iPhone to Mac and vice verse. The software is well compatible with iPhone, iPad and Mac, including the latest iPhone 7/7 Plus. Please give it a touch of the button below and start your free trial.
Supported Data:
- Music
- Videos
- Contacts
- Books
- Photos
- Text Messages
Free Download Buy with 20% off Free Download Buy with 20% off
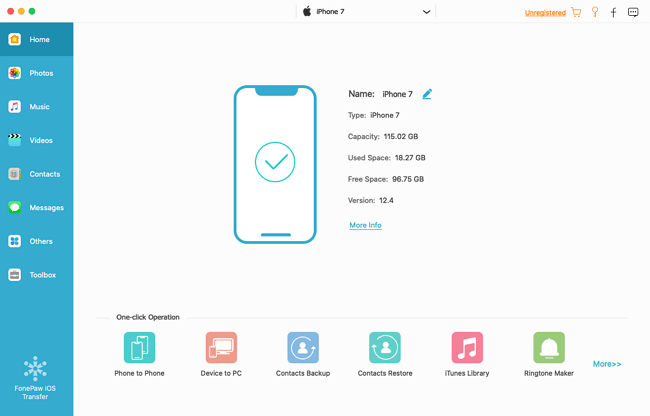
Step 1. Hook up to the Program
When done installing iOS Transfer on Mac, please launch the software and connect your iPhone to it with USB cable. When iPhone is detected, you can see related information like Name, Type, Capacity, Version, and Serial Number.
Step 2. Preview GIFs on iPhone Transfer
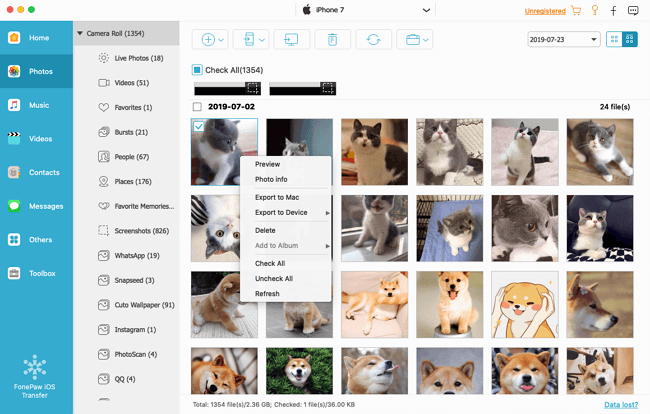
Now, please select "Photos" on the left panel and choose the desired album to launch. Here are all the photos stored on your iPhone. You can double-click the image or right click > Preview as to check out the GIFs before the transfer.

Step 3. Start Transferring GIFs to Mac
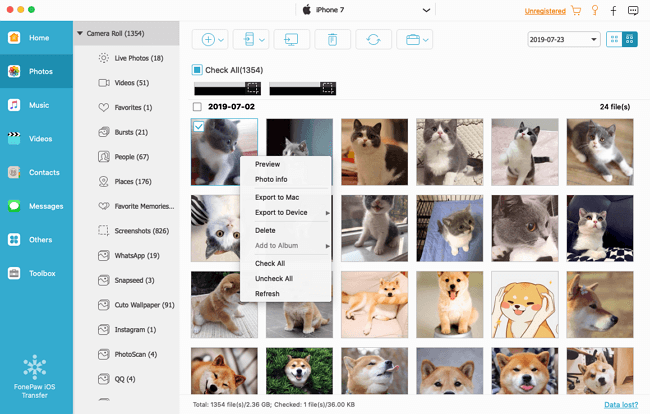
After previewing the images, please make up your choices. The software is able to export one or multiple items at a time. If you'd like to migrate all the photos, you can right click and choose "Check All" option. Then, please go to "Export to" > "Export to Mac". The process takes time in accordance with the size of files being transferred.
How to Move iPhone GIFs to Mac via AirDrop?
Also, there is another shot t o take. As the official way to share content between Apple products, you can try this way to export GIFs to Mac. Convenient as AirDrop is, it's far from powerful as FonePaw iPhone Transfer in terms of various data transfer. To see how it works, let's kick off.
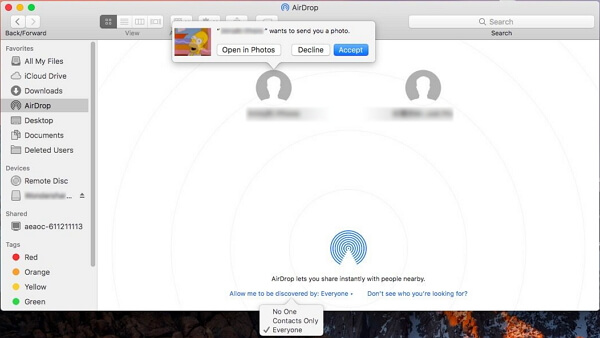
Step 1. On Mac, go to "Go" > "AirDrop" and allow me to be discovered by "Everyone" at the bottom of the interface.
Step 2. Open "Photos" app on iPhone.
Step 3. View your images and select desired GIFs you like to export.
Step 4. Now, tap on the share button on the lower left.
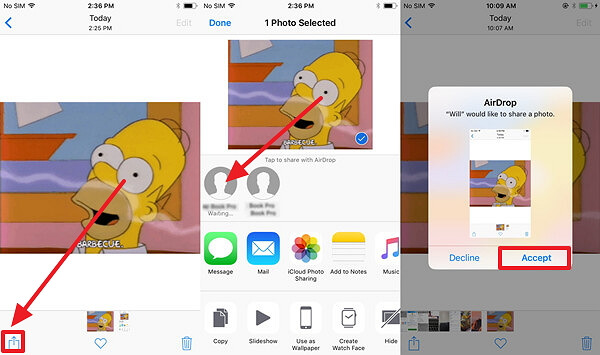
Step 5. Choose the icon of your Mac under "Tap to share with AirDrop" title.
Step 6. Click on "Accept" or "Open in Photos" on your Mac.
How to Preview GIFs on Mac?
To be honest, the current Mac operating system doesn't support to view GIFs in a direct way. Therefore, for those who want to look up GIFs on Mac, they have to try in other ways.
Approach One:
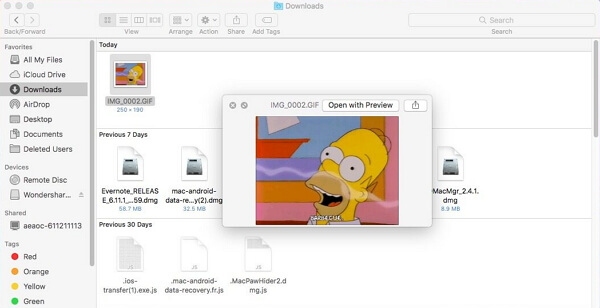
Step 1. Navigate to the GIF(s) on Mac.
Step 2. Don't directly open the image, instead, just click once on the GIF. (Don't double-click)
Step 3. Now, tap on the "Space" key on the keyboard and you can see the GIF shows.
Approach Two:
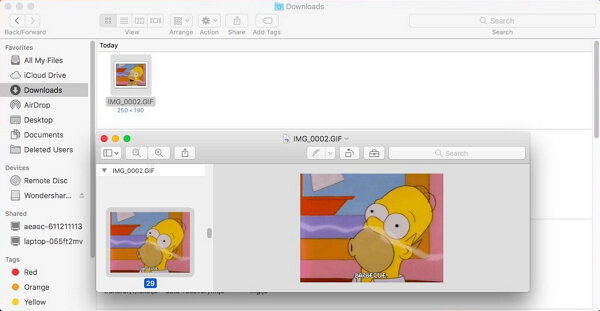
Step 1. Open the file in which GIFs are stored.
Step 2. Double click to open a certain item.
Step 3. Though the preview is still, it becomes dynamic when you keep holding down the "↑" or "↓". If you take a close look, you'll know that the dynamic effect is made up of a series of still images.
To secure your favorite GIFs, you'd betterdo a full back for iPhone (opens new window) from time to time. If you need any further help, welcome to FonePaw.
Free Download Buy with 20% off Free Download Buy with 20% off


