


When communicating by email on iPhone, we sometimes need to send or receive pictures on our iPhone. And this will lead to a question: how to save and transfer pictures from emails on iPhone. If you are puzzled by this question, here are some useful tricks for you.
# Part I Save Pictures from Emails on iPhone
When receiving pictures from emails on iPhone, you may want to save the pictures on iPhone. There are two spots to save the emailed photos: Camera Roll and iCloud Drive. The following are the specific steps of the two methods.
Save Emailed Pictures on Camera Roll
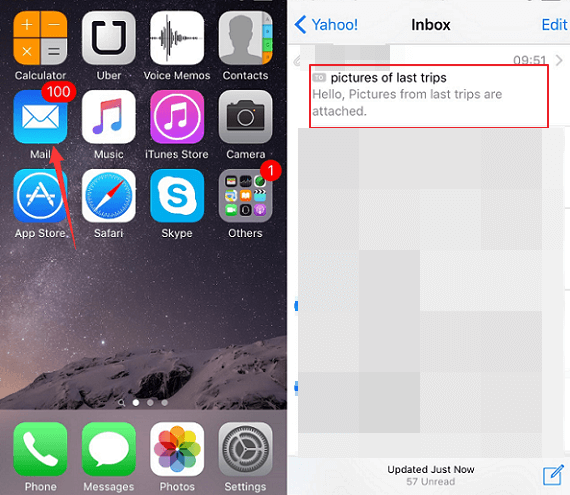
Open the Mail app on iPhone; find the email that contains photos you want to save from mailbox.
Click the email and scroll to the bottom, where you can see the attached pictures. For inline pictures, find the pictures in the body of the email. If the pictures have not been downloaded yet, tap the images and wait till the downloads to be completed.
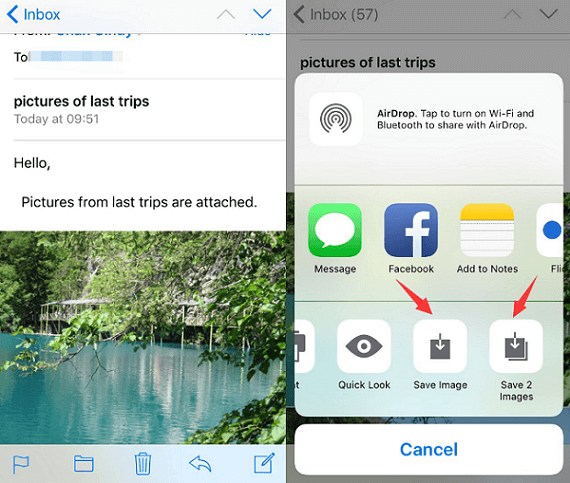
Press a picture till a window pops up. Choose Save Image to store the single image or Save Images to store all images attached to email.
Launch Photo app on iPhone, you will see the pictures from email in Camera Roll album.
Save Emailed Pictures on iCloud Drive
To save pictures on iCloud Drive, you should first make sure that your iPhone has met the prerequisites below:
-Your iPhone should run on iOS 8 or later version;
-You have installed iCloud Drive on the iPhone;
-You have turned on iCloud Drive on the iPhone: go to Settings>iCloud>iCloud Drive.
With iCloud Drive on, find the pictures that you need in the mailbox, press a picture until a pop-up window appears, choose Save Attachment. It will switch to the iCloud Drive page. Select the album to save the pictures and click Export to this location
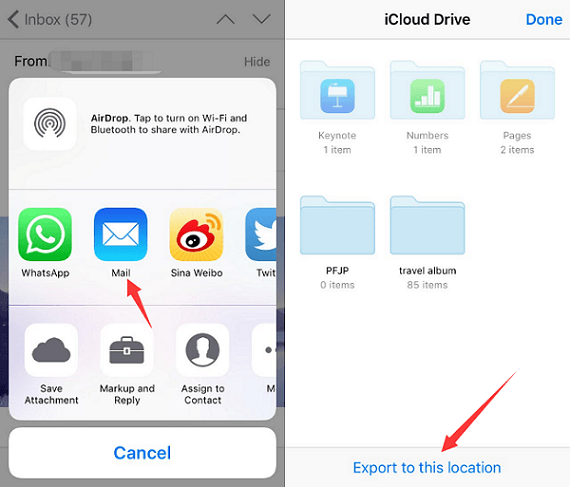
Comparing with saving the pictures on iPhone Camera Roll album, using iCloud Drive makes it possible for your Mac, iPad or other devices to easily get access to the pictures. Therefore,choose iCloud Drive to save the emailed pictures if you want to share with other devices.
# Part 2 Transfer Pictures on iPhone via Emails
To use emails to transfer pictures on iPhone, there are two ways: using Mail app or Photo app. Go on reading for more details.
Transfer iPhone Pictures via Mail App
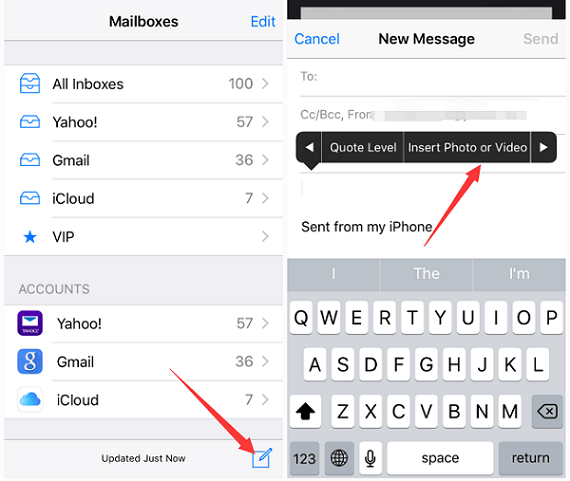
Open Mail app on iPhone, click the icon on the bottom to start a new email.
The pictures can be inserted anywhere in the body: press the spot that you feel right to insert the pictures, from the pop-up line, choose Insert Photo or Video.
Select the pictures to send by clicking Choose. You can only choose one picture at a time. After you have chosen the pictures and finished the email, click Send. The pictures will then be transferred to your recipients.
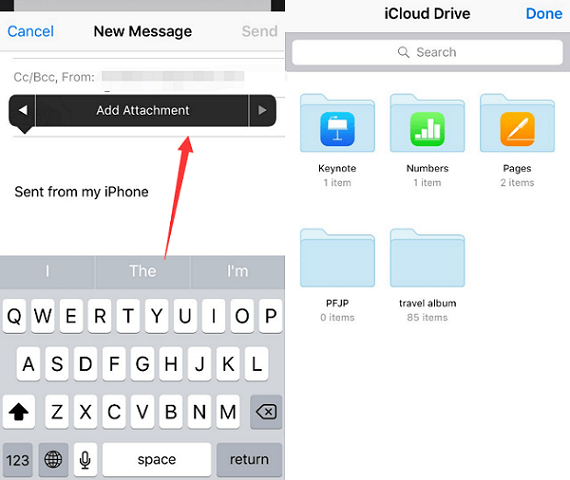
For iPhone running on iOS 9, it is possible to send photos in iCloud with email. When writing an email, tap where you want to insert a picture, there will be an option of Add Attachment. Enable the option, you can then choose photos from iCloud Drive.
Transfer iPhone Pictures via Photo App
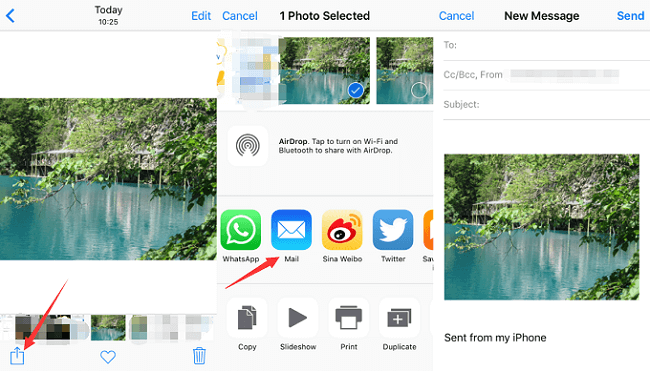
On Photo app, find the photos you want to transfer. Click Select, choose the right photos, and press the send button on the left bottom.
From the pop-up window, choose Mail app. You will then enter the writing email window with the photos attached.
These are all you need to know about saving and transferring pictures from emails on iPhone. Now start to email photos with your contacts with what you have learned.