


Every version of iOS is supposed to surprise us with new features. With the arrival of iOS 11, here comes a new feature in 'Notes' app. Do you know, now you're allowed to directly scan any documents on the desktop or in computer and store them as customizable images in Notes.
Don't Miss Out:
If you have not yet known how to scan documents in Notes so far, let's get down to the tutorial below. In case of potential data loss of scanned documents, I also propose an approach to retrieve and get your lost scanned documents back on iPhone/iPad. Please read on for a further idea.
Idea One: How to Scan Documents in Notes on iPhone/iPad?
iOS 11 makes the 'Notes' app more versatile. When creating a new note, you can "Add Sketch", "Take Photo or Video", "Add Photos from Photo Library", "Draw with Brushes", "Add Contacts", "Add Charts" and "Scan Documents". Of which, "Scan Documents" won the favor of the majority. Now, let's take a look.
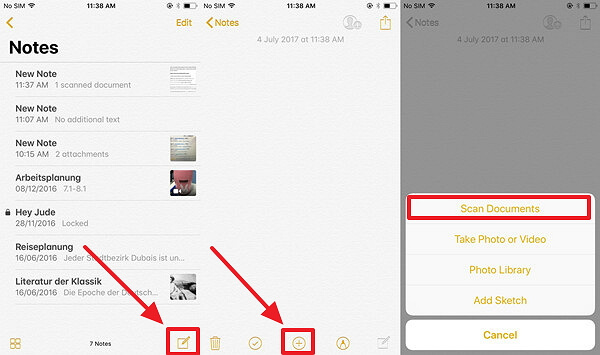
Step 1. Launch "Notes" app on iPhone/iPad.
Step 2. Tap on the button on the lower right on the main interface.
Step 3. Tap on the "+" button in the middle and choose "Scan Documents" at the top.
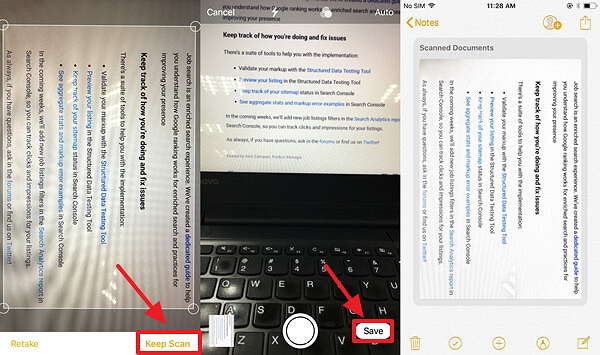
Step 4. Now, aim at the desired item and capture it.
Step 5. Drag the corners to adjust the screen and then tap on "Keep Scan" when done.
Step 6. If you like to go on scanning more, just do it. Or tap on "Save" button to redirect to the Notes screen.
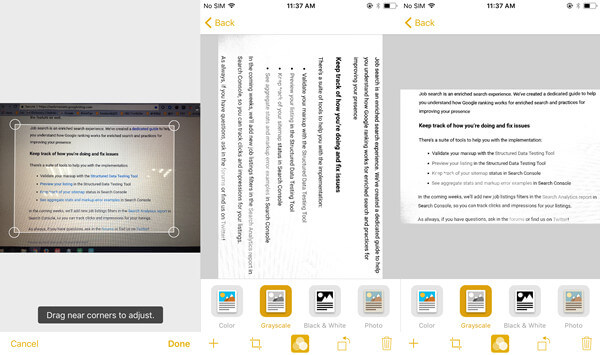
You can see scanned documents on the screen. Furthermore, you're allowed to make touches on the documents. Tap on the scanned documents and you can edit them right now like "Add more documents", "Readjust the documents", "Apply filters", "Rotate the image" or "Delete".
Idea Two: How to Retrieve Lost/Deleted Scanned Documents from iOS Device?
What we noted down must be of importance. So, it comes to be quite a misery what if notes get lost/deleted by accident. How to rescue your scanned documents? If you've backed up iPhone/iPad (opens new window), it's easy for you toperform data recovery (opens new window) from iTunes or iCloud. However, if there is no backup available, please take FonePaw iPhone Data Recovery into consideration.
FonePaw iPhone Data Recovery (opens new window) is a notable software specializing in Data Recovery and System Recovery available on almost all models of iOS device with the latest iPhone 7/7 Plus supported. It helps recover a bunch of data from your iPhone with or without backups. To gain a better knowledge, I break it down for you.
Video Guide: 3 Ways to Recover Deleted Files from iPhone Without Backup
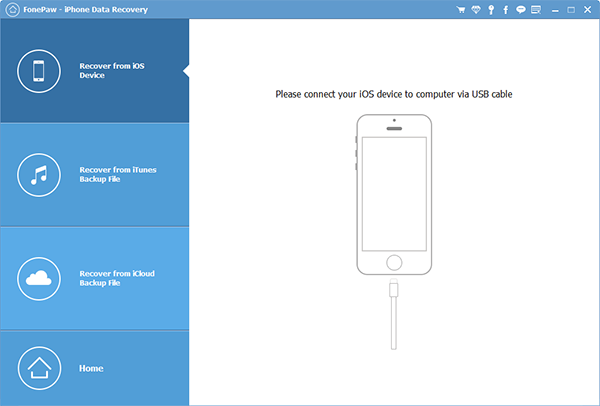
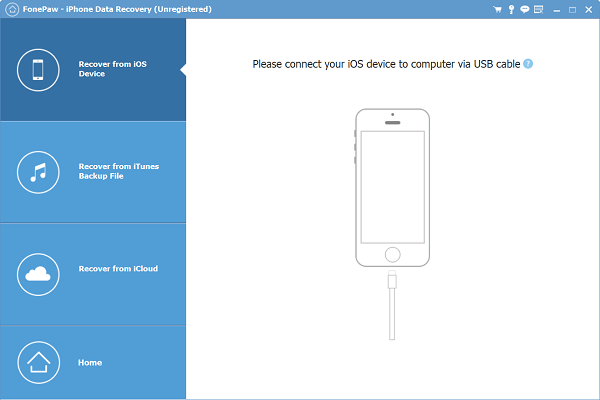
Step 1. Get Started with FonePaw iPhone Data Recovery.
Please download and install the software on your Mac/Windows PC. Then launch the program and select "Recover from iOS Device" option on the left panel as well as connect your iPhone/iPad to it via USB cable.
Step 2. Begin Scanning For Deleted Data
When your iOS device is detected, there is a "Start Scan" button in the middle. Please click on it to start scanning process.
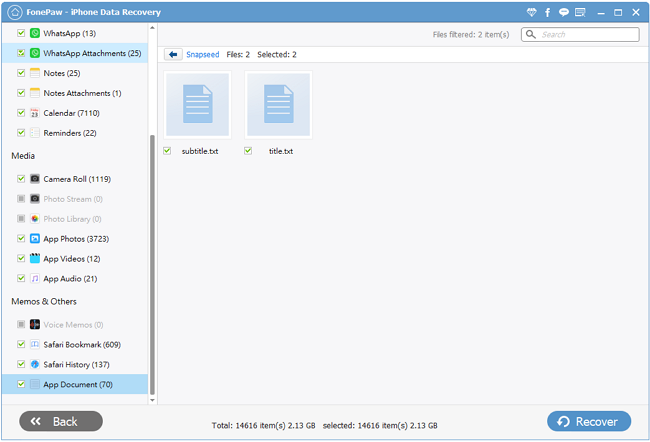
Step 3. Check Out Scanned Documents
When done scanning, all the data scanned out will be listed on the screen. You can switch the items on the left to check out more contents. As for scanned documents in Notes, please select "App Photos" and open the "apple.notes" folder. Then, you can preview the scanned documents.
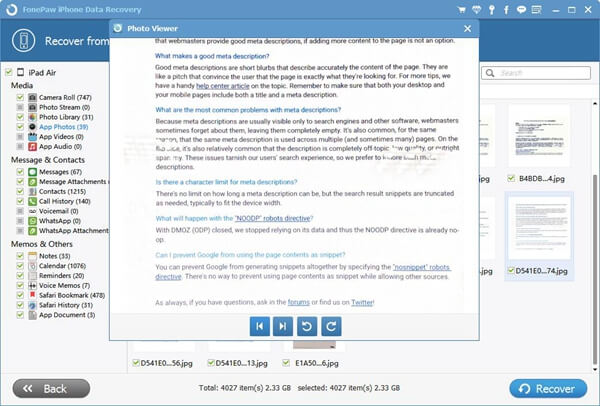
Step 4. Recuperate Scanned Documents
After viewing the lost data, you can select desired documents for restoration. Make your choices and click on "Recover" button on the lower right. Then, select a route to export and it's all done.
I hope this tutorial helps. Don't be hesitated to post your misgivings below. I'd be glad to settle them.