Have you ever mistakenly deleted your important photos on Windows 11/10/8.1/8/7? For example, your picture of your business, your moments with your friends and families, your record of your childhood, etc. It is very common that you delete these photos without warning by accidentally pressing “Ctrl + D”, clicking the "Delete" option, or even permanently deleting them by “Shift + Delete”. Many people don't even realize what they have done until a very long time later.
So, how to recover deleted photos on Windows 11/10/8.1/8/7? In this article, we will give comprehensive answers, covering 5 methods to help you find your precious photos. If you need this, keep reading.
1. Recover Deleted Photos from Recycle Bin
In fact, when you delete photos, they are not immediately gone forever. As a computer user, we all know that the Recycle Bin is to store the files and folders that we deleted temporarily. The first thing to do is to recover the deleted photos from the Recycle Bin as long as you do not use a “Shift + Delete” key combination or you do not empty the Recycle Bin afterward. But, if you empty the recycle bin, you need to take other actions.
Additionally, the very first moment that you delete a photo, you can press "Ctrl + Z" to undelete it immediately. If you realize the deletion after a period of time, you can check the deleted photos in the Recycle Bin and restore them. Follow these steps to recover the Recycle Bin on PC.
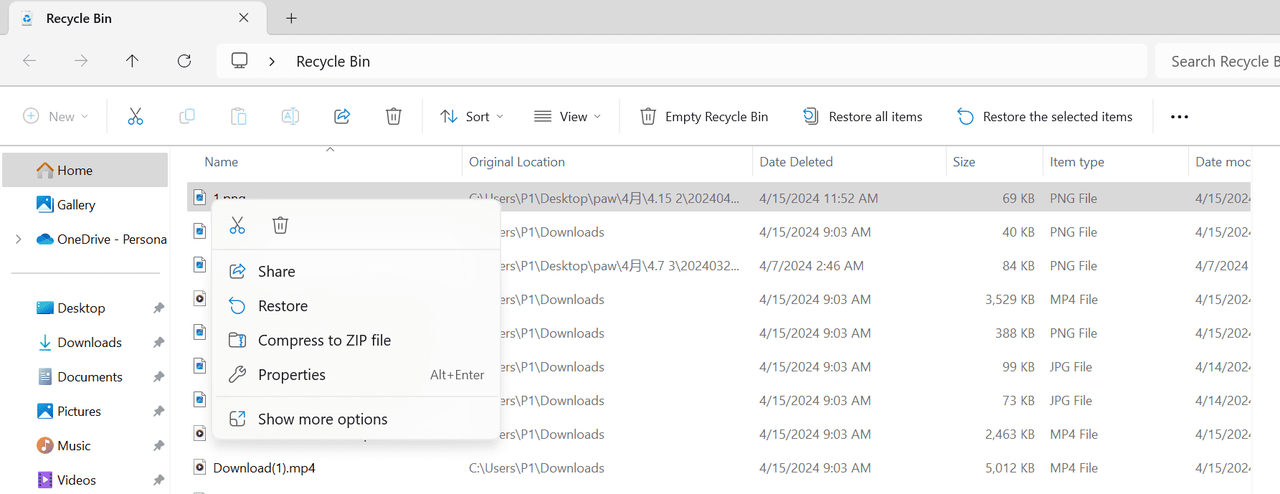
- Open your computer Recycle Bin.
-
Locate and select the photo you want to recover.
- Right-click the file.
- Select the "Restore" option to recover the deleted photo to the original place or you can just drag the file directly to the destination.
Although by default there is no time limit for deleted files to stay in the Recycle Bin, Recycle Bin has a storage size (usually 5% of the disk storage by default) that will empty older files automatically to make room for new ones once they reach capacity. So, you should act quickly before photos are literally gone.
2. Recover Permanently Deleted Photos via Data Recovery Tool
As mentioned above, it is another story if you permanently delete your photo either by "Shift + Delete" or empty the Recycle Bin. You cannot recover deleted photos from Recycle Bin directly. For situations where your photos are permanently gone for any reason, the simplest and most convenient way is to utilize professional data recovery software.
It is strongly recommended to use FonePaw Data Recovery for its outstanding performance with a high success rate in recovering deleted files on Windows, even permanently deleted ones. It supports recovering over 1000 file types (including any image formats), handling various scenarios no matter what caused the data loss, and is perfectly compatible with various Windows versions. It has an intuitive interface. You will find no problems using it.
- Ability to recover any photo formats: jpg, .jpeg, .png, .gif, .bmp, .tif, .tiff, .webp, etc.
- Excellent compatibility with various Windows versions: Windows 11/10/8.1/8/7.
- Support multiple photo loss scenarios: accidental deletion, formatted drive, emptied Recycle Bin, damaged hard drive, partition loss, etc.
- Work for recovering photos on any devices to Windows: Computers, HHDs, SSDs, external disks, USBs, memory cards, cameras, etc.
- Free scanning and previewing: 100% free scanning and previewing feature before recovery, ensuring an efficient recovery experience.
Next, let's start using FonePaw Data Recovery through a simple guide below to recover your precious photos.
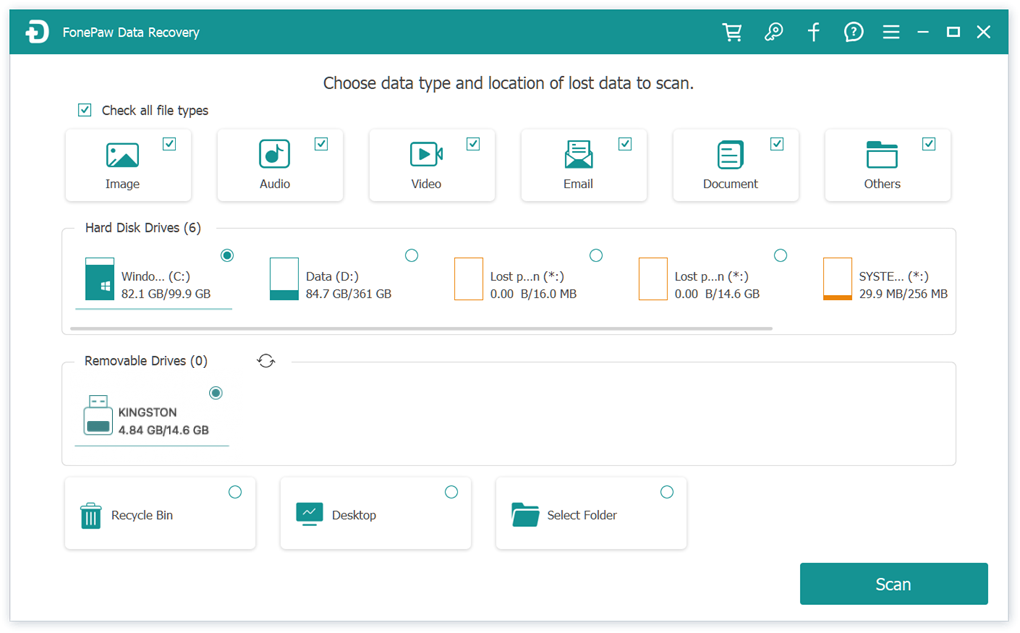
Step 1. Install and launch FonePaw Data Recovery. On the software homepage, select your file type (Image), then the location where the photo is lost, and click "Scan".
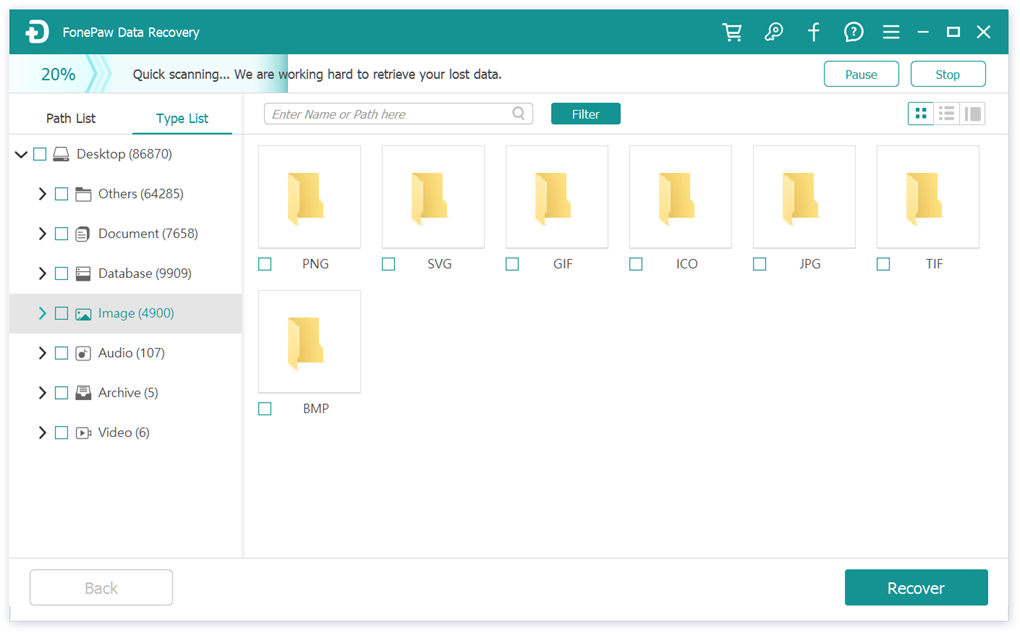
Step 2. After the scanning, the results will be listed on the screen. You can easily locate your deleted photos using the "Filter" feature.
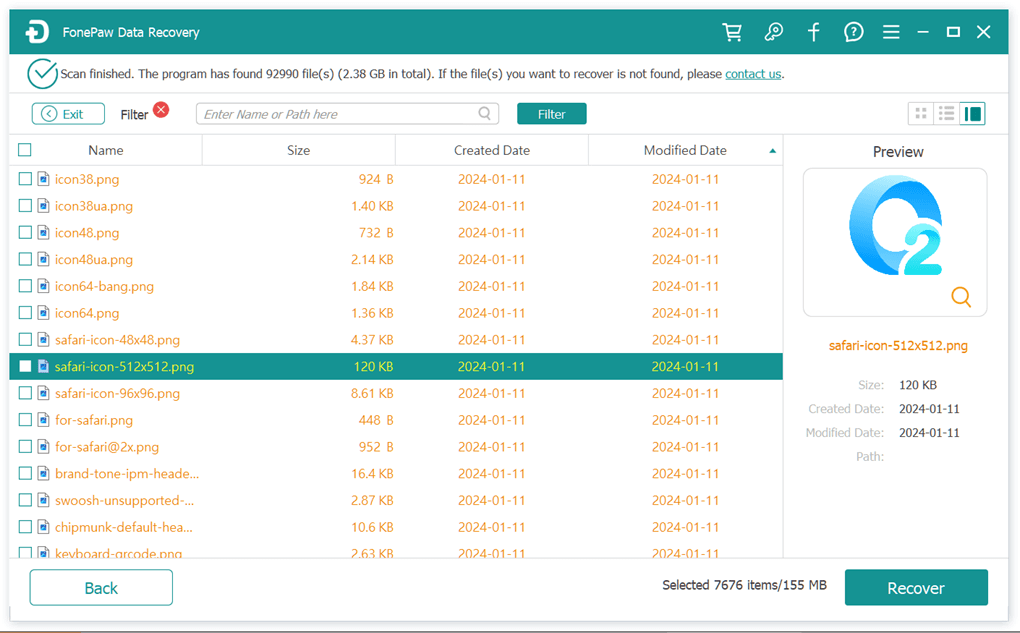
Step 3. Then you can preview photos in terms of image, size, modified date, etc. Afterward, select what you want to recover and click on the "Recover" button to start recovery.
3. Recover Deleted Photos from Previous Versions
If you don't want to download extra software to recover your deleted photos, there is an alternative. Previous Versions feature, also known as “shadow copies”, is a built-in backup and recovery feature available in Windows 11/10/8.1/8/7. It automatically creates snapshots for files at a time point. So, you can use it to restore your files to the previous time point when your photo is deleted or modified. Here are the steps.
- Navigate to the location of your lost photo.
- Right-click on the folder you want to recover. Select "Restore previous versions".
- Choose a file version to restore.

This method has limitations. You may encounter a situation where there are no previous versions available because you didn’t enable the feature to back up files in advance, or the Volume Shadow Copy Service (VSS) is disabled.
4. Recover Deleted Photos from File History
File History is also a backup feature. It was introduced in Windows 8 and continued in Windows 10 and Windows 11. It automatically backs up files in user libraries, desktop, favorites, and contacts folders, typically using an external drive (networked drive sometimes) to store the backup files. So, if you are a Windows 8//8.1/10/11 user and have ever used the feature to back up your photos, you can use this method to recover your deleted photos. Here is a simple guide.
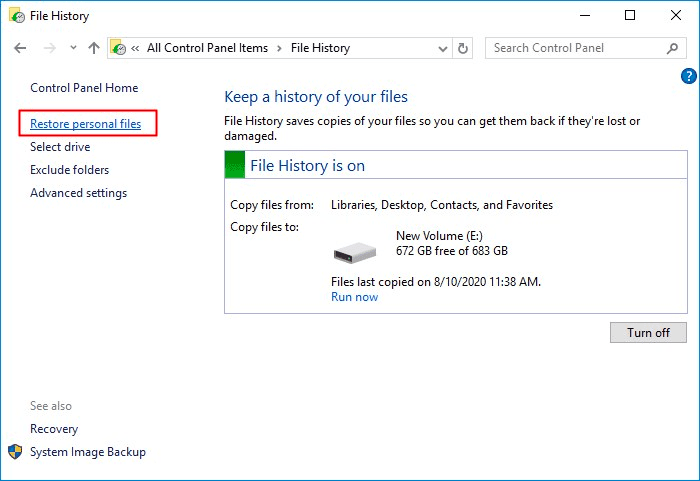
- Navigate to "Control Panel". In the search box, type "File History" and click it.
-
Click on the "Restore personal files" button.
- Select the backup file to restore.
5. Recover Deleted Photos from Backup and Restore
If you are a Windows 7 user, you are unable to use the "File History" feature. You can use the "Backup and Restore" feature instead. It is a built-in utility designed to create backups of user files, folders, and system configurations, as well as the system image itself. Here are the steps.
- Navigate to "Control Panel".
- Look for "System and Security" and click on it.
- Find "Backup and Restore" and click on "Restore my files".
- Browse the folders or files, and choose a backup file to restore. Then follow the on-screen instructions to complete the process.

Summary
Although losing precious photos can be painful, you can get them back since we have prepared you in so many effective ways. Check your Recycle Bin when you find the photos have been deleted in the first place. Built-in backup features of Windows like "Previous Versions", "File History", and "Backup and Restore" are also helpful.
If you seek a more straightforward and easy solution, consider using FonePaw Data Recovery to improve your chance to recover valuable photos. Keep in mind, the best way to prevent data loss is to take regular backups. You can use some external storage devices or cloud storage services such as Google Photos, Dropbox, OneDrive, etc.

Data Recovery
Recover deleted data from PC/Mac, USB, and other removable drives!