


When people's working lives are moved over the Internet in the past years, Microsoft Teams also became a vital platform for enterprises to keep employees stay in tight collaboration online. As more important conferences are hosted through Microsoft Teams, people wonder if there are ways to record the meetings for preventing missing important notes mentioned in the conferences.
Therefore, this post would guide you with the step-by-step manipulation tutorial to record Microsoft Teams meetings with or without notifications. Please scroll down and continue reading if you also need help.
1. Can You Record Microsoft Teams Meetings?
For facilitating the high-efficient online conference progress, Teams has provided a built-in feature for people to record Teams meetings without depending on third-party programs to help. However, this feature comes with restrictions, as not all meeting participants could process the meeting record. The following table demonstrates the possibility of different users recording Teams meetings:
| User Type | Available to record | Control the recording |
| Hosts (Meeting organizers) | √ | √ |
| Company employees | √ | √ |
| Users with Office E1, E3, E5, and 365 Enterprise license | √ | √ |
| Users from another company | × | × |
| Guests | × | × |
| Anonymous users | × | × |
2. How to Record a Meeting in Teams for Free
As you've already known, Microsoft Teams actually provide the option to record your participated meeting. And let's check out the steps.Microsoft Teams Recording Preparations
As the Microsoft Teams meeting recording is unavailable for anyone to proceed, you have to ensure that you have met the following qualifications before getting started with the official method to record Teams meetings:
- Whether you have the license of Office 365 Enterprise E1, E3, or E5
- Whether your right to record the meeting has been approved by an IT admin
- Whether your device has enough space to save the recording
- Whether you have ticked the Teams Meeting Policy called Allow Cloud Recording
- Your account status is not anonymous or would be regarded as a guest, or federated user
- Make sure your region has been allowed by Microsoft to record Teams meetings
Start Recording Teams Meeting
As you have double-checked that you are available to record Teams meeting, it's time for you to proceed with the recording process with the manipulation guidance provided below. Here will show you the correct process to start and control recording meetings on Teams.
1.Run Microsoft Teams and start the meeting.
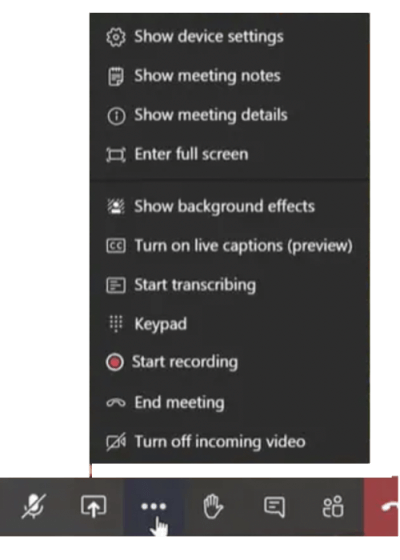
2. As the meeting gets started, on the controlling bar, click on to proceed to record the meeting by tapping the Start recording option.
3. Once again, you can end the recording here as the meeting is over.
After Recording: Where Does Teams Save Recordings
Based on the type of the meeting, the recordings would be saved in different places:
- For the channel meetings: the recordings would be saved to SharePoint.
- For the meetings in a channel: the recordings would show up in the meeting chat or channel conversation.
- For other types of meetings: the recordings would be saved on OneDrive.
3. How to Record Teams Meeting Secretly
A great downside of utilizing Teams' built-in recording feature should be its recording notification. When you proceed with the recording, everyone who participated in the meeting would be notified that the recording is started. Therefore, if you consider recording Teams meeting secretly, FonePaw Screen Recorder turns out to be the best program for you.
Recommended Teams Meeting Recorder
As an awesome Teams meeting recorder, FonePaw Screen Recorder would assist people to capture the meeting details with great quality, and no notification would be delivered to the meeting participants that the recording gets started. Other than Teams, FonePaw Screen Recorder can be utilized to record other online conferences, including Zoom, Webex, and more.
What's more, FonePaw Screen Recorder is an easy-controlling program, which provides optional modes for people to customize the recordings in the personal preferences section. For more flexible recording control, FonePaw Screen Recorder provides customizable hotkeys for people to make full use of the program in more convenient ways based on their own using habits.
Free Download Buy with 20% off Free Download Buy with 20% off
More Advantages of FonePaw Screen Recorder:
- It is able to simultaneously record microphone and system sounds.
- No lag performance avails to record meetings and other screen activities.
- Real-time painting and snapshot taking are both available.
- The noise cancellation feature enables you to record the voice more clearly.
- Scheduled recording mode provides to automatically proceed and end the recording without manual control.
Record Microsoft Teams Meeting with FonePaw Screen Recorder
In the following, the procedures to control FonePaw Screen Recorder to record the Teams meeting would be introduced explicitly to you.
Step 1. Preset Video Recording in Video Recorder
First, open FonePaw Screen Recorder and select Video Recorder from the main feed. In Video Recorder, you can customize the recording settings such as the recording area, and pre-test the audio volume in preferences.

 Tip:
Tip:
You can utilize the Task Schedule to enable the auto-recording without manually controlling it.
Step 2. Proceed Recording Teams Meeting
As the Teams meeting starts, press the large REC button in FonePaw Screen Recorder to proceed with the recording. During the recording, you can use the drawing panel to take notes for not to miss any important points mentioned in the conference.
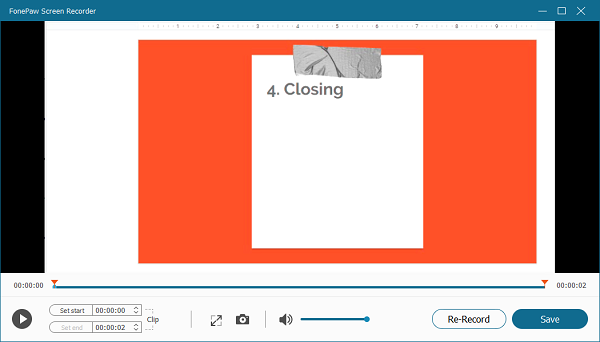
Step 3. Save the Teams Meeting Recording
When the meeting ends, simply tap the stop button on the controlling bar to end the recording. Subsequently, only by clicking on the Save button, and the meeting recording would be stored locally on your computer.
4. Frequently Asked Questions
Why is the Microsoft Teams Start Recording button greyed out?
When you notice that the Start Recording button provided in the Microsoft Teams is greyed out, it probably means that the storage path for storing the recordings has been altered, or there occurs a policy change. Otherwise, when your account doesn't meet the qualifications to proceed with the recording, you would also find that the Start Recording button is disabled and appears in grey.
Who has permission to record Teams meeting?
As introduced in the first module, only the users who are the meeting organizers, company employees with permission from the ID admin, and the users with Office E1, E3, E5, and 365 Enterprise licenses would have the permission to record Teams meeting inside the app.
How to share recordings in Microsoft Teams?
Teams allow people to share the recorded conferences with those who are not invited to participate in the meeting. The meeting organizers just need to access the recorded files in OneDrive or SharePoint, then copy the links and directly share them with anyone you like. If you are not the meeting organizer, you would be asked to gain approval from the host before sharing the recording links with other people for getting access to the content.
Final Words
Recording Teams meetings is an easy job, as both the official and the awesome third-party screen recorder could both be your help. With these 2 methods, you don't need to worry about missing any important notes in a Teams meeting. Just put them into practice in the upcoming Teams conference!
