


Data security is a big concern for everyone. When it comes to the usage of iPhone/iPad, Touch ID & Passcode are the shields to prevent your personal data from being accessed without permission. In this article, we're going to focus on the tips that you can use when setting up Touch ID & Passcode and increasing data security on your iPhone/ iPad.
You May Like:
Touch ID Not Working-How to Fix It (opens new window)
How to Unlock iPhone for Use with Another Carrier (opens new window)
Part 1: Steps to Set Up Touch ID
Touch ID allows users to unlock their iOS device with a fingerprint. It is available for the under-listed iPhone/iPad models:
- iPhone 5s or later;
- iPad Pro, iPad Air 2, or iPad mini 3 or later.
To use Touch ID, you need to add a fingerprint first (you can enroll up to five fingerprints). Here are the specific steps:
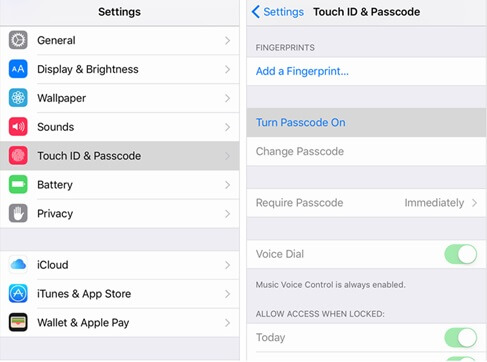
Step 1. Go to "Settings" > "Touch ID & Passcode". You'll be asked to enter the passcode of the device if you have turned on the passcode.
Step 2. Click "Add a Fingerprint" to begin.
Step 3. You'll be asked to place a finger on the Home button several times until your fingerprint is completely read by the device. Please:
- Use your finger to touch the Home button instead of pressing it;
- Keep touching the Home button until you feel a vibration;
- Make small adjustments to the position of your finger each time you touch the Home button.
Step 4. You'll then need to adjust your grip. In this step, touch the Home button with the outer areas of your fingertip, instead of the center part that has already been recorded.
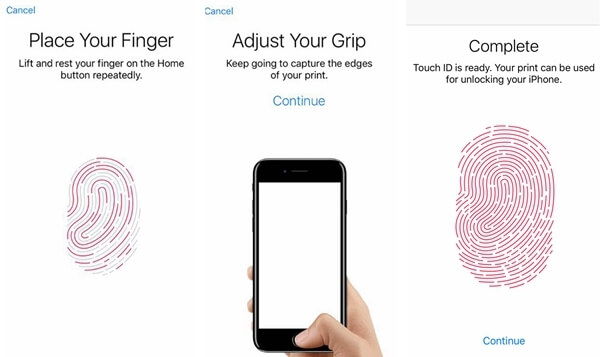
Step 5. Your fingerprint has been successfully added when you see "Complete". You can then rename the fingerprint to help yourself remember the right finger.
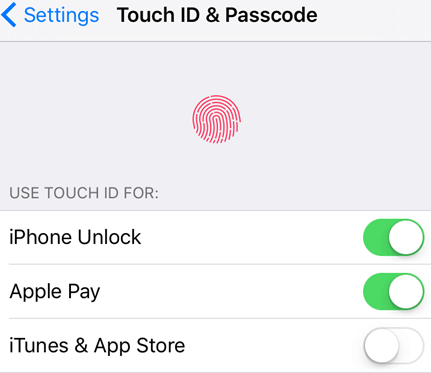
You can not only use Touch ID to unlock your iDevice, but also to make purchases in iTunes/App/iBook Store and make Apple Pay purchase. To enable the functions, on "Touch ID & Passcode" settings, toggle on "Apple Pay" and "iTunes & App Store" options.
Note: For iPhone 6/6 Plus or later, you can use Touch ID for Apple Pay within apps, and on websites in Safari; for iPad Pro/Air 2/Mini 3 or later, only within apps and on websites in Safari.
Part 2: Steps to Set Up Passcode
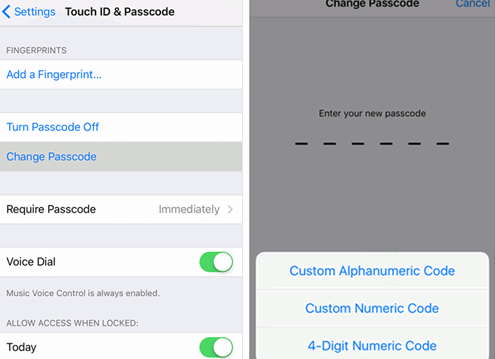
Step 1. navigate to "Settings" > "Touch ID & Passcode" ("Passcode" for the device without Touch ID), and then tap "Turn Passcode On".
Step 2. You'll be asked to enter the passcode. Enter the passcode and re-enter it to confirm.
Note: There are four types of passcode: six-digit passcode, four-digit numeric code, custom numeric code, and custom alphanumeric code. Tap on "Passcode Options" to switch to the one you like.
Step 3. If You want to change the passcode later, tap on "Change passcode".
Part 3: Tips to Level Up Information Security
To level up the security of your iPhone/iPad, you should:
1. Always turn on passcode or Touch ID
Without passcode or Touch ID, others can easily access your information when the device is lost or your data will get mistakenly deleted by children or even your pets. (If you have data deleted, FonePaw iOS Data Recovery (opens new window) can help you get them back).
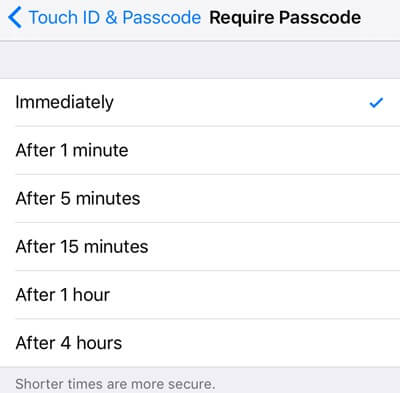
2. Require passcode Immediately
But you change the "Require Passcode" setting to require passcode 1 minute~4 hour after the screen is locked. But for your security, you should set it at "Immediately" so that your device requires passcode as soon as the screen is locked.
3. Enable Erase Data
The feature will erase your device automatically after ten failed passcode attempts. This could be very helpful when the device is stolen or lost. Remember the case of FBI against Apple? Even the FBI found it hard to disable this auto-wipe function. So go to "Settings" > "Touch ID & Passcode" > Toggle on "Erase Data".

4. Be Careful about "Allow Access When Locked"
iPhone/iPad now allows you to access some features when your device is locked. Including:
- Notifications View: View notifications from apps on your device, such as WhatsApp, Facebook.
- Siri: Siri can answer questions and execute commands right from the Lock screen.
- Wallet: You can access things in Wallet, such as coupons, boarding pass, movie tickets without unlocking your device.
- Reply with Messages: When your contacts send you a message from iMessage, you can read the message and reply it directly from the Lock screen.
- Home Control(iOS 10): You can control your home automation accessories without unlocking the iPhone/iPad.
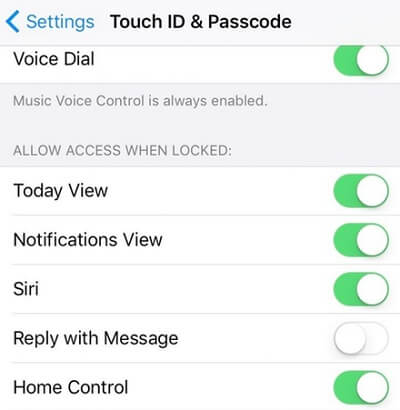
The feature can bring us a lot of conveniences, but it also means that some important information of yours are accessible for anyone without unlocking your device. For example, your credit information on Wallet; important messages on WhatsApp or iMessage. So if you find it necessary, disable the options in "Settings" > "Touch ID & Passcode" > "Allow Access When Locked".
5. Unable to Unlock Device
If you have trouble unlocking your device, for example, forgetting passcode (opens new window) or Touch ID not working (opens new window), click the link for help.
That's it. If you have further questions about Touch ID or passcode, leave a message in the discussion section.