


Some people are asking for a way to format a hard drive for Mac. Whether you are trying to backup Mac to an external hard drive, wipe out any personal information and sell the computer, or even use a new operating system, you need to format the hard drive on your Mac or PC.
But before you can do anything, you need to make it clear that the hard drive you want to wipe or format would be an external hard drive or an internal hard drive. We can easily format external hard drive for Mac. But when it comes to format internal hard drive for mac, things are getting a little more complicated. Maybe we will go through with the way to format a startup drive for Mac later. But now in this guide, we will cover the situation of formatting an external hard drive in steps.
Notice that you need to backup your importanct files on the hard drive you are going to format as the procedure would delete all of the data and bring it back to the factory settings.
Format an external hard drive for Mac
# How to Format External Hard Drive for Mac
If you are trying to format Mac external hard drive, you can go over the process step by step:
Step 1. Connect your hard drive to your Mac.
Step 2. Open Finder and choose "Applications > Utilities > Disk Utility" to launch the app on your Mac.
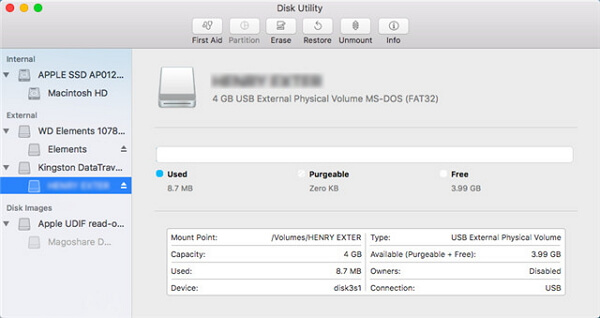
Step 3. Once you open the Disk Utility app, you can see all the drives on your Mac are listed on the left-hand sidebar. Just select the one you want to format and click on the "Erase" tab.
Format an external hard drive for Mac
Step 4. Now in this interface, you will see a "Format" option. In this drop-down box, you are allowed to choose different format.
OS X Extended (Journaled) should be selected if you are going to use the drive as a system or 'boot' drive on macOS.
Mac OS Extended should be selected if you will be using the drive as a media or 'scratch' drive on Mac.
Mac OS (FAT) is compatible with both PC and Mac platforms. However, there's a limit to transfer files within 4GB.
ExFAT is similar with Mac OS (FAT) but it can work with files as large as 16EB (exabytes)
So if you are going to use an external drive for both your Windows PC and your Mac, you should choose the ExFAT or FAT format.
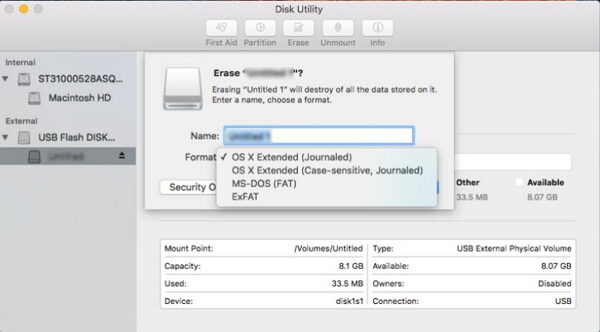
Choose format for hard drive
Step 5. Name your drive you like but it would be better to choose something specific, so that you can make things clear every time when you look at its name.
Step 6. Click on the "Security Options" button and you are able to choose the way (fastest or more secure) to format your external disk. The fastest way will save your time but it erases the drive only by removing the header information. That is to say, you can easily restore the hard drive using a data recovery software if the files haven't been overwritten. It is not good and the format process is meaningless in some way. So maybe you can try the more secure one. It may take quite a long time, but it will erase the drive in a deeper way.
Step 7. Click on the "Erase" button to start erasing the external hard drive or USB. Formatting a hard drive will take a while and wait for it patiently. Once the progress bar is at 100%, the job is done!
# How to Recover Formatted Hard Drive on Mac
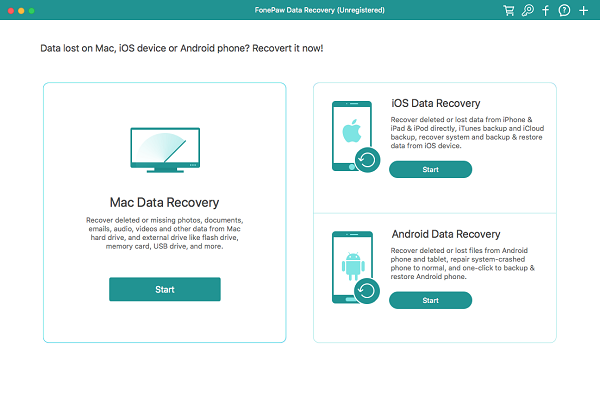
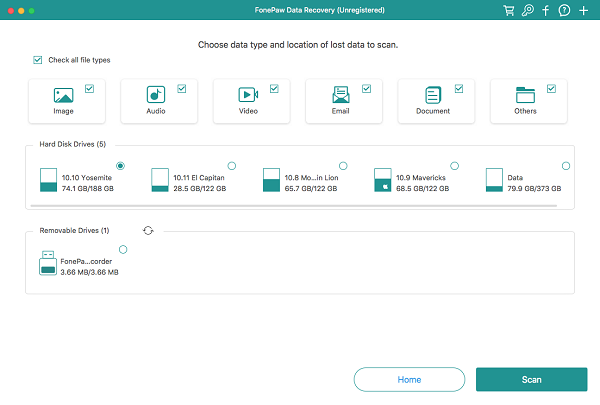
As it is mentioned above, after formatting a hard drive, all data on the hard drive will be erased. But what if you have second thought and need to recover files from the formatted drive? Is it possible to recover files from formatted drive on Mac? Yes, it is possible. But you'll need FonePaw Data Recovery (opens new window), a Mac data recovery program that can recover deleted files from hard drive, SD card (opens new window), USB drive even the drive has been formatted.
Free Download Buy with 20% off
Step 1. Run FonePaw Data Recovery on your Mac. Remember that you should not install the application on the formatted drive. Otherwise, some of the files could be overwritten by the application.
Step 2. When the application is open, select the files you want to retrieve from the formatted drive. Tick the formatted hard drive. And click Scan.
Step 3. The application will first quickly scan some easy-to-get files on the formatted hard drive. If you need more files. Click Deep Scan to find files that are buried deeper.
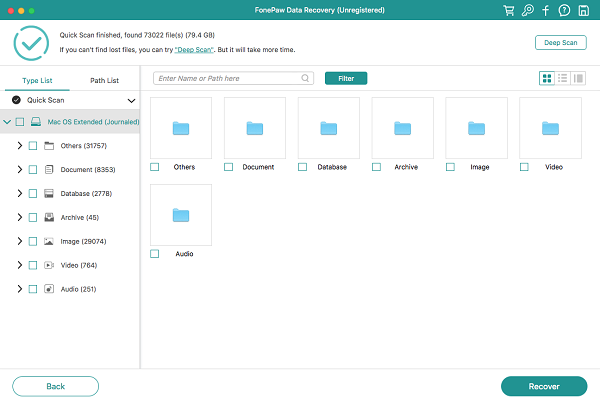
Step 4. View the results by file types or path. Tick the files you need and click Recover. If you have deleted files that haven't been found, do not save the recovered files on the formatted drive. Instead, save them on other drive, such as your USB drive.
If you have any problem when following the steps to format hard drive for Mac, please leave us a message on the comment box below!