


To screen record on Mac, there are actually many solutions to work it out. For instance, you can utilize the built-in feature provided by Apple's media player, QuickTime to proceed the screen capturing without third-party software installed (audio recording cannot be proceeded at the same time); or turn to any online and desktop recorders to realize the screen record on Mac with audio equipped.
Today, this post will focus on a lightweight but powerful screen recorder for Mac, which provides effortless recording modes and flexible settings to record screen and audio at the same time on Mac. Now, please read further to see who it is and how it works!
Use FonePaw Screen Recorder to Record Screen and Audio at the Same Time on Mac
You won't want a bulky app to screen record on Mac as it probably leads to slower Mac performance by consuming the CPU of your computer. Referring to this, FonePaw Screen Recorder should be a rational option with the lightweight body and easy-using functions to cater with all recording demands on Mac computers.
The program can fully satisfy you no matter for the gameplay recording (high resolutions and FPS required), or online lessons as well as meetings capturing (webcam, microphone recording, and instant control with note taking features). With customized settings as well, you can flexibly determine the recording settings and output parameters to export the videos/audios. The following qualifications all drive users to select FonePaw Screen Recorder while they gonna record Mac screen with audio:
Free Download Buy with 20% off Free Download Buy with 20% off
Key Features of FonePaw Screen Recorder
- Simultaneous recording mode - it is able to proceed the screen recording with the system sound, microphone, and webcam accompanied at a time.
- Customization on parameters - the format, codec, quality, and channels are all allowed to be freely customized before proceeding the screen or audio recording.
- Flexible controls on capturing screens - the program delivers easy-using functions such as hotkeys setting to enable more convenient manipulation to control the recording process.
- Beneficial recording features - more effortless tools such as the scheduled recording, locked window recording, and noise cancellation equipped to realize more convenient screen capture on Mac in high quality.
- Instant note taking panel - while proceeding the screen recording, the instant drawing panel is provided to take noting on the recordings, which is perfect for doing highlights while taking a lesson or attending the online conferences.
Actually, there's more to explore as FonePaw Screen Recorder is designed with more helpful and beneficial features for you to facilitate screen recording with audio on Mac in more time-saving but with great outputs. Now, let's also explore the manipulation of FonePaw Screen Recorder to figure out how to screen record on Mac with audio utilizing this app.
📽 Video Guide (Text guide comes in a close second)
Step 1. Complete Installation
First, please install FonePaw Screen Recorder on Mac at first. The program is compatible with the latest macOS systems. Simply by tapping the Free Download button provided here and follow the simple instructions to complete the installation, you can get started with the screen record on Mac without charge (FonePaw Screen Recorder offers free trial before making the purchase. Please try it out first).
Free Download Buy with 20% off Free Download Buy with 20% off
Step 2. Select Video Recorder
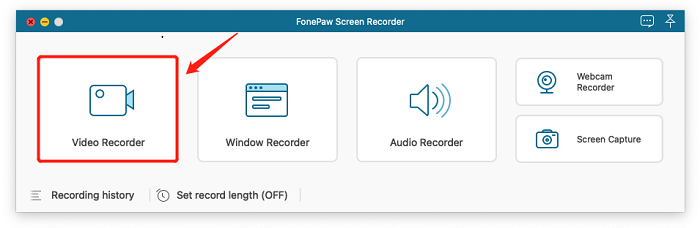
When FonePaw Screen Recorder is now installed, please launch the app in Launcher on Mac, and select the Video Recorder from its main feed. To record audio only, the Audio Recorder aside better suits your demand.
Step 3. Configure Recording Settings
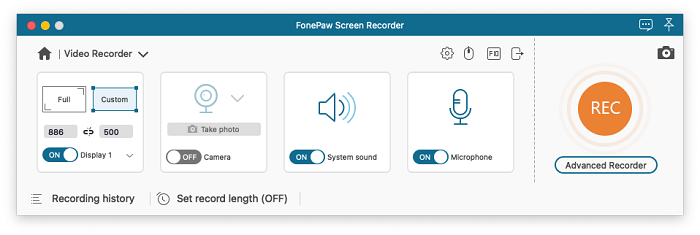
In Video Recorder, please customize the recording area in your preferences. FonePaw Screen Recorder allows to record the full screen or customize the size freely.
To record screen with audio on Mac at once, turning on the System Sound and Microphone options, then also adjust the recording volume to create a perfect recording before it proceeds. The Webcam recorder can also be opened here.
Step 4. Initiate Screen Recording with Audio
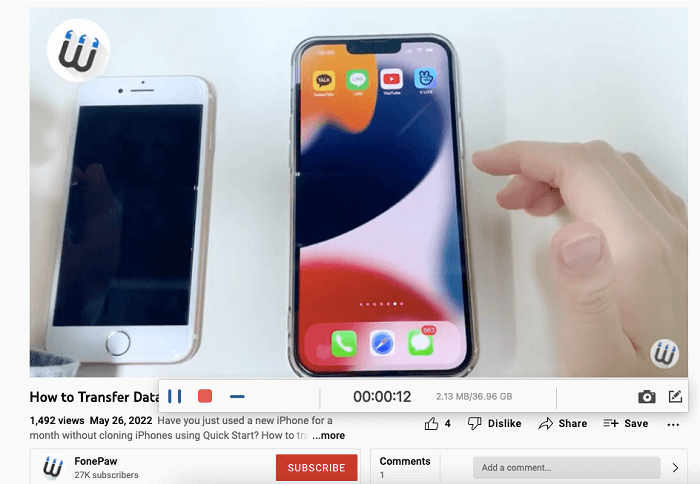
Once the settings are determined, you can initiate the screen record with audio on Mac by tapping on the large REC button on the screen. Then FonePaw Screen Recorder will count down from 3 and begin the recording process for you.
Utilizing hotkeys to control the recording is also possible.
Step 5. Stop and Save the Recording
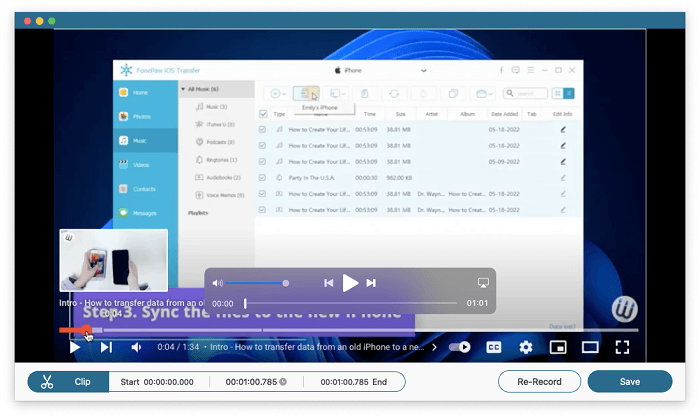
As the recording is finished, please confirm Stop to end the screen record now. Subsequently, you would be turned to the previewing window to check the status of the recorded video. After trimming the unnecessary parts from it (premium feature), tap the Save button and the recording will be saved on Mac locally for playback at anytime later.
Free Download Buy with 20% off Free Download Buy with 20% off
Use QuickTime to Screen Record on Mac with Audio [Internal Audio Included]
When QuickTime provides the hidden recording feature to enable screen record without third-party program installed on Mac. However, if you wish to capture audio while processing the screen recording at once, QuickTime fails to satisfy your need. Nevertheless, there is still a catch to work it out! Only by installing an extra piece of software named Soundflower, people can then make QuickTime work to capture a screen with audio on Mac. In the following, please follow the procedures to install Soundflower to enable QuickTime to record Mac screen with audio.
- Click here to follow the instructions.
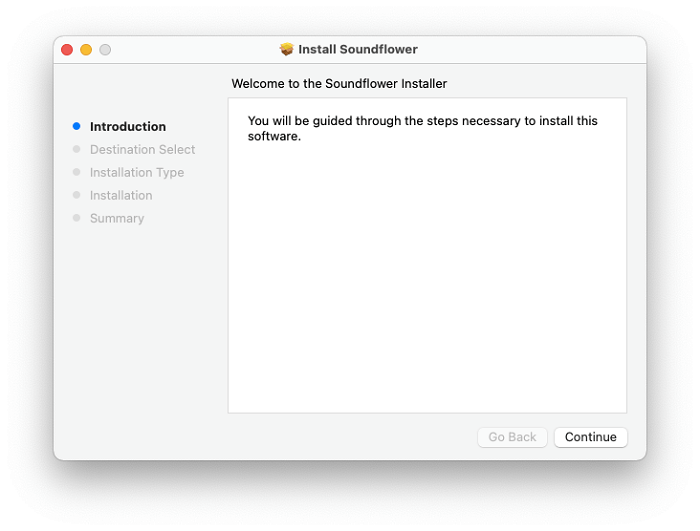
Step 1. Please install Soundflower on Mac first. You can find the installation package on Github website.

Then open the package and launch the installer to get the plug-in.
 Note:
Note:
- If the installer cannot be opened due to security warning, you may need to go to Apple menu >> System Preferences >> Security & Privacy to grant the access.
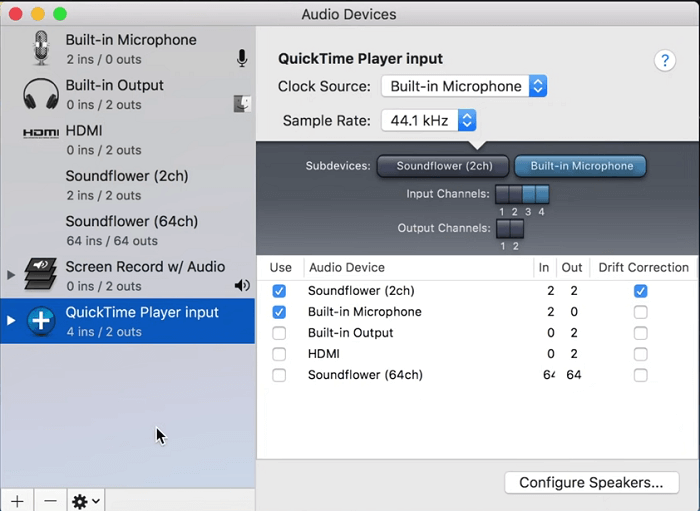
Step 2. Now you should be able to find both Soundflower (2ch) and Soundflower (64ch) on your audio devices, and you need to set the on-use device up. Go to Finder > Applications > Utilities, and find Audio MIDI Setup. Here, click "+" at the bottom left corner to create Aggregate Device and Multi-Output Device that contain the Soundflower.
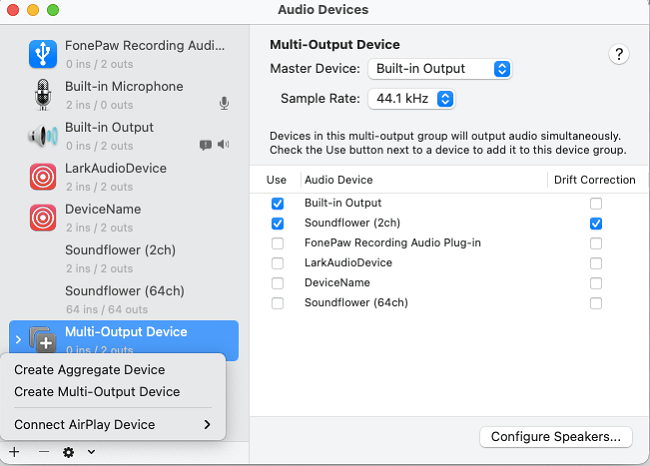
Create and set up the Multi-Output Device. Select Built-in Output and Soundflower (2ch) as the devices. In case that you forget the use, you can rename it to something like "Screen Recorder w/ Audio".
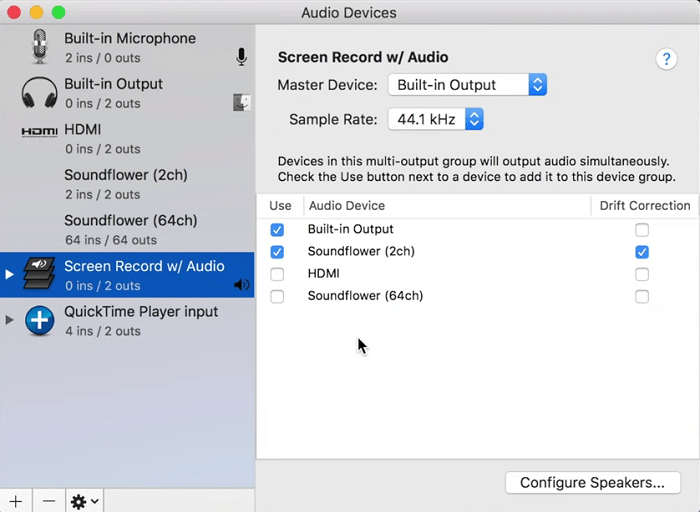
Similarly, create Aggreate Device like this. Tick Built-in Microphone and Soundflower (2ch), and you can also rename it to something like "QuickTime Player input" if you want to better recognize it.
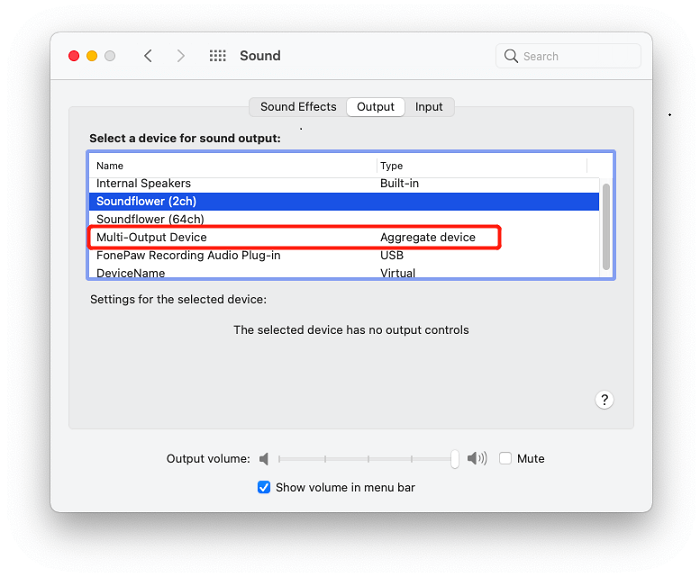
Step 3. Now, please go into System Preferences >> Sound >> Output and select Multi-Output Device to be the default device, and keep others unchanged.
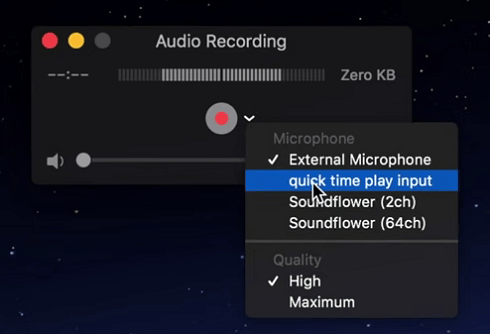
Step 4. Subsequently, please open QuickTime and go to File >> New Screen Recording to initiate the recording bar. Once it appears, click on Options and check Aggregate Device in the Microphone setting.
Step 4. When the audio setting completes, one tap on the Record button to initiate screen recording on Mac now! QuickTime will ask your permission to allow the recording. Please confirm Record to proceed. QuickTime will also give you the opportunity to select whether to record a full screen or the customized part. Just determine it in your preference.
Step 5. Once the recording is over, please click on the Stop button, then QuickTime will automatically store the recording to the local folder on your Mac. You can play the recording back with QuickTime player without Internet connection!
Conclusion
To sum up, there has no direct option to record screen with audio on Mac. Even to utilize QuickTime, you ought to install Soundflower extension to enable the audio recording at a time. Therefore, an all-in-one screen recorder like FonePaw Screen Recorder can better cater to your need to record both the Mac screen and audio together.
