


Online meeting is essential on phone for convenient working. And Zoom is the most popular app designed for online meetings. With this capability, you may come up with the idea of recording a zoom meeting on your phone, when having important meetings and wanting a reply for further review and analysis. Here in the post, it will prepare you from obtaining prerequisites prior to the recording for understanding three operation methods to record Zoom meeting.
1. Before Recording a Zoom Meeting on iPhone: Know the Prerequisites
As you can know, Zoom is equipped with built-in recording capabilities. However, these capabilities also come with multiple conditional limitations. The prerequisites are listed in detail for you to know better before you record a Zoom meeting:
1. The Zoom app only supports cloud recording for phone users to record Zoom meetings.
2. Only the host and the co-host of the conference are permitted to record when in Cloud recording.
 Note:
Note:
3. Only a licensed user or paid subscriber can use the function of cloud recording.
2. How to Record a Zoom Meeting Using Cloud Recording on iPhone
After the above introduction for using cloud recording, you will know that only the host and the co-host of the Zoom meeting can record a meeting on iPhone by using a cloud recording feature.
You can follow the below illustrations step by step to record Zoom meeting.
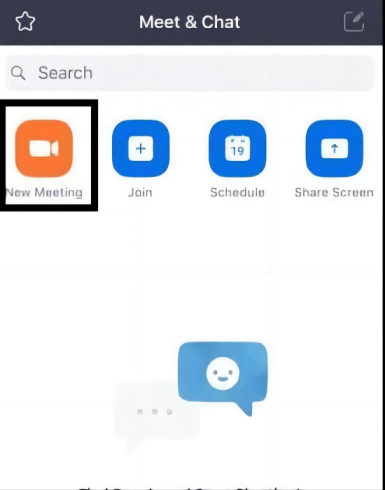
Step 1. Start a Zoom Meeting
Launch your zoom app and make sure you sign in as a paid subscriber account. Only in that case, you can use the record function while a basic user can not use it. After the sign-up, you can start a Zoom meeting.
Step 2. Find and enable the “Record to the cloud”
After you start the meeting, you can go to the lower right of the interface and click on the toolbar named “More”.

A pop-up window will show up and you can tap on the selection of “Record to the cloud”, and start the record right on.

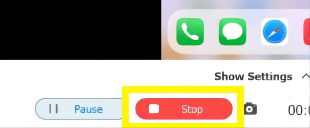
In the middle of the recording, you can click stop or pause in the recording icon in the upper right and select the corresponding option based on your need.
![]()
Step 3. Export the recording
When the meeting is over or you want to stop anytime, Zoom will start uploading the recording contents to the cloud. And it will take a certain time to process according to the actual duration of your meeting. Here you should know that uploading a 10-minute zoom meeting will take more than 20 minutes, which is equivalent to twice or more of the recording time.
Once the processing is finished, Zoom will send you an email that contains two download links. One is for management, and the other is for sharing.
And by so far, you have done all the necessary steps to save to the cloud, and you can enjoy your meeting record at any time. In the meantime, you can also share with anyone you want.
3. How to Record a Zoom Meeting as a Participant on iPhone
But if you’re a meeting participant instead of a conference host or co-host, then how to recording a Zoom meeting? That means you can’t apply the above-mentioned method. As a participant, you can’t use the cloud recording function. But there are still methods that can meet your needs of recording Zoom meetings as you want.
The most suggestive method is via a third-party tool to record a Zoom meeting. Other than that, if you hope to know more methods or methods for free, you can also use iPhone built-in recorder to achieve your goal. These two methods for recording Zoom meetings as a participant will be discussed in detail below. You can read on and follow the steps to learn more.
Record Zoom Meeting Video & Audio via a Third-Party Tool
To record a Zoom meeting for review as a participant, you may seek help from a third-party tool to record the Zoom meetings. FonePaw Screen Recorder stands out for its recording features, high-quality video and audio, and 6x faster download speed. It is noted that you can get not only 2k but also 4K resolution on the Phone Recording mode.
Free Download Buy with 20% off Free Download Buy with 20% off
Here we will show you a step-by-step guidance on how to operate recording a Zoom meeting. Read on for details.
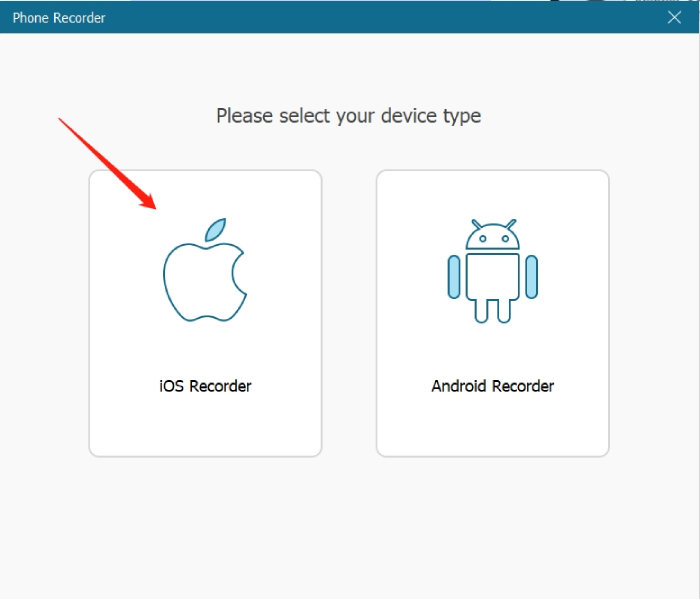
Step 1. Open your FonePaw Screen Recorder and select your device type
After opening the FonePaw Screen Recorder, here you shall select the “Phone Recorder” and then click on the “iOS Recorder”.
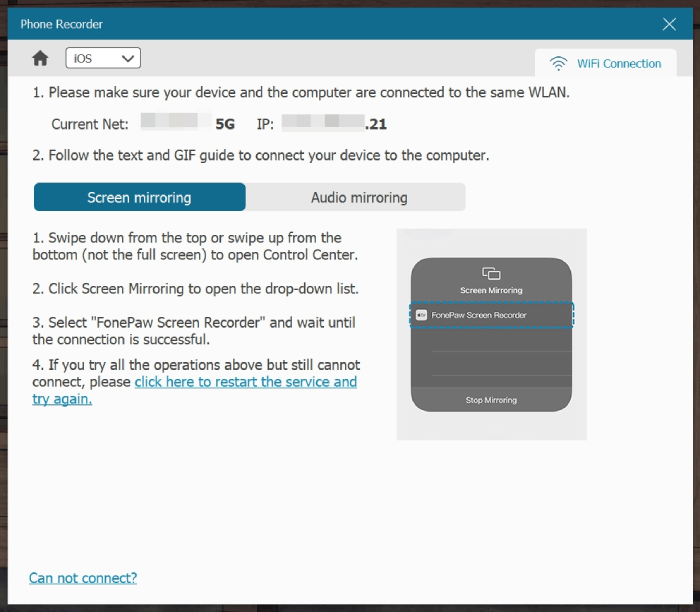
Step 2. Prepare your phone for Mirroring to PC
There is one important condition that you shall know. That is, the mirroring function requires your phone and your PC shall connect to the same network.
After ensuring the network condition, open the control center of your iPhone and select Screen Mirroring. Then choose the FonePaw Screen Recorder.
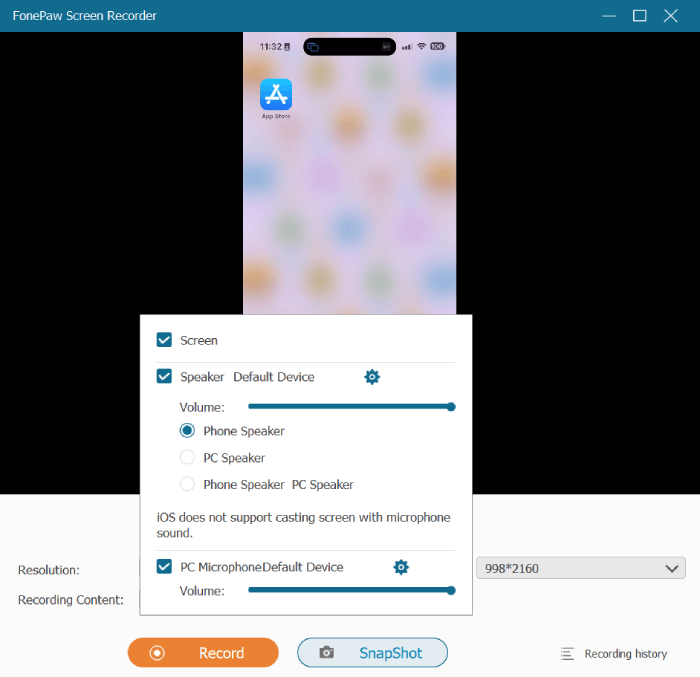
Step 3. Preset the record parameters on FonePaw Screen Recorder
After your iPhone is all setup, now you can go back to the main interface of the program FonePaw Screen Recorder on your PC. Here, you shall pick your preferred resolution and recording content before you start the recording.
Step 4. Start Recording
When all the parameters are set up, you can start the recording in no time by hitting the Record button. During the recording, a pause at any time is available for choice.
Step 5. Save to computer
Click the “Stop” button when you no longer need to record. With the help of the in-built trimmer, you can edit the recording before output and saving it.
Record Zoom Meeting Using iPhone Built-in Recorder
If you’re a no paid subscriber and don’t bother using a third-party tool, there is also another way to record Zoom meetings by using the built-in recorder on your iPhone. Although it is the simplest way, it also comes with many limitations, like the system requirement of iOS 11 and above, and no editing support for video. The operation is very simple. Read on for more:
Step 1. Launch Zoom and Get the Meeting Prepared
After you launch Zoom, first you shall be prepared for the meeting as a host or joint meeting as a participant.
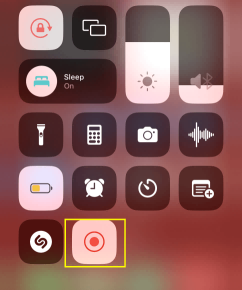
Step 2. Tap the Record Icon to start recording
Every iPhone has a fixed function that you can pull down Control Centre from the top. If you have added the Recording module in the Control Centre, you can just start the recording with a simple tap on the Recording Icon and after a short count down. There goes the recording, Easy and speediness.
![]()
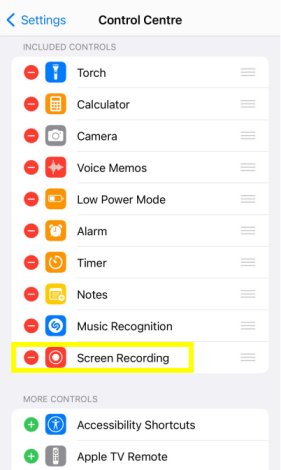
If you do not add the Record Module in Control Centre before, you can find the Control Centre in “General” in the iPhone setting, and press its plus icon in front. Then the Record module will be forwarded to the “Included controls” which you can find its icon on the pull-down menu as well.
Step 3. Stop Recording by pressing the Record Icon again
When the Record Button turn in red, it means the recording keeps going on. When you do not need to record more, you can press the Record to stop. And your iPhone will automatically save the recording to your Photo Album where you can find it later.
2. FAQs About Recording a Zoom Meeting on iPhone
Why Can't I Record My Zoom Meeting with Audio?
When you find the audio of your recording files does not work, do not panic. You can check and improve by referring to below methods:
- Make sure your recording files are compatible with your target media player. If your media player can’t recognize the recording files, you shall change to another media player or the default one in your device.
- Check for all mute settings in the Zoom app if you accidentally turn on mute. Meanwhile, do not forget to check whether you choose the wrong microphone before you record.
How to Record Zoom Meeting on iPhone for Free?
You can make use of the in-built recorder on the iPhone to record Zoom meetings for free. But this method has set up a bar for phones, which requires your iOS system to be at and above the iPhone 11 version. If you have a lower system version, it is recommended to use a third-party tool FonePaw Screen Recorder for the recording. It provides not only high-quality output but simultaneously allows you to conduct editing after recording.
Conclusion
Recording meetings on the Phone can bring great convenience to life. People can review it again for personal usage, or share the recording with bosses or colleagues. And three methods have been raised for solving the question of how to record zoom meetings on an iPhone, which are cloud recording, a third-party tool FonePaw Screen Recorder, and the in-built recorder on the iPhone.
If you’re a paid subscriber of the Zoom app, meanwhile being a host or co-host to the meetings, cloud recording is the most convenient way for you to record your phone meeting. And if you’re looking for high-quality recording performance and being a participant in Zoom meetings, you can look at the third-party tool FonePaw Screen Recorder. FonePaw Screen Recorder possesses necessary and powerful functions, such as recording versatile scenarios with kinds of recording modes, recording Zoom meetings with audio and webcam and so on. But last, all of these methods are user-friendly when they fit your request for utilization.
