


Nowadays, iPhones have become more than just devices – they are our personal storytellers, capturing countless moments that define our lives. However, as our photo collections grow, so does the need for storage space. If you find yourself grappling with limited iPhone memory, worry not! Transferring pictures from your iPhone 15/14/13/12/11 to your Mac is an ideal option.
But how to import photos from iPhone to Mac? In this article, we will present you with a variety of methods to effortlessly import photos from your iPhone to your Mac, from the convenience of USB connections to the wonders of wireless transfer through AirDrop and iCloud. Read this article and bid farewell to storage constraints. Now, let's get started.
How to Import Photos from iPhone to Mac with USB
Normally, to import photos from iPhone to Mac, you'll need a USB. It can be more convenient and allows you to transfer more items at a time. Thus, in this part, we will provide you with three helpful apps, including third-party software and built-in apps, to import photos from iPhone to Mac with a USB.
iOS Transfer Tool 🔥
Transferring photos from iPhone to Mac is made effortless with FonePaw iOS Transfer, a user-friendly and feature-rich tool designed specifically for this purpose. This remarkable software offers connection options of both USB and Wi-Fi for different user preferences. Not only does it ensure swift transfers over 20 iOS apps such as images, music videos, contacts, messages, and reminders, but it also boasts features for one click to transfer data from iPhone to iPhone, iPad, and Mac.
Plus, this program also offers additional iTunes-like functionalities for easy music management. With the iTunes Library in the built-in toolbox, you can sync iTunes, and selectly move songs, and playlists between iOS devices and PC/iTunes without restrictions.
- Support third-party software data transfer, restore, and backup
- Various connectivity options: USB or Wi-Fi
- Offer features more than iTunes can do
- Fast transfer speed and easy-to-use
- Compatible with Mac and Windows
- Embed a toolbox for additional features like ringtone maker
Now, follow the steps below to go through the two tutorials of how to transfer photos from iPhone to Mac with FonePaw iOS Transfer.
Manually Select Photos:
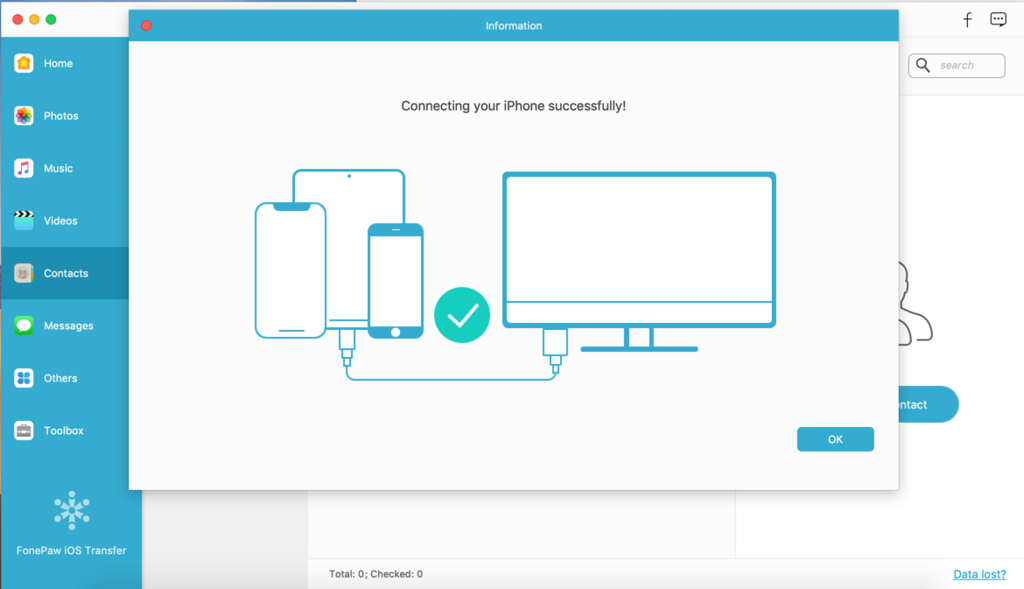
Step 1. Free download and launch the program and connect your iPhone to your Mac with a USB.
Free Download Buy with 20% off Free Download Buy with 20% off
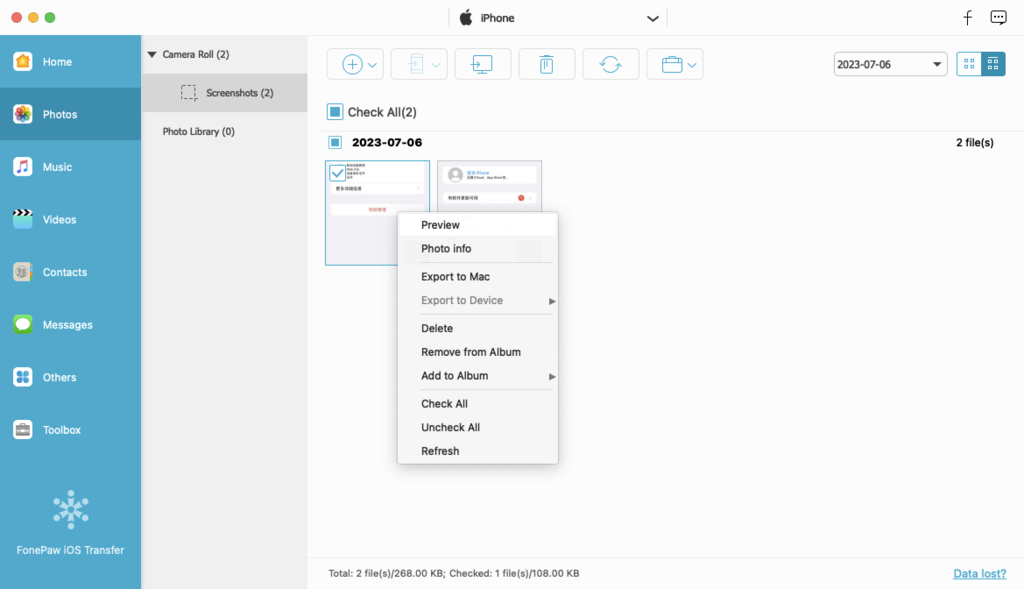
Step 2. When your device is connected successfully, select "Photos" from the left panel and you'll see the photos that can be transferred on the right panel.
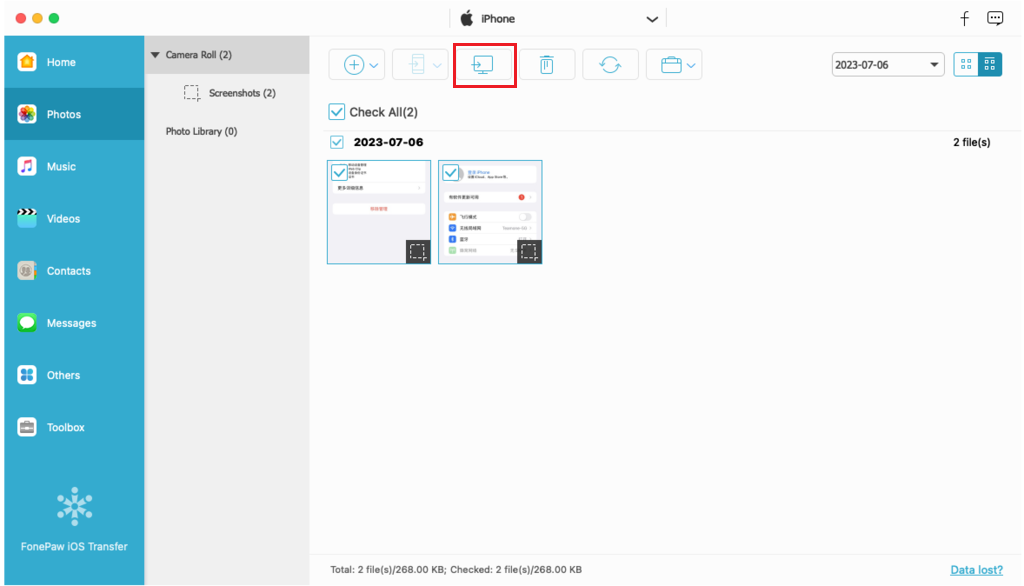
Step 3. Select the photos you want to transfer and then click the "Export to Mac" button to start transferring.
One-click to copy all photos:
STEP 1. Connect your iPhone 15/14/13/12/11 to your Mac with a USB.
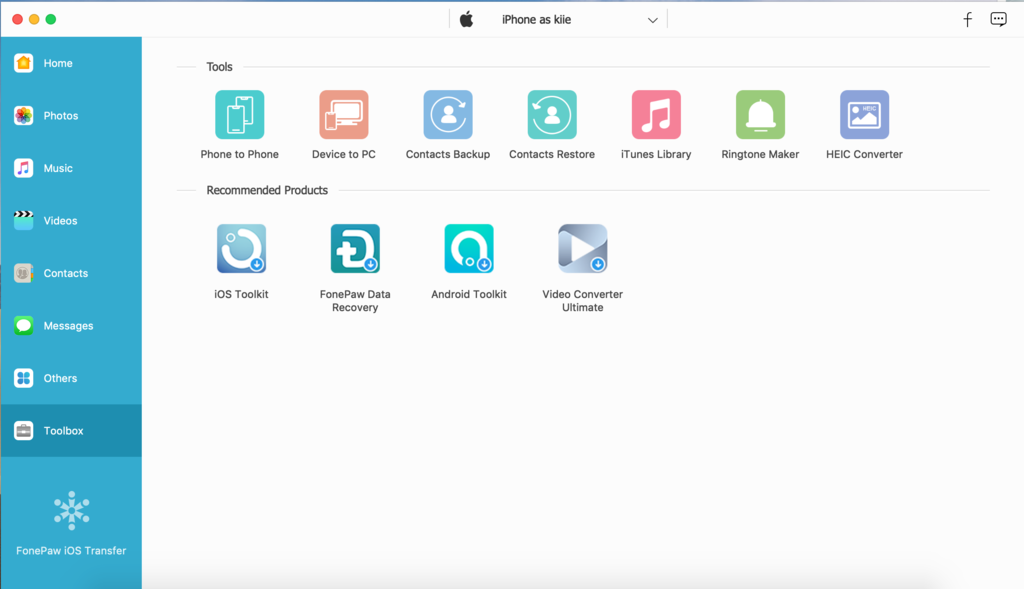
STEP 2. Select Toolbox from the left panel and choose "Device to PC".
STEP 3. Then select "Photos" and hit "Start". You'll see all photos moved from iPhone to Mac within seconds.
Free Download Buy with 20% off Free Download Buy with 20% off
The Photos App
If you simply want to import photos from your iPhone, the Photos app on your Mac provides another straightforward method. It is easy to operate. All you need to do is to connect your iPhone to the Mac and select the photos to import. Check the steps below.
STEP 1. Connect your iPhone to your Mac using a USB cable.
STEP 2. Open the Application folder and find the Photos app on your Mac.
STEP 3. Select your iPhone from the "Devices" section on the left sidebar and
STEP 4. Finally, you can select the desired photos or click "All New Items" to import any pictures that are not already in the Photos app.

 Note:
Note:
- You can also select the drop-down menu next to "Import to:" and import your photos to different albums.
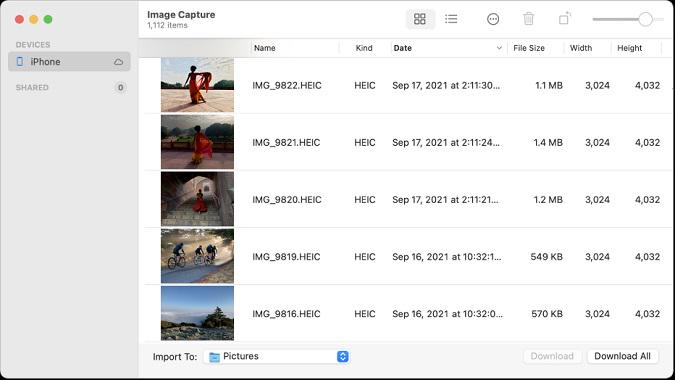
Image Capture
Aside from the Photos app, another built-in solution - Image Capture, is also available to transfer iPhone videos to computer or import photos from your iPhone/iPad. It allows users to specify where to save images. Plus, it also comes with image editing capabilities. Here is how.
STEP 1. Connect your iPhone to your Mac using a USB cable.
STEP 2. Launch "Image Capture" from the Applications folder.
STEP 3. Select your iPhone from the device list on the left panel.
STEP 4. Choose the photos you want to import.
STEP 5. Finally, click "Download" to initiate the transfer.
How to Import Photos from iPhone to Mac Without USB
If you find yourself without a USB cable within reach, fret not, as there are still wireless options available to transfer your photos from your iPhone.
AirDrop
AirDrop is Apple's ingenious wireless file-sharing feature that allows you to transfer photos between your iPhone and Mac effortlessly. No cables are required! To do that, make sure that both your Mac and iPhone have Wi-Fi and Bluetooth enabled, and better to sign in with the same Apple ID. Or you'll need to click "Save" when the transfer is done. Check the steps below to try importing photos from iPhone to Mac via AirDrop.
STEP 1. Set the AirDop on iPhone and Mac to "Everyone" first.
STEP 2. Open the Photos App on your iPhone.
STEP 3. Select the photos you want to transfer.
STEP 4. Tap the "Share" button and choose your Mac from the AirDrop options.
STEP 5. After transferring, remember to switch off AirDrop on your Mac and iPhone.

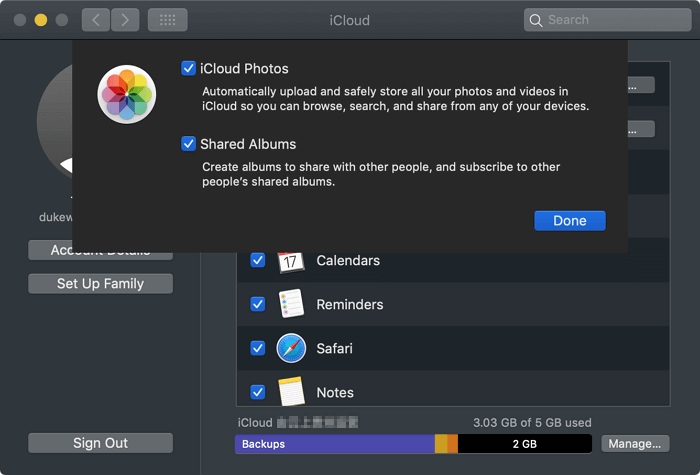
iCloud
iCloud is another way to help you sync your photos across your devices, including your Mac. Once you turn on iCloud photos, your photos on your iPhone will be updated automatically to iCloud. After that, iCloud seamlessly synchronizes these photos with original, full-resolution across all your devices that share the same Apple ID as your iPhone. Now, let's see how to sync iPhone photos to Mac via iCloud.
STEP 1. On your iPhone, go to "Settings > [your name] > iCloud > Photos".
STEP 2. Enable iCloud Photos.
STEP 3. Click the "Apple menu > System Settings/System Preferences".
STEP 4. Click "iCloud" and sign in with your Apple ID. Then hit "Options" next to the "Photos" option and enable "iCloud Photos".
STEP 5. Finally, when the syncing process is done, your photos will now be automatically synced to your Mac.
Note:
- Keep in mind that iCloud provides only 5GB of free storage. If you have numerous photos, they may not all fit within this limit and can't be transferred completely.
Watch the video for more detailed step-by-step instructions.
FAQs About How to Import Photos from iPhone to Mac
Where Are Photos Stored on Mac After Importing from iPhone?
After completing the transfer, your photos will be saved in the Mac's Photos Library folder by default. If you want to view your photos, navigate to Finder. Then choose "Pictures" and right-click "Photo Library". Choose "Show Package Contents" from the list. In a folder named Masters, you will find photos in different folders.
Additionally, if you used Image Capture and specified a custom saving location, you need to remember the path for easy access.
What Will Happen If I Turn off iCloud Photos?
If you disable iCloud Photos, be aware that your photos and videos stored in iCloud will be deleted 30 days after you stop using the service. Therefore, it is advisable not to turn off this feature if you want to retain your iCloud-synced content. Or you'd better make a copy of your photos and videos before turning off iCloud Photos.
Conclusion
We have introduced to you 5 ways on how to import photos from iPhone to Mac with and without USB. Among all these methods, FonePaw iOS Transfer is our most recommended. It not only offers a comprehensive solution for transferring videos, photos, music, contacts, etc. from iPhone, iPad, and iPod to Mac with ease but also does the same job as iTunes and even manages collections. So why not install it right now and have a try!
Free Download Buy with 20% off Free Download Buy with 20% off